Showing posts sorted by relevance for query recital. Sort by date Show all posts

Tuesday, 26 September 2017

Recital Shirt - View B

I was delighted to have been asked by Liesl + Co to help pattern test their new patterns back in May and immediately said yes. Then I set to trying to find how I could affordably get 36" digital patterns printed....

For the record my local copy shop franchisee quoted $98 + GST for a job that Creffield did for about $14 and with such expert service and understanding of the importance of not scaling etc that I was blown away and will sing their praises very loudly. Add in that they did it while I waited, and they have a coffee machine, and they have a coffee table covered in cycling magazines (possibly only this West Melbourne store, but hey). Heaven!

Anyway I digress. Oliver + S pattern testing. YES PLEASE!


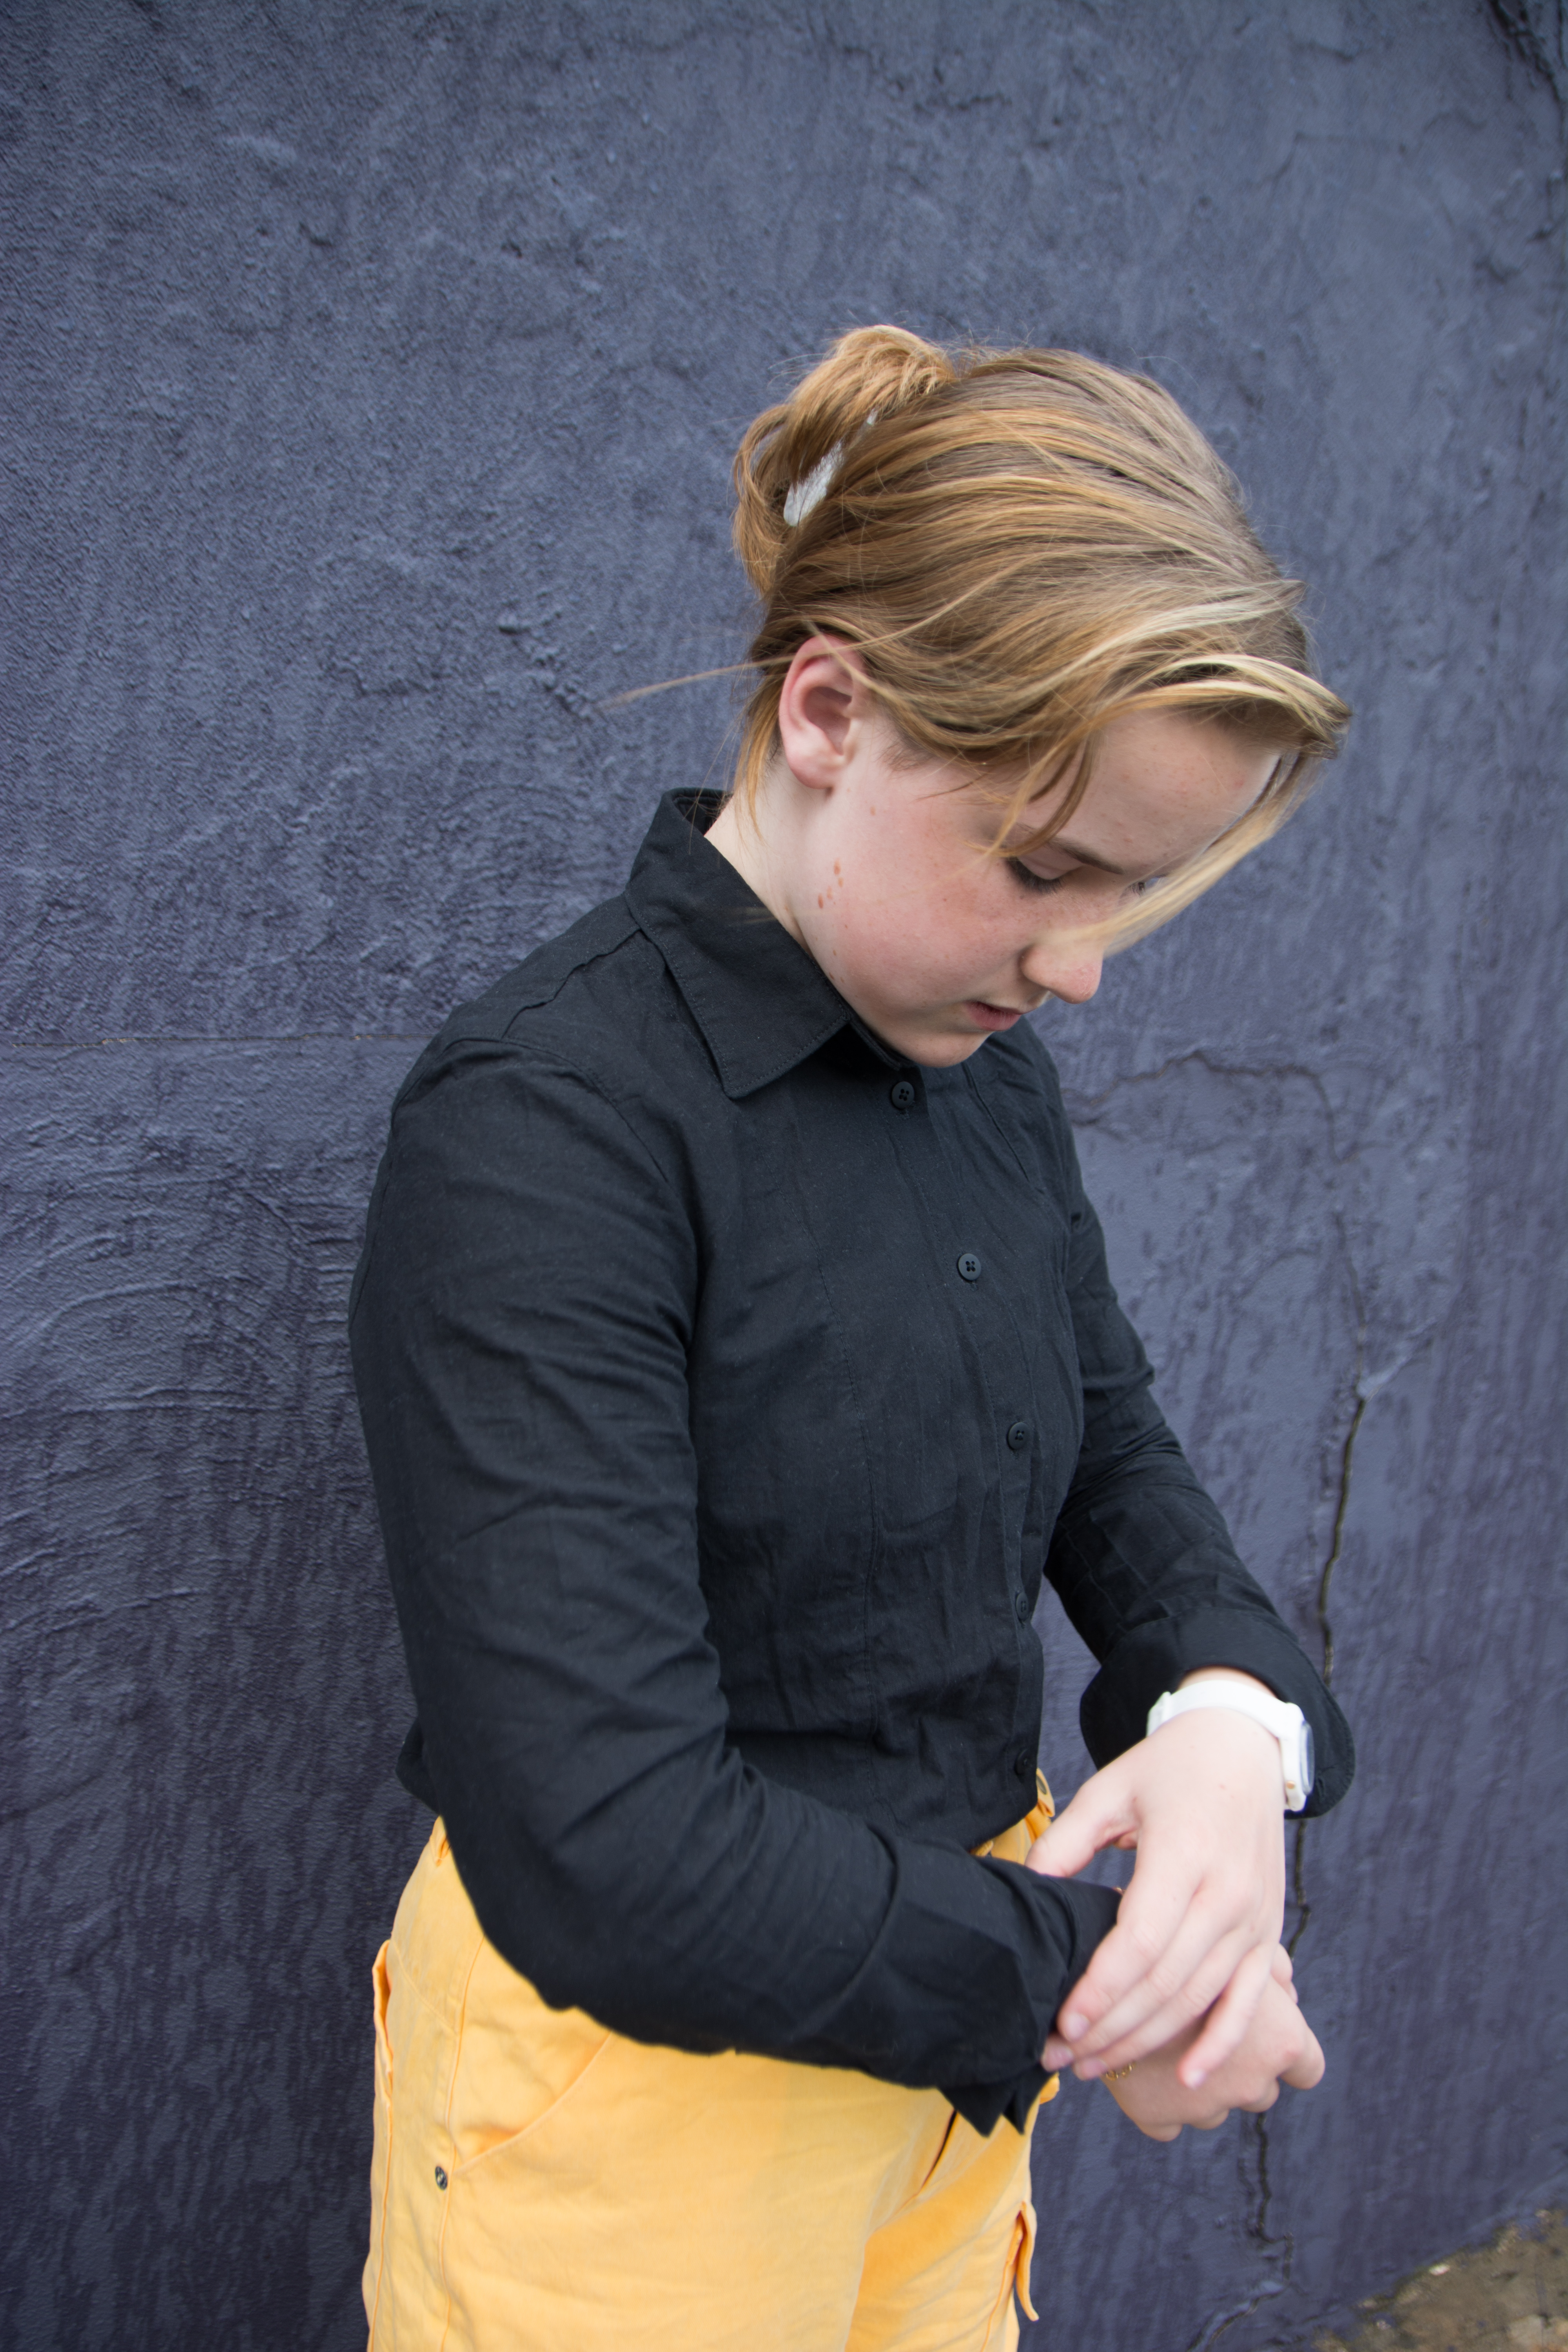
The Recital Shirt is one of the latest offerings from Liesl + Co and it's a classic button up shirt with a bit of a twist. It has princess seams at the front allowing for easy custom fitting and comes in three different cup sizes: A/B, C and D

With no measurable difference between my upper bust measurement and my full bust measurement (thanks, I guess, to lots of push ups and back exercises and no boobs), I was in the  A/B pattern camp. And my measurement put me in the size 12.


Since I was pattern testing I made no alterations to the pattern before cutting and sewing. But, you know, I've worn this quite a few times since making it (without letting anyone know it was me-made or an as yet unreleased pattern) and I don't think there's anything I would change.

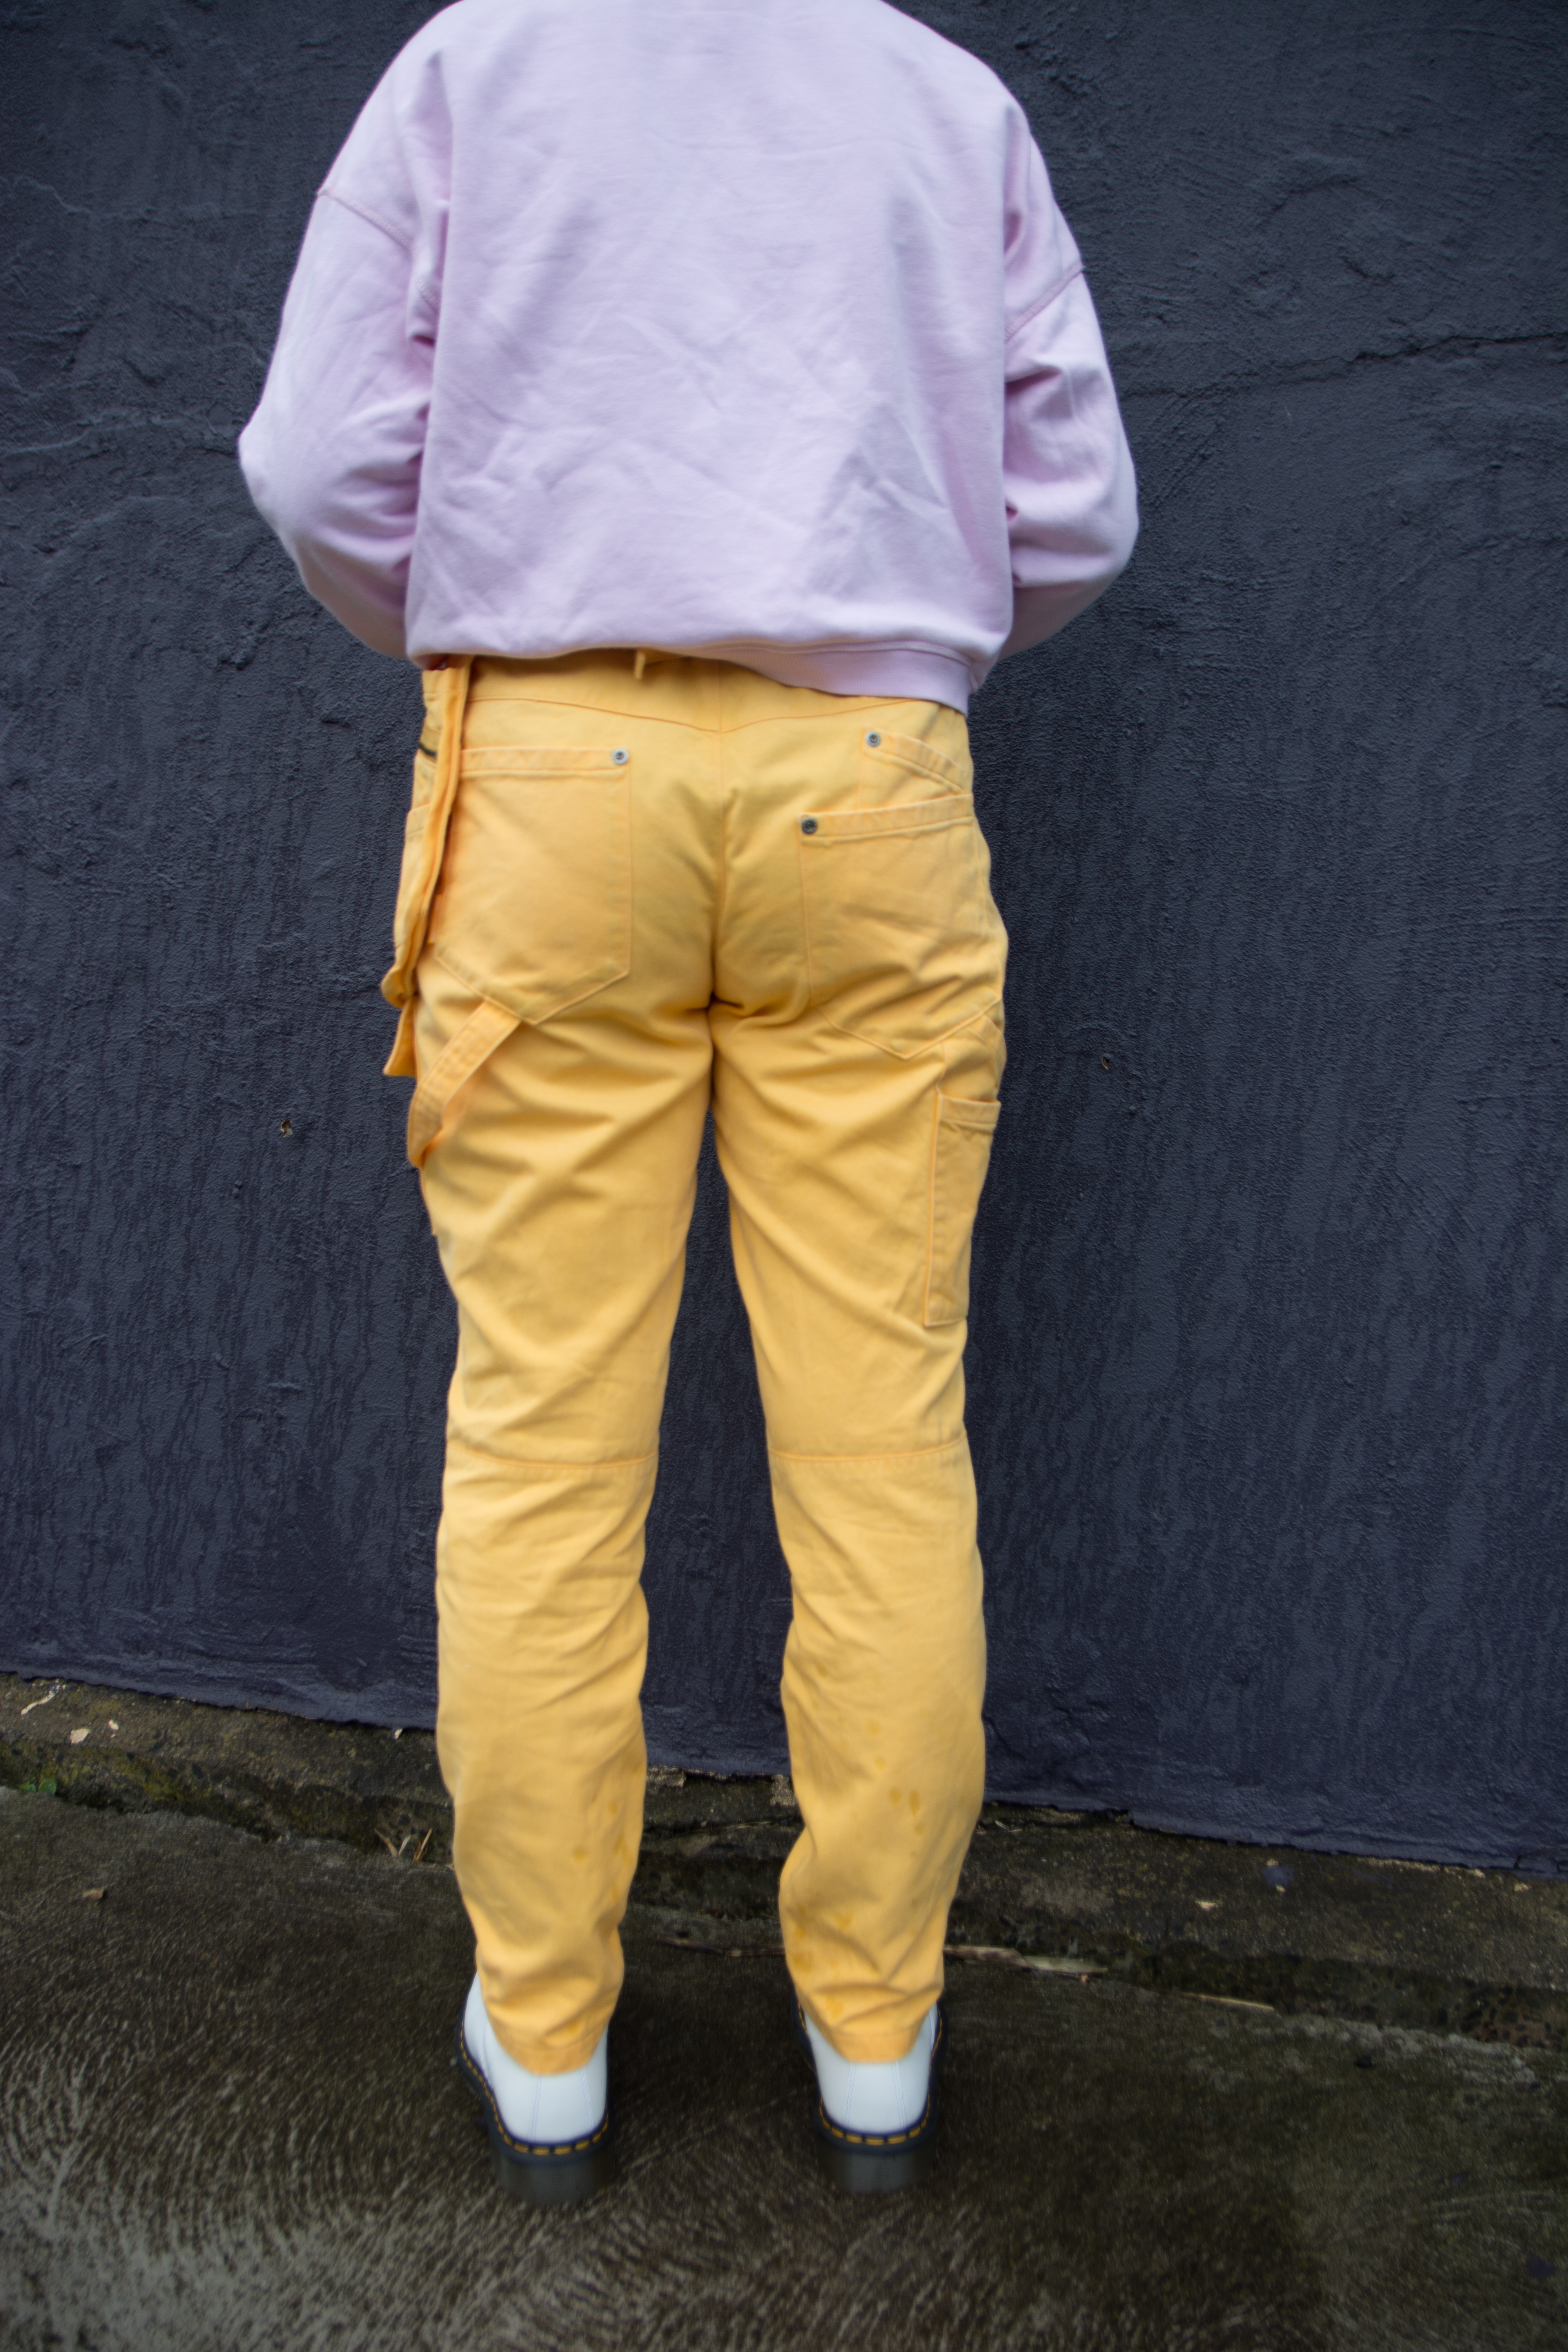
The back has some lovely darts that give it a nice shape, and while my size 12 is comfortably loose it doesn't look like I borrowed my husband's shirt.


Forgive my awkward modelling, these were the fit photos for Liesl and I just can't be bothered taking any more of me prancing around in someplace more interesting. Actually, this is pretty much how I photograph everything these days, so who am I kidding...

The View B has some wonderful deep(ish) pleats at the front giving it a bit of a tuxedo shirt vibe. My fabric was some $3/m linen from Eliza that I pulled from the stash and while I love it for a shirt it was very shifty and my pleat sewing is seriously lacking in precision. My Recital Shirt is more Jazz Improvisation than Symphony Orchestra but that's cool with me.


And it obviously wrinkles like a mother. :)

Hanging on a coat hanger after being ironed it looks really great, and the insides are lovely and neat too.


The method of attaching the collar was one I hadn't seen before and I was really impressed with how it turned out. Especially for the lack of any hand sewing! The same technique is used for the cuffs and once I'd got my head around how it was done it was easy.

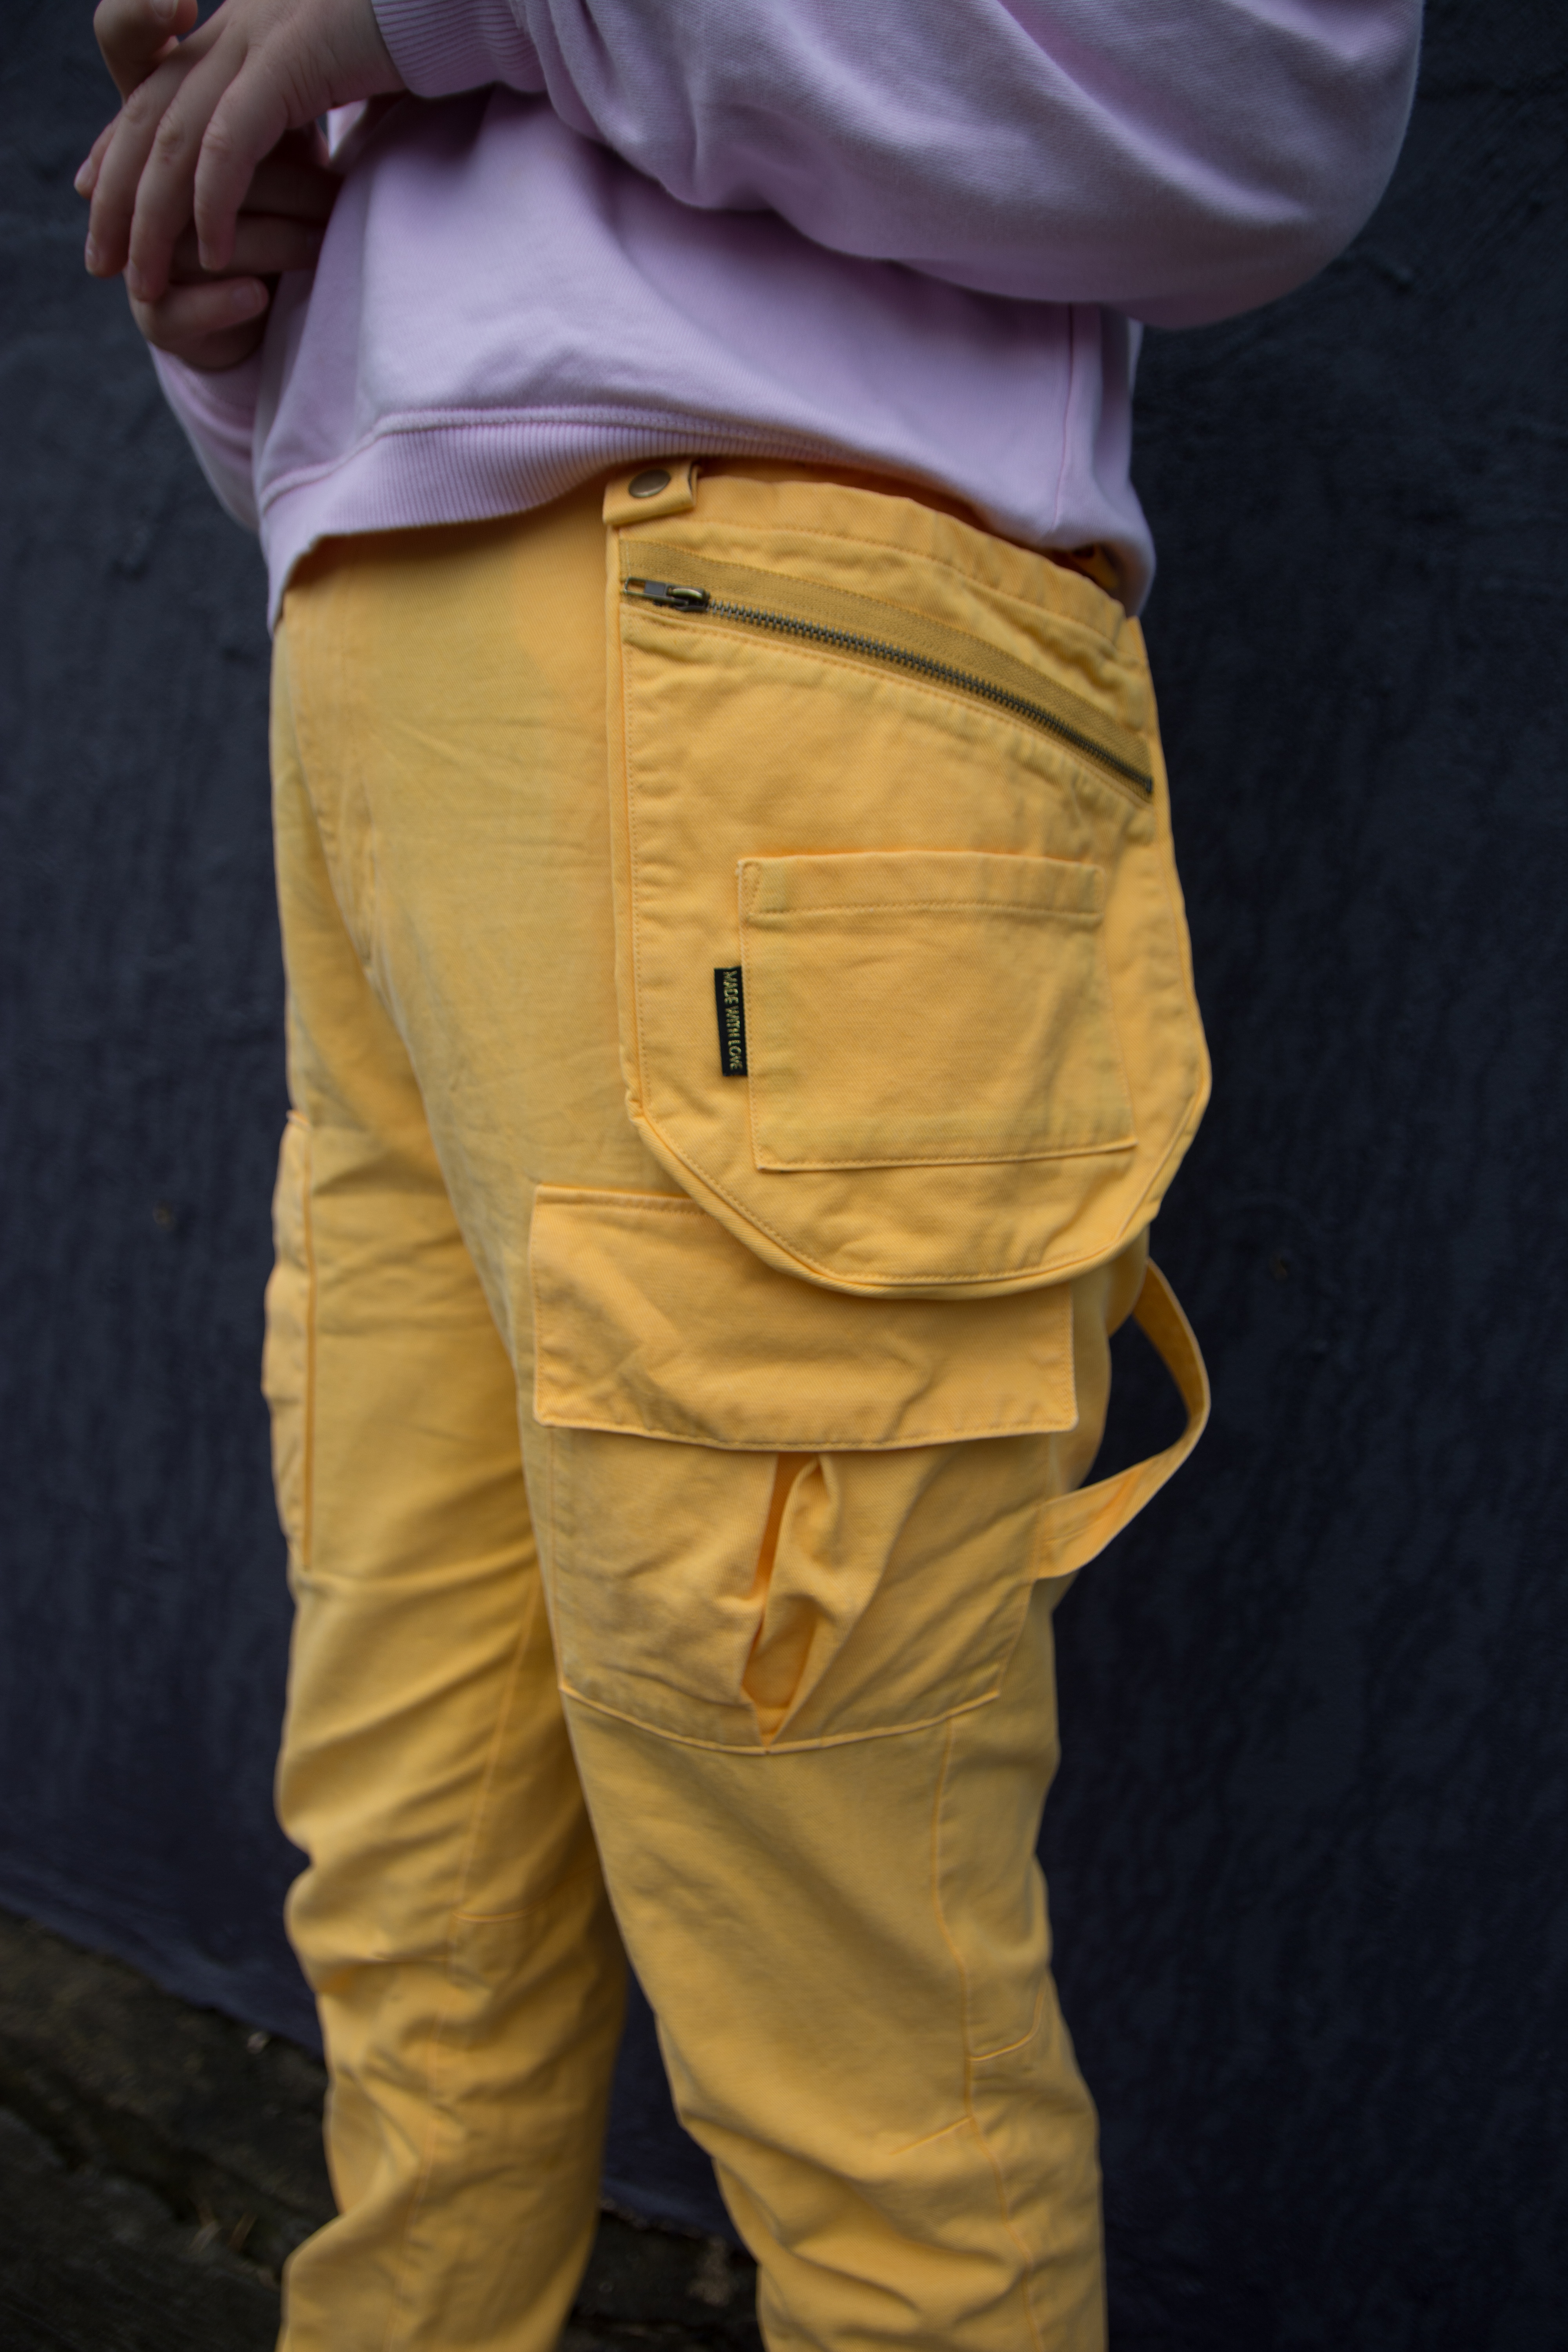
The other new to me technique was a tower placket for the sleeve cuffs. Again, very well explained in instructions and diagrams. The sleeve length on Liesl + Co patterns is a delight for me and my arms which never seem sufficiently covered by ready to wear shirts.


The other cool thing is that the pieces of this shirt can be mixed and matched with the Liesl + Co Classic Shirt. So, if you've already done all the work on fitting that one around the bust, or just prefer the plain, unseamed front, but you like the back darts of the Recital Shirt, you can have both!


I liked this one so well that as soon as I found a bit of extra sewing time I cut another one to make View A. I'll show you that one tomorrow....

Wednesday, 27 September 2017

Recital Shirt - View A

This shirt wasn't commissioned like the View B pattern test that I blogged about yesterday. But there I was, with a free evening and piles of fabric and lovely patterns looking at me and suddenly I found myself in a cutting frenzy.

I had some perfect shirting fabric picked up a year earlier at a Phillips Shirts fabric sale and I knew it would suit the View A of the Recital Shirt very nicely. And well, that was already printed, traced off and sewn through once...


View A differs from View B in that the front pleats are absent, so the princess seams are more apparent. Also the tuxedo winged collar is replaced with a regular mandarin collar and the option of putting in a ruffle. Otherwise the sleeves and back are the same.


This shirting cotton is quite narrow and I had bought an arbitrary two metres (or maybe two and a half from memory) with no plans for what to do with it. It was a very tight squeeze to get the shirt cut out and so there was no fun to be had trying to perfectly pattern match the back yoke or get tricky in any way like that.

But after my shifty, squirrely linen it was an utter delight to sew this perfect shirting cotton. I don't have a great close up photo of the pattern but it is ropes, hooks and pulleys and has a very Hermes vibe. I thought with the Hermes thing going on and the lightness of the cotton, the ruffle collar, while not usually my style, would be fun to add.


I like it open like this, but I have to confess that if I button it up the look is a bit too much like an old fashioned lamb chop for me. Does anyone still use those frilly paper things on the end of lamb cutlets or does that only exist in the lexicon of cartooning nowadays?

I think I may be about to show off the wrong sleeve placket... The other one, the one I didn't photograph, has a freakishly lucky bit of pattern matching where the placket is a perfect continuation of the pattern on the sleeve. You'll just have to take my word for it. Or you could invite me out to a fancy lamb restaurant and I'll wear my shirt and show you.


It wasn't until I was about to start cutting that it dawned on me that a vertical stripe pattern and the curved princess seams might make for a weird looking shirt. But I think it still works. In fact a finer stripe could look really cool with the change in direction of the fabric along that princess seam.


I've been quite generous in the size I chose here (straight size 12). There's a few months between taking my measurements for the first pattern test and getting this second version photographed and I've been on a bit of an eat-less-muffins regime. It would be an interesting exercise to size down and really fit this shirt using a fabric with a bit of stretch. But then I don't wear shirts much at all and certainly wouldn't have use for an ultra-fitted shirt. So, it would be an interesting exercise in fitting, but not one that I care to be bothered with right now.

I've got one more shirt to share with you tomorrow and then I'm drumming my fingers waiting for the new Liesl + Co patterns to arrive as I keep finding and buying great fabrics for making Flipper a shirt. I guess it will be his turn next.

Tuesday, 5 December 2023

Classic white shirts

Way back when I first made the Liesl + Co Classic shirt (here) I promptly went on the search for the perfect fabric to make a white version. I found the fabric, along with a couple of others, and stashed them. Good ideas never go away, so three year later I have some new shirts.


The impetus to finally make the shirts came from having just finished knitting myself a shawl (blog post coming soon) and suddenly deciding I needed a plain white shirt to wear it with.

However, before I made the shirt I decided a white shirt would need a pair of black ponte pants to wear it with. I actually made them first and then never got around to photographing them. They're the same Vogue9284 pants that I'm wearing in the photos above, although these initial navy ones are definitely too short. I added length to them to get the new black ones the same as the brown ones here


The shirt is the Liesl + Co Classic shirt. I added 2" of length knowing that I wanted to wear it over slim pants more like a tunic. I also added 3/4" to the sleeve length.

This fabric is a divine cotton with a tiny herringbone weave stripe. It adds just enough texture and interest to prevent it looking like bedsheet fabric. I found it at Phillips Shirts which was the first place I went after making the original Classic shirt, knowing I'd find what I wanted there or nowhere.


Of course I found more than one fabric I liked, and so while I was contemplating this shirt, I also decided I needed another Recital pleated shirt.

This one hasn't had a photoshoot of it's own, but I've worn it heaps and snapped a few selfies. It's also a shirting from Phillip's Shirts, but must be a poly blend as it doesn't come out of the wash in a bad state at all, and that's great for someone like me who hates ironing.


It's a very pale, ice blue with a tiny woven pattern. Again I added a little bit of sleeve length (and then always wear them unbuttoned and turned up anyway) and 2" of body length


It was the knitting that prompted the shirts, and the shirts that prompted the black pants. All of which are well loved garments now.

Details: Liesl + Co Classic Shirt and Recital shirt
Fabric: Cotton and poly/cotton shirtings from Phillips
Size: 10
Modifications: 2" body length and 3/4" sleeve length


Monday, 15 June 2020

A tale of two shirts

With a blog post title like that you could be forgiven for expecting some great piece of literature might follow. I apologise now, in advance of your disappointment.

It continues to be the best of times for some and the worst of times for others. I'm not going to discuss the situation of racism in our country and the recent manifestations against it, other than to say this: Since the Royal Commission into Aboriginal Deaths in Custody concluded in 1991 we have had 29 years, over 10,000 days, in which to make it clear that the situation is unbearable and must change.
It's not a question of whether protests should go ahead, on a certain day, with Coronavirus restrictions. It's a question of what the hell have we been doing every other day that has allowed the current situation to prevail.

While the real woman behind the sewing alter ego seethes with anger and roils with shame, Lightning McStitch is now going to blather on about sewing some shirts...


-------------------------------------------------------------------------------------------------------------------

............and let's let her start with a drink in hand


When Coronavirus lockdowns first started happening there were plenty of Frocktails events that had to be cancelled.

Our compatriots up in Sydney joined forces with a few of the US Frocktails events and hosted a virtual frocktails event in lieu of their planned parties.

I'd suddenly been consumed with the urge to sew myself some button up shirts and thought I'd try out both the Liesl + Co Camp Shirt and the Classic Shirt. I've already sewn the Recital Shirt (both ways) and love it. I was curious to see how these two would compare.


For my virtual Frocktails outfit I sewed the Camp Shirt in this metallic coated cotton that I'd picked up in ClearIt some time earlier. I'd had it earmarked for a different pattern (V1414), but that one would have the reverse side show, and the fabric is a very dull beige on the back.

I thought the lux pyjama vibe of the Camp shirt in this fabric would be fun. An old friend described this look as "pissy rich 70's housewife" which cracked me up. But having always wanted to dress up as Margo Leadbetter from The Good Life I was also delighted (for the record I wanted to be Barbara with all the chickens and goats but I wanted to dress up like Margo)

She was on the money with the 70's comment as the skirt pattern is a 70's original. I still need to hand sew a hook and eye at the back and close the belt properly, and it deserves a blog post of it's own come summer time.


The Camp Shirt turned out to be perfect for this fabric with its relaxed, one piece collar. It's much more a blouse than a shirt and I've been wearing it with jeans and it works just fine like that too.

It's a straight size 10 as per my measurements with no alterations. Amazingly I had he perfect buttons in my stash, even with slightly smaller ones for the sleeve plackets.

The Classic Shirt lay cut out for quite some time, and then for some time afterwards was sewn, but was waiting for buttons...


This was a cotton/poplin that I'd bought at Rathdowne Fabrics ages ago with probably the intention for it to one day become a shirt. I'm not sure if I'd thought that would be for me, as I never usually wear purple, but suddenly there it was, also cut out, and ready to be my Classic Shirt.

Again I made a straight size 10, but something possessed me to lower the bust dart by half an inch on this shirt (but not the other?!). I think I must have been wearing my Gelato Blouse which does seem to have an oddly high bust dart compared to other Liesl + Co patterns. Either that or I was just feeling a bit old and saggy and figured I might need to start making some kind of sewing concessions for my boobs... I don't know. But I needn't have done it. The bust dart is under the chest pockets so it doesn't matter that it's too low, but it is. It should be 1/2" higher, or exactly where it was before I moved it.


I'm keen to track down a nice, textured white cotton and make the perfect white shirt. I think it would be the front and collar of this shirt with the more fitted back of the Recital Shirt. It's cool that the pattern pieces are interchangeable in that way.

Doing business through the postal service during lockdown, I bought the perfect buttons from Buttonmania. Square purple buttons (not something I had in my stash!), with smaller round ones for the sleeve plackets.


Monday, 27 July 2020

Crayon dressing

Being stuck at home (read: crappy, cold rental) made me realise I needed another pair of pull on ponti pants and more long sleeved wool tops.

I didn't have any solid colour ponti and I'm not quite ready for bright, printed pull on pants - give me another month of lockdown and I may yet eat those words - so I set off to Fabric Deluxe who have a great selection of solid ponti fabrics (1.5m needed - note to self). Chocolate brown is my jam!


The elastic waist pants are Vogue 9284 which I'd sewn once before and wondered about their legitimacy. Well, I wear them all the time, and that was before workwear, athlesiurewear and loungewear all got thrown into the Covid blender and became the same thing!

I could certainly do with another pair.


The sizing on this pattern is odd. I measure between the 14 and 16, yet I've made the size 12, even taken them in a little, and you can see they're still not tight.

The side seams are sewn last and that allows for a bit of fit adjusting. The pattern has a 5/8" seam allowance, so if you'd underestimated your thigh size there'd be room to adjust. I ended up sewing my 5/8" seam, and then, instead of a second row of stitching 1/4" into the seam allowance, I did it 1/4" into the pants. I've also added 1&1/2" length at the lengthen/shorten line and I'm happy to say they're the perfect length (the navy ones are a tad short). I can wear these with flats or boots where they have a bit of a jodhphur vibe.

In a nice, heavy ponti I like the slight looseness and it gives them more of a nana trouser look and less like leggings that I'm meant to be running around in.


In rummaging around in my stash I found this heavy wool knit that came from my friend's mum's stash (many thanks to the late Barb xx)

There was just enough for a long sleeved tee, so I made a Liesl + Co Metro T, size medium, no mods. Perfect!
  

Because too much brown is never enough, and we weren't quite at lockdown and face mask stage when I took these photos I dragged a kid off to a nice brown bird mural and snapped some pictures.


Of course, most of the time I'm wearing this outfit it's under a coat (even indoors, curse this crappy rental), of which I have quite a few brown ones! (this one is Gerard Darel and I bought it in London in 2001)

I handed the coat to my son to wear while he photographed me and he looked so gangsta and cool in it, I wish I'd taken a photo of him! :)

The shirt is my Liesl + Co Recital shirt in fabric from Phillips Shirts. For a very comfy outfit it almost looks "put together" - at least by my standards.

Wednesday, 6 March 2019

End of summer Perth Dress

It was cooling off and feeling like summer was over in mid February and then a sudden, late heatwave just before the official first day of Autumn had me scurrying to make one last summer dress.


I'd planned this dress last summer and never got around to it. When the weather forecast predicted 38C on the day of a school fundraiser evening party, I had the perfect occasion and motivation to get it sewn.

The pattern is the Perth Dress by Carolyn & Cassie. I'd already traced off the size 40 last year and so I cut it out in one evening, sewed it almost entirely the following evening, and then added the collar and finished it off in the brief afternoon period between work and school function.


It's a fairly straight forward sew and the instructions were perfectly fine. I was going to use a new method of doing the pockets that I just learned from a Japanese sewing book, but I forgot and went ahead with a more regular way - and the way this pattern had it described as well. I should photograph and blog the Japanese technique as it results in a finished pocket seam allowance towards the back and an open finished side seam with no snipping seam allowances or weak spots. It's kinda magic.

I sewed the sleeves in flat as I find that quicker, but otherwise I followed the instructions.


Fitwise, I'm happy with it except that the collar sits a bit far back for me. I don't think it's the shoulder seam as that's sufficiently forward such that the sleeve head sits well. But I think I would need to do a considerable high, round neck adjustment to get that collar to sit closer to my back neck.

It's noticeable with this pattern as the way the pleat at the front is formed is by closing the collar - you really can't wear the dress unbuttoned. Buttoning up the collar makes it clear that it's sitting too low at the back as the front feels a bit too close. Not choking, but overly close.


I recall only doing a high, round neck adjustment once on a Vogue pattern and that was only by about 1cm. This one looks to need closer to an inch. I was thinking to go back to my Liesl + Co Recital Shirt and button it all the way up to see how that feels. I wonder if it's an adjustment I would often need to do and I just never notice it because I don't wear things buttoned up...

I suspect it may be both: That the pattern leans a little to the low side, and I am a little to the high side.


This photo gives the truest representation of the fabric colour (but there was way too much squinting into the light for it to be a good photo spot :) ). It's a super light linen from Phillips Shirts that I bought over a year ago.

I threw it on for the school party and was perfectly comfy and received a few compliments on the night. I volunteered to sell cold drinks on one of the stalls and was kept very busy. The length of the dress had me mindful of how I bent over to rummage in the bottom of the ice buckets - it's short, but I think it needs to be to balance the width and shape.

Two days later I threw it on again (hence the wrinkles) for these photos at a dinner party but given that it hailed today I suspect summer really is finally over. It can be hung up and will still seem new next spring!


It's feeling like time to start sewing outerwear and jeans. I'm not overly fond of cold weather, but I do love sewing cold weather clothes.

Monday, 15 May 2023

Gr6 graduation cargo pants

I'd be getting an F for the lateness of this assignment if blogging about a sewing job was actually a requirement. Instead I'm giving myself an A+ for execution, and a "highly commended" for my positive attitude in the face of an unimpressible tweenager....

Late last year, as the end of primary school was coming up, A put in her request for her "graduation outfit". She wanted to wear a black button up shirt, under her favourite pink jumper with a pair of yellow cargo pants.

Since she had zero chance of finding yellow cargo pants anywhere in a shop, she realised it would be worth her while asking nicely....

I quite liked the idea of making her cargo pants, even if I didn't entirely understand the outfit's appeal. In my head, the "graduation" was an evening affair and this was an unusual outfit, but I wasn't about to become the fashion police.

There's a lot of tasteful mustard shades of heavy cotton drills or denims out there, but she wanted a proper buttercup yellow. I found this lovely, soft, cotton drill online at SuperCheap fabrics and it fit the colour brief perfectly. I also clicked on their black, lightweight cotton for the shirt. The quality of that fabric is not so nice. If it ever gets worn, and then washed, it might soften up. But I'm getting ahead of myself. Let's stay in the happy zone where I'm enjoying making exactly what's been requested of me.

The shirt is the Liesl + Co Recital shirt, with the collar from the Classic Shirt. These two patterns are designed to go together in a mix'n'match sense. I made a size 2 as per her chest measurement but it's probably a bit tight across the shoulders and upper arms. 

I didn't have a women's cargo pants pattern and she was very keen on the Waffle Patterns Azuki workpants - in reality I think she just falls for everything Yuki designs when it's included in one of the awesome little sketches she does.

The pattern is fabulous, and the only quibble I have is that I bought and paid for the printed pattern. What that actually entailed was receiving a copyshop print out of the pattern, but still only getting all the instructions digitally. I'm a fan of a nicely printed instruction booklet, or a pattern in a packet. This was a bit disappointing and should perhaps be advertised as a "printout of digital pattern".

I made the size 40 pants and followed the pattern suggestion to baste the pants pieces together to try them on before taking them apart again and adding all the pockets etc. Kind of like making a muslin with the final fabric. Fine, so long as you're likely to err on the side of too big.

She wanted every pocket and extra option on these, and I think the final count was something like twelve pockets! I added some rivets as I went, and I suspect I even snuck a label under a pocket edge somewhere although it's not visible in any of these photos.

The only adjustment to the pattern was to take a bit of height off the back yoke, and bring it in closer to the lower back, and then shorten the waistband to match.

The little pouch bag, which contributes 3 or 4 pockets to the total pocket count is removable and attaches with press studs. 

She was absolutely in love with these pants when they were finished. She wore them dog walking and at every opportunity. It took all her willpower to not wear them immediately before graduation day so that they would be washed and dry and ready....


The day came and she even managed to talk me into driving her to school so she wouldn't need to put her bike helmet over her hair-do. I insisted on a few photos before we left, but something caused the happy yellow pants mood to evaporate. Since the blog is about my sewing, and to be fair to someone who was having a bad morning and who is actually quite beautiful, I've cropped her face out of all these pictures. 

For a much younger, and very cute, refresher on what the "death stare" looks like: try here.

We got to school in the car, only to see everyone else arriving still in regular school uniform. Nobody's mood was improved by this and my only suggestions were either; I would provide a note explaining she'd misread the process and assumed it was a casual clothes day, and I'd deferred to her as she's usually more on top of this kind of shit than I am, or, I'd drive her home, get myself to work on time and she could get changed and ride back to school and be late. She took the latter.

The pants were worn again, a bit later, on the actual end of term day which was a free dress Friday.

Meanwhile, I'd been informed that "graduation" was actually an evening affair (ha! I knew it!) and could she please have a dress just like the one that Adora wears to the prom in the update version of the She-Ra cartoon.


Are we all sighing deeply and counting to ten in unison? 

But you know I went back for round 2 don't you? 


Sunday, 15 August 2021

Cinema Dress

If there's one pattern that I've bought more fabric for than any other it's the Liesl + Co Cinema Dress.

I've been meaning to make it since forever (well, since the pattern release in 2014) and I would buy 3m cuts of nice linens and then invariably use them for something else.

I pulled out one such stash of fabric recently thinking it would work for a different pattern and decided that I really had to stop doing that and make this pattern. Why not? I can't go to the cinema, I can't go to the beach and stand around a nice marina for photographs, can't do much of anything....but maybe an impractical, loud, linen dress would be just the thing for my lockdown mood...


I'm not often one to make muslins, but I knew enough about this pattern to know not to just dive in. A lot of reviews mention the sleeve head being too tight and it being impossible to raise one's arms. I also knew that I wouldn't be wanting to do up buttons behind me every time I got dressed/undressed so I had to make sure not to overfit the pattern.

I can take it on and off without any unbuttoning, and this, below, may be the only photo of anyone wearing a Cinema Dress and hitting the #justtouchyourhair pose :)


I was going to take photos of my process and pattern tissues but that involved a lot of semi-nudity and now it's all folded away. Here's what I did. I traced off the size 12 which was the larger of the two pattern sizes that my measurements fell between. 

I trace all my patterns onto the Trace and Toile interfacing and it's easy to then sew that together for a tissue fitting. I sewed the front bodice and back bodice pattern pieces together and set the sleeve in. Sure enough the sleeve was tight across my upper arm, the shoulder was off the edge of me and I couldn't move.

So I pulled out the Recital Shirt pattern (similar princess seam bust so I'd thought things might line up - they didn't) and referenced the sleeve shape and armscye from that.

In all, I raised the underarm by almost 3/4". Shaved about 1/2" off the width of the shoulder and then widened the sleeve head considerably. At that point I cut some quilting cotton and made another half bodice, one-sleeved muslin. The only further change was to take about 1/2" off the height of the sleeve as it was too poofy.


With the armscye and sleeve completely redrafted, the rest of the dress is the straight size 12. It's a perfectly comfortable, light, throw on summer dress but feels quite dressed up. Liesl has a black linen one that I am jealous of every time I see it. Now that I've got the pattern sorted I could definitely have a less "vibrant" one.


These white plastic buttons were in the stash and suited the dress perfectly. I'm glad not to have to undo them and happy to forego a more fitted waist. The dress is still quite shapely even though it feels like a comfy sack dress to wear.

The fabric came from the remnants pile at Drapers Fabrics and is a really nice feeling linen/tencel. I'm glad I kept it for this dress as I'd intended all along.


Now I really do want a Melbourne black version too.