Wednesday 22 June 2016

Sew bossy and culotte road test

Squeezing two things in here. The first is a pair of culottes that I made myself way back in late 2014

The pattern is the Girl Friday Culottes by Liesl & Co. They're the first ever pants I've made myself and while they have their problems (which I'll go into more detail about in a moment) I have worn them a lot over the two summers since they were made.

A "day in the life" of my culottes blog post is over on the Oliver + S website. Click on the image below to go to the blog post.


I made the culottes when they were first released and there was an errata with the pattern. Turned out the markings for the deep box pleats in front and back were accidentally reversed and labelled with the incorrect sizes.

If you made a small size your pleats were too shallow and the waistband ended up too short for the culottes. Conversely, if, like me, you made a larger size (size 14) the pleats were too deep and the pants ended up much smaller than the waistband. Eventually, via confused pleas for help on the Oliver + S forum, Liesl found the error and corrected it, sending out new copies of the pattern to everyone who had purchased it up to that date.

However I still had some trouble with one section of my waistband being too long. All the other notches lined up and only one back side was too long. Fearful the culottes wound end up too small I kept the waistband length and eased the culottes onto the waistband ignoring all the notches.

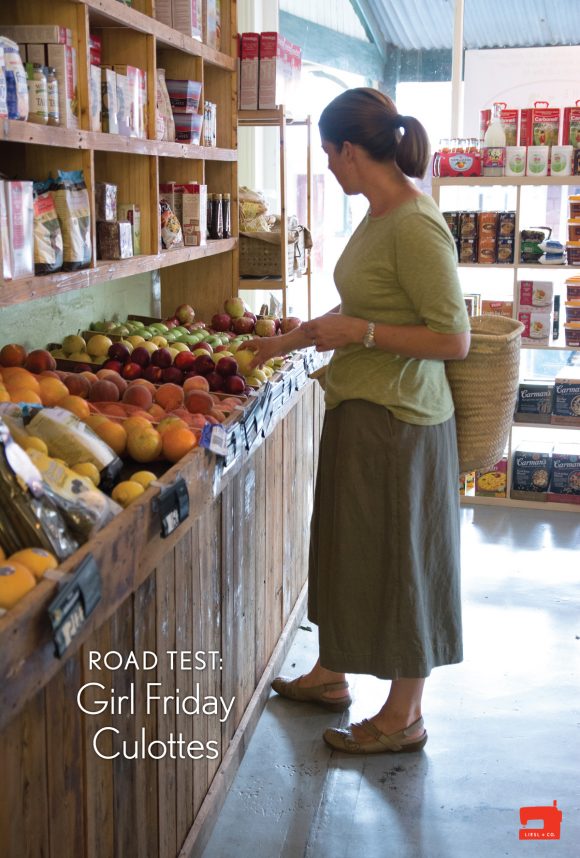
But.... they've always been a bit big in the waist. They tend to drop down a bit, and then with the spread of my hips the pockets gape open.

The way the pockets are designed is really genius and the side zip is hidden neatly in one of the pockets. But, if you have a low waist to hip ratio then the culottes have to spread and the pockets end up opening. If I hoick mine up to high waist (just above belly button level) then they fall much better and the pockets don't open at all.

The other problem might be my fabric choice. This fabric was a mystery stretch twill/denim that I picked up cheaply somewhere. I think I may have been better without the stretch component.

All of that aside I've worn them a lot, and I really should have bothered making the adjustments that Sew Brunswick details here in her review of them. Given how old/faded these ones are now I think I might just sew a new pair and get the fit right. Perhaps navy linen for next summer.

The reason it's taken me over a year and a half to get them on the blog? There was a lot of talk in fashion mags and newspapers at the time of the pattern launch about the resurgence of culottes - aka man repelling pants. I'd been planning a much more complete "road test" of them. It was going to include all the things that a girl can do in her culottes and culminate with a photo of the one thing a girl probably couldn't do - that is, picking up a bloke at a party.

But therein lay my problem. I needed a party scene, a room full of eligible looking blokes and a photographer to capture me, standing alone with my wine glass. Turns out I just don't get out enough or know enough men that aren't my dad's age to have made that happen.

Anyway, for a reasonably complete photo series of me in my culottes, go check out the Oliver + S blog post.

Next up: Sew Bossy


I didn't know that was a "thing" until the fabulous Ute sent me a pattern, some fabric and a bossy edict about what to do with it! ;)

Here's the result: (- and some more photos of my Girl Friday culottes)


The pattern is a German pattern: Schnittmuster's FrauMia

Ute had made a few translations for me, but by and large the construction did look very simple.
It's a raglan sleeved t-shirt designed for woven fabrics, with a facing to finish the neckline.

At first I was kinda excited as a raglan sleeve top is one pattern I don't yet have. But then I looked at the pattern pieces and thought how on earth could this possibly work for me...

You see, the pattern pieces for the top are at their widest at the shoulders/upper chest and then narrow from there, with the narrowest point being the hips. That certainly is not how my body is shaped. I've got reasonably wide shoulders, not much of a bust, then I get a bit narrower and then a whole lot wider.

(see what I mean about the culotte pockets opening up?)
I thought about making a muslin, but the more I looked at the pattern pieces the more I thought that IF I were to make a muslin I would undoubtedly never make the pattern at all. Stiff, muslin like fabric was never going to help get this pattern over the line.

Ute had sent me this beautiful Atelier Brunette cotton lawn (chalk charcoal) and while I didn't want to waste it, I figured I was "under orders" so to speak, and surely the whole point of Sew Bossy was to try something you might otherwise not have tried....

With that decision made, I made the only measurement that would matter - my hip measurement and then tried to work out which size. Curiously, the hip measurement was about the only one missing from the pattern, so I measured the flat pattern pieces and worked out I was a Medium. Seriously, I'm a medium? how enormous would a lady's bust have to be to justify a larger size than this one??
If it had been a PDF that I'd printed myself, I would have assumed I'd made some scaling error.

OK, here's a pretty unflattering photo, but just to show how "1980s eastern block female shotputter on steroids" the shape of this top is:


The only part in the construction that had me a bit confused was how to add the seam allowance to the sleeves. That's hard to describe without showing the sleeve pattern piece, but a diagram of how/where to add the seam allowance would have been appreciated. The Japanese pattern books I've used tend to do this: the seam allowance is not included, but the pattern cutting layout shows the seam allowances drawn in so you can see how and where to add them and how much.

My seam allowance on the sleeve ended being an academic problem, as once I'd sewn the sleeve underarm seam they were far too tight and I couldn't flex a bicep at all - no good for hurling that shotput after all! I had to leave about a third of the sleeve seam unsewn and taper the seam allowance down to the point where the stitching finished.


The fabric is truly lovely. It's light, soft and as pleasant to work with as only a great quality cotton lawn can be. And so, even though the pattern was not a win for me, I have, on hot, hot days, enjoyed wearing this loose, boxy top.

I wonder if the pattern would perhaps suit someone with a bigger bust and narrow hips. Those of you who can wear big, boxy tops with your skinny, tight jeans and look fabulous.

Of course I feel dreadful that the idea that Ute had for me did not turn out as marvelous as she might have imagined it. I'm also very nervous that the fabric and pattern that I sent her shall be a success. Here's hoping.


Wednesday 15 June 2016

To all the stencils I've loved before...

Apologies for the blog silence. I threw myself completely into the pattern tracing, muslin making and construction of my dress and coat for the Dressmaker's Do.

I'm not quite done with all of that, but since I'd just made another freezer paper stencilled t-shirt for P's birthday (he's come down with horrible gastro and isn't up for modelling just yet) I thought I'd round up all my stencilled projects and share some tips.

Instagram image of WIP
 I won't write a how-to of basic freezer paper stencilling, 'cause that's been done many times already (see here and here for good basic ones - or, if you have the Oliver + S Sandbox pattern then you have a written pattern with instructions for stencilling) but rather, I'll show what I've done and give my tips and tricks. All discovered the hard way of course, 'cause I never think to research how to do something first!

Where to get freezer paper in Australia is often the first stumbling block. At the beginning I had bought one to two metre cuts from a roll at a quilting shop. That's not the cheapest way to buy it obviously. I now have a full roll, which I think came from Spotlight, but I seem to recall having to ask for it. It was "under the counter" if I recall correctly (?!)


If you live in a major city there might be a US expat shop like this one (USA foods), and that's by far the cheapest way to buy the freezer paper. Unless of course you are tempted to load your shopping cart with weird USA only confectionery! Some other online craft shop options are here and here

Basic stencils are as simple as trace or draw, cut, iron then paint. I usually take over the knife duty, but the kids can certainly do the painting. This "favourite footy team" t-shirt for kindy was done in an afternoon by P when he was five.


It's pretty easy to use freezer paper stencilling for big lettering. Just be sure to keep the insides of letters like "a and o"


More detailed lettering can be done with freezer paper if you have a steady hand and patience with the scalpel blade. For smaller lettering, and other complicated designs, I'd suggest ironing on the main stencil, then adding back in all the elements that have been cut out in order to get the positioning correct. Then peel off only the areas you want to paint. Here's a great Instagram video series of exactly that process (@craftroom101)


Of course, if you have one of those Silhouette stencil cutting machines you can cut a perfect lettering stencil in seconds from a digital file. But to me, that feels a bit like cheating. I like the relaxing approach of taking time to boil the kettle, put on the radio and painstakingly cut a stencil.

I've said it before, but anything I can do with a scalpel in hand that can not possibly result in death is relaxing! :) 

The picture above is my Slaughterhouse 5 t-shirt from a few years ago that amused me no end, and which I would almost make over again. Perhaps when he's older I can get a Montana Wildhack reference in there and get away with it. ;)


The Space Shutle above was done with multiple layers. Once the metallic white paint was dry, parts of the stencil were reapplied and the silver grey applied over the top. That one used a Jones Tones paint which has a slightly 3D effect and is not so easy to handle and use in detailed work.

My preferred paint is Setacolour Opaque. They mix together really well allowing me to get exactly the shade I want with only half a dozen pots of paint in the stash.

By not mixing the paints too well, you can get a nice blotchy, textured colour. That's what the kids did when they painted their Vermicious Knid dress/t-shirt.
 

 T-shirt transfer lettering (above) looks dreadful compared to the freezer paper stencil lettering  (below). It's worth taking the time to cut a stencil.
 

Blotchy, poorly mixed paint is perfect for monsters! Flipper's Father's Day t-shirt monsters were painted by the kids and then I added the hairy details freehand.


Single colour stencils that are more detailed to cut, but then super quick to paint can look awesome.

Here's where you need a steady hand and a good knife. I'll confess the one I bought at Spotlight is cheap and has a "looseness" that bugs me. I actually think I'd do better with a small scalpel handle from the vet clinic and a number 11 blade. If you can't pilfer scalpels from your work, look for a good quality craft knife. Cheap ones are kind of rubbish and little slips can ruin a stencil.


While a Vermicious Knid outline, or a dead bird are fairly easy to draw freehand, these more complex stencils are best traced. If you ever get to do craft during the day then use a sunny window to tape up your picture and freezer paper and get tracing.

If you're an after-darker like me then you need some kind of light box. You can buy expensive light boxes from art stores, or (again) raid your local vet clinic for one ('cause we've all gone digital and are throwing them out), or make use of your mid century furniture: A glass topped coffee table (sixties styling optional) is perfect. Put a torch or lamp underneath and you've got an enormous lightbox.
The Darth Vader stencil image, and my recent Pokemon Talonflame picture both come from DeviantArt which is a great source for images. You can purchase images, but I guess if you're using them for personal use and not for mass production and resale, a little right click and save is probably forgivable.

Searching for images will often give you almost what you want but not quite. I found the perfect drum kit silhouette for my nephew's Christmas present t-shirt, but wanted some Beatles-esque lettering. I found a font through My Fonts  that looked pretty good and then used Paint.net to overlay the two images.


Once cut and ironed down, this all black stencil took barely two minutes to paint. Don't forget to iron the dry paint (with a pressing cloth or baking paper sheet) for a solid 5 minutes to set the paint and make it washable


The stencils that I've been enjoying making recently use the freezer paper just to give the shape and blocks of colour. Then, the line detail is added freehand after the main paint has dried. If you're nervous about painting fine line detail, then you could heat set the paint and then use a fabric marker to draw the detail lines instead.
 

This is where the Setacolour paints are worth the pricetag. They're opaque and thick enough without being gloopy or lumpy. I'm yet to use them, but I love the look of the Setacolour translucent paint to give watercolour lines as in the t-shirt here


I found a few other pictures of clothes I've made for the kids that have been painted freehand, or stamped, but I thought I'd keep this to a stencil round-up. In looking at all the pictures I'm aware that my painting style is very much a tightly controlled copyist :), but I do love the idea of watering down the paints one day and making some Nani-Iro-esque fabric. Here's a great post from You and Mie about letting go and letting the kids do the fabric painting.

But for these type of stencils there's really nothing more to it than some patience, precision and practice. Final tip: If you paint BEFORE you sew, then you can always chuck out the t-shirt front panel and start over.

Now, I need to get back to coat making and pretending to manage the household...