Friday 17 December 2021

Concert time

In his first year of high school, P decided to learn a musical instrument, and I was happy that he got to do the double bass.

He was really enjoying it, and so when I got the 10 day notice of the end of year concert and the need for a black, smart casual outfit I jumped into action


I went straight to Ottobre,and those are about the only patterns that suit 13 year old boys. In the winter 6/2012 edition there were exactly the patterns I needed. A button up shirt (pattern 37) and a pair of chino style trousers (pattern 39)

I made both to his measurements, which landed him in size 164, adding one inch each to leg length and sleeve length, from memory. 


The trousers have a single welt pocket on the back which I somehow managed to completely stuff up (it was an instagram story reel if you enjoyed the opportunity to laugh at/with me). I ended up with an enclosed pocket that acted like a flap, and a very neat welt opening that just functioned as a hole into the pants under the pocket flap. Oops. Anyway, I simply topstitched the pocket flap to the trousers and called it a design element. The welt then lead into a "pocket" formed by the pants and the double thickness pocket flap and at least you couldn't tickle his butt through the opening!

The rest of the construction was smooth sailing, and I really should remember to look at the Ottobre website, as, although their instructions are sparse and sometimes unclear, there are some photo tutorials for things like back welt pockets.

Although now I remember there were some curious instructions for finishing the waistband so that it could be let out later. I didn't quite understand them either, so I simply tried it on him and then adjusted the centre back seam before attaching the waistband.


The shirt was simple, although I did make some construction changes and give it "the Oliver + S treatment". I doubled the yoke so I could have a back yoke facing and enclose all the seam allowances.

All the fabrics were in the stash. The pants was the very last of some Eliza drill and the shirt was some lovely antique washed cotton from fabric Deluxe - leftover from a dress of mine that I'm yet to photograph.

I finished everything in perfect time and went off to work on Tuesday morning, the day of the concert, only to get a phone call in the afternoon to say he'd rolled his ankle in gym class and needed collecting. Barely three hours before the concert I rushed out of work, picked him up from school, whisked him off to A&E for xrays, got him fitted in a moon boot (minor non displaced fracture) and then had him at the school concert in time. 

In his own words : At least the moon boot is black!


Monday 13 December 2021

Thea top, seventies skirts and Empower lace scarf

Back in March, soon after I finished my first knitted garment, the Basic-T, I started another.

I bought a yarn that was the same length per gram and figured that meant I didn't need to swatch, It should knit up the same, right? Apparently no. First up I noticed the yarn had a colour variation that was leading to ugly "pooling" of light and dark patches. So I ripped back and started over alternating each round between two balls. I was almost finished before I tried it on, realised it was far too small and that I'd never have enough yarn to start over with another needle size. 

So I turned to another one of Suzanne Mueller's patterns that I liked: the Thea Top


It's a simple tank top, knit in the round form the bottom up. In a new-to-me technique some stitches are then set aside wile one shoulder after the other is worked.


Finally, the annoying bit, the stitches are picked up around the neckline and the armholes to add the ribbing. I'm still not sure I know what I'm doing and it's hard to be sure that I'm picking up the right bit. in some places it looks neater than others. 


The yarn is Vinnis Colours Nikkim in Chestnut from Handmake Create. 
After the weird, too small sizing with the BasicT I swatched and moved up to  a 4.5mm needle. I've made the size L as per measurements. 

The sizing is perfect, but the shoulder straps do look wider on my version than the pattern cover version. 


The skirt I'm wearing here is the seventies, bias cut, yoked skirt that got  a brief mention back here.

That reminded me that I never put the second version up on the blog. This one, made in a linen/cotton from Fabric Deluxe is a definite improvement. 
I ignored the pattern's too small, cut-on pockets and instead drafted my own. I used some other pattern's more generous pocket outline and this technique for side seam pockets that behave! I like it much better for all that.


The next bit of knitting that I did, just for the fun of learning a new technique was the Empower lace scarf

I'd bought this one skein of DK weight yarn from Fibresmith and didn't have a plan for it. This seemed a fun project. the lace, which is quiet basic, kept me on my toes and there was plenty of ripping back. Eventually I worked out that leaving a veritable ladder of lifelines was what would get me to the end!


It's knit as a big triangle and then a short end on the bottom left is sewn to the top short end to make a neck cowl or scarf.


that gives it a bit of a baby's bib vibe, or bandana. I'm not convinced I like it, or will ever wear it, but it was definitely and good brain exercise to knit it up.


Sunday 5 December 2021

Another year, another crochet crustacean

It's not often that Flipper pays any attention to what I'm making, and even rarer for him to express an interest in something to be made for him...


So when he he leaned over one evening and asked if I could make him a lobster, you better believe I dropped everything and said "Yes! I can! That's how awesome I am! Thanks for asking".

Some work project of his had been given the codename "project lobster" and he felt the need for a mascot.


I already had the pattern as there's a lobster pattern in the book: Crochet Sea Creatures by Vanessa Mooncie. It's been quite well used, since I've made a hermit crab, starfish, jellyfish and a sea anemone

All I needed was the yarn. The closest match I could find online to the pattern yarn was The Fiddlsticks Finch 10ply cotton. I followed the pattern re hook size, but it does have that annoying openness that looks crappy in amigurumi. But, had I dropped a hook size or two to get a denser body I would never have been able to make the legs. All eight of those with one full hook size smaller than the body was insanely fiddly.


He is a pleasing full pot sized lobster:


And I believe has already joined  a few team meetings


Tuesday 30 November 2021

Black sewing - favourite patterns

Ever since I made the very bright (for me) Cinema Dress, I'd been dreaming of a plain black version. 

I bought some black washed linen from Maaidesign and to qualify for free postage threw in some black cotton lycra and ribbing, and maybe some other things too. ;)

That linen was not going to be right for the Cinema Dress of my dreams (Henceforth to be known as CDOMD) as it was a bit heavy, and not black enough. But it would be perfect for a pair of pants.


And a happy coincidence was that I just happened to have recently traced off Vogue 9114, an out of print  Kathryn Brenne pattern. 

Usually I would at least sew the tracing interfacing together in a rough muslin, but instead I went with the method of reading reviews on Sewing Pattern review dot com and doing what they did. It worked.


The advice was this: They're big, so size down. And: The crotch is seriously dropped so take a good bit out of the crotch depth.

I went with the smaller size that my measurements fell between (forgotten already but it's written on the tracing, probably M), and took 1&1/2' out of the rise. Then I just cut the fabric with a devil may care attitude, and possibly a glass (or two) of wine. It only occurred to me later that by hoicking up the rise and inch and a half they'd end up considerably shorter than intended.


I love them. The elastic waist is not overly gathered. In fact it could probably be replaced with a few pleats and a fitted waistband and side zipper if I wanted to fancy them up. The shape is relaxed but not clownish. They feel like tracksuit pants but look quite a bit more interesting.


Since the overlocker was thread with black thread, and I'd bought that cotton lycra, I whipped up a quick Liesl + Co Metro tee in size L. It's my favourite t-shirt, but I must remember to give myself a slightly longer sleeve and a smidge more bicep room.

If you've seen me anytime in the last month, or might do anytime this summer, pretty sure I'll be wearing at least one of these garments. Or maybe a new version in brown...


Edit; I forgot to mention that I ignored the Vogue instructions for the in seam pockets and referenced my own photo tutorial here for the Japanese pattern book way of doing it that is SO MUCH better.

Summer clothes for A

A few months back I did a bit of impulse sewing for A, whose wardrobe was getting outgrown...

First up I made another of the New Look 6444 jumpsuit.


It's the same size 12 that I'd made back here in february, and while that one still seems to fit, this one is a bit small.

I wonder if it's the double gauze fabric shrivelling a bit with each wash. It might fit better if I was bothered to iron it. :) Anyway, it was a cheap fabric from Spotlight and whipped up with whatever stashed bias binding I had. It's been worn a few times, but might not see the summer out.

The next garment I knew would be a winner. her all time favourite sewing pattern; the Class Picnic Shorts from Oliver + S


The shorts were cut from the leftovers of a beautiful jacquard cotton that I gifted my mum for Christmas last year. The promise was that I would sew her whatever she wanted (already delivered, just not photographed). More fabric details to come.

There was enough leftover for these shorts. I knew she'd pretty much outgrown the pattern, so I've made the size 12 and split the pattern pieces for the front and back vertically down the middle and added 1/4" - giving a full inch extra circumference width all round. the facing pattern pieces needed a 1/4" added at the same spot and the waistband just needed to be cut 1/2" beyond the pattern piece. It all came together perfectly and fits well. Not too loose, not too tight.

The top was just for fun. The fabric is a long stashed Soft Cactus cotton from Maiidesign (like 5 years plus). I'm not sure I've seen her wear it yet, but it's always an enjoyable sew and since the pattern was out...


Sunday 21 November 2021

A major project, and a peacoat...

The beginning is always a good place to start, right?

It's 2018 and we've finally decided that our dark, cold, double fronted Victorian house with the concrete slab-bathroom-kitchen at the back is ready for a renovation.... How to choose an architect? Why not with a recommendation and that good vibes feeling at the first meeting. It worked for us.

Three years later, and we've been in our renovated house for 12 months now. Needless to say we love it. 

This afternoon we invited our architect over to play (yes there was champagne and card games, cause you know, it's been a long lockdown and we may have forgotten how grown ups are meant to socialise...) and I gave him this gift I'd made:

It's our house, in the form of a peacoat:


During the long winter lockdown of 2020 there were plenty of site meetings, on a concrete slab, under a frame, and we were freezing. The idea of a nice wool coat had already come to mind. I just needed to find the perfect materials.

If you were inclined towards stereotypes, you could imagine what "colours" a Melbourne architect wears: There's only one, and it's black. I pushed the boundaries a bit with this very dark grey. It's a pretty close match for the dark grey external trim of our house...


I got lucky with the main fabric. It's from SuperCheap and is one of their wool/cashmere fabrics. It's a  great feeling wool, a lovely coating weight without being as stiff as some wool melton, and instead of being a solid, flat grey it has that tiny check look to it.

Cause they really are super cheap fabrics I bought two wool cashmere coatings sight unseen. One, the charcoal grey was perfect for the coat. The other, called Thunder, was perfect for the hood lining. No-one wants a slippery satin lined hood right? There's enough of that left over for another coat another day.

The thunder wool is a much lighter grey with quite a greenish tone and was really just a light version of the green colour that's used for a large part of our house. It also had a slightly brushed face which made  it ideal for a snuggly hood lining.


The pattern is the Thread Theory Goldstream Peacoat. A pattern that I've had in my stash since it was first released. My husband's never wanted one, and until recently my son had still fit in the Oliver + S School Days Coat (if you need me to link that one you've not been paying attention!).

I was itching to make it, and this seemed the ideal project. I gave away a bit of a clue in asking for my architect's measurements which he provided, in true style as a list titled "Anthony's dimensions". He fit squarely in the size M, but while I'd had him measure sleeve length, inseam, neck etc all as per the Thread Theory how to Measure a Man chart; the pattern only asked for chest and hip. I decided to be brave and just go with a straight medium and keep it a surprise


The coat is a combination of the two views throwing all the elements in the mix. I wanted pocket flaps and sleeve and shoulder tabs and the hood. Maybe this is where the project veered somewhat from the restrained you-can't-have-it-all-Shelley nature of the house renovation .

The lining was the real treat. With Lisa's help we digitised our house plans and turned them into a tileable repeat and then had Next State Print print them onto their satin polyester fabric in exactly that shade of green.


You'll have to take my word for the colour match as the sheen to the satin fabric means that if I hold it up to the green walls of the house there is no way a camera will happily photograph the two colours as the same. They look the same to the eye. Anyways, I've learned that building tolerances allow you to say that anything viewed from 1.5m with a bit of a squint is good enough!


To make the coat really warm I used wool quilt batting from Spotlight and quilted along the 10x10cm lines of the print tiles before cutting out the lining pieces for the body. The sleeves are just the wool coating and the satin polyester lining without quilting.

All of this was made much more fun by that birthday present to myself: My new sewing machine. Look at all that sewing space in the picture above. bliss!


The dining table has always been my sewing space. I can carry out my craft addiction but still feel like I'm part of my family. A sliding door means that the overlocker can come out and make a ton of noise and I can shut the dining room off from the living room. That's all the sewing space I need.

We were in and out of lockdowns throughout the year and sometimes I could have had the houseguest but not the ready made gift and then the gift was ready but the visitors were banned. Eventually we were getting close and I realised that, like every good building, I need my construction date to be recorded. Thankfully Kylie (of Kylie and the Machine) still had a spare Circa 2020 label in her personal stash that she could part with.


Earlier in the year when I had the wool in my hands and shops were open I'd zoomed over to Jimmy's Buttons where I'd found the perfect buttons. They were exactly the dark, marled grey I was after and even came in two sizes: large ones for the coat front and smaller one for the hood attachment and sleeve and shoulder tabs.


The pattern was great to sew: If you're so inclined there's a full sew along on the Thread Theory blog where it gets a tailoring treatment. This one is the fusible interfacing easy route. The only minor gripes were the minimal measurements (especialy compared to the detailed man measuring chart) on the pattern envelope and the lack of any extra lining length for the sleeves. I feel they should have a 1cm overhang at least, similar to the coat hem,

Otherwise I think it's a great pattern that can be a fairly simple sew as this one was, or it can be used as the base for a full on tailored affair.


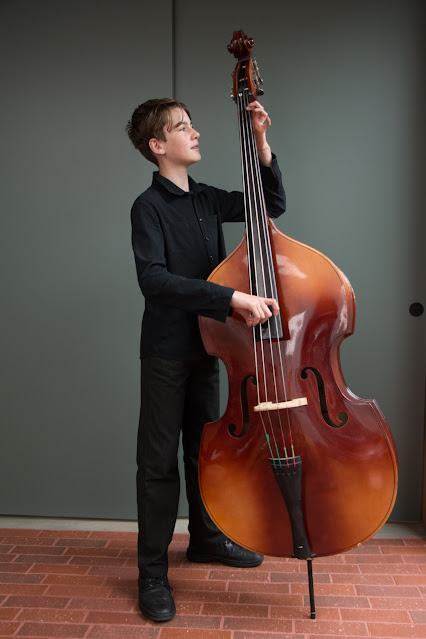
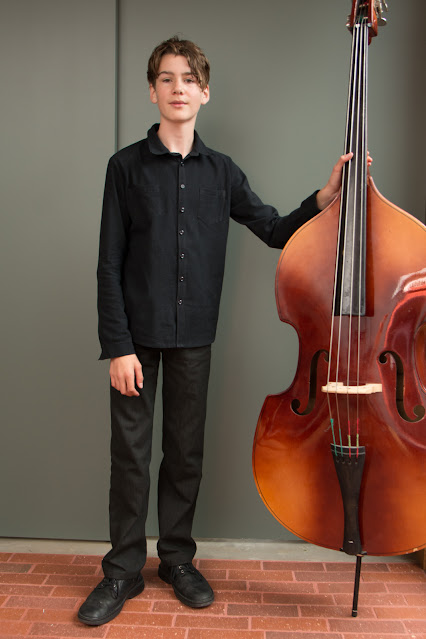
It was a real struggle to photograph the coat. I needed a human shape to make it hang nicely. I had one that was too small and one that was too big, but it was neither of theirs to model. I think the kids were frankly surprised when I didn't insist on Anthony modelling it for me for a photograph - after all it's been the rule for them since birth!


Ever since finishing it I've been terribly nervous that the sleeve length would be too short. Just before wrapping it up to gift I got monkey-boy to try it on and when his arms fit the sleeves I relaxed! :)

I'm happy to say it looked absolutely perfect on Anthony!

Details:
Pattern: Thread Theory Goldstream peacoat
Size: M
Fabrics: Wool cashmere main and hood lining both from Supercheap fabrics.
Lining: Satin printed fabric from Next State Print
Buttons: Jimmy's Buttons
Shoulder pads from Spotlight
Label: Kylie and the Machine (out of print)
Amazing house design: Bloxas

Tuesday 16 November 2021

Homewares: the next episode

The not-quite-scrubby-enough bath mitt that I knitted from nettle earlier this year lasted about 6 months then started to wear out.

Time for version 2.0


This time I used some of the Nutscene jute string from String Harvest. I'd bought a 40m ball of the forest green and a 130m ball of the natural colourway


I just made this one up as I went, using a "ripple" stitch on the front side (reference was my crochet stitch bible book, looking for something in the "texture" section) and a simple treble crochet on the back side


The two pieces were then crocheted together using slip stitches in the green yarn, with a second row in the other direction to make it look good from both sides, and some slip stitching into the stitches on the free edges.


In hindsight it was too dense a technique for the thicker, heavier yarn. This one should probably have been a looser knitted mitt. It also used up almost the whole, larger ball of jute. It's scrubby enough alright, but is quite heavy and solid for a bath mitt, especially when wet. I'm predicting it will last quite some time.

Meanwhile I picked up the Dishie yarn again and made a few dishcloths for our house


I used the free Nordic Dishcloth pattern on the KnitPicks website (where the Dishie yarn came from).

It was fun as I had to learn to knit cables. A new first. It would obviously be easier with a cable needle, but I made do just using another small circular needle.


They look great. Until you get them wet that is! Then something happens to the cable pattern and you end up with dense vertical lines of knitting with thin, sparse horizontal ladders between.


Even though this might not be the best stitch pattern for a practical dischloth, I am sold on the idea of knitted cotton dishcloths as they work well and don't get smelly at nearly the same rate as a sponge or commercial cloth. These three on rotation from the cupboard to the sink to the wash basket is working well. When they wear out I'll try a different stitch pattern and make some more!