Showing posts with label Vogue patterns. Show all posts

Wednesday, 11 March 2026

Melbourne Frocktails 2025

Holy smokes, it's almost a year since my last blog post. I've been making things like crazy, of course, but even snapping a quick picture seems to elude me these days.

Melbourne Frocktails has to be documented on the blog and this year I decided to knit!

photo by Penny Stephens

I liked the idea of a close fitted lace blouse with a simple skirt and I already had just the pattern: The Barbroe Blouse in the Knitting For Olive book.

Ruth (Rootaberger, long time blog reader, I'm the fan ) and I went to the Bendigo Wool Show in July and amazingly had shopping lists and a plan. Of course we came home with more than we'd planned for!


On my shopping list was some very dark colour of fingering silk to make the Barbroe Blouse. I spotted the Green Tea Yarns silk and when I asked about a sombre, dark shade (what is it with yarn people and all those bright colours?!) I was pointed to some dyed-just-for-the-show navy which apparently nobody else was yet to show any interest in. Perfect! 

The knitting was a journey and the full notes with all the tweaking to fit adjustments is finally up on Ravelry


For the skirt I wanted something with a flat waistband and hip area, knowing that the top would lay over it, then an A-line or wider skirt.

Turns out the Vogue 1486 pattern that was a free giveaway from Simplicity McCalls Australia in last year's Melbourne Frocktails stash bag was just the thing.

The skirt pattern is intended to be made in scuba knit and left un-hemmed. I wanted to use silk to match my blouse, definitely needed hemming and lining and only had a too small pattern, but the style was right so I made it work. Oh, and I wanted a curved waistband so it would lay flatter under my blouse than the high rectangle of the pattern. Not much to change, right?


The silk fabric was a very cheap shantung out of India from an Etsy seller. It feels crisp like paper which is what I wanted, but I could have done without the fraying!

I used the waistband from the Grasser wide leg jeans that I'm loving wearing (but still haven't documented here) and then slashed and spread the too small skirt pattern pieces to fit the waistband. I used an invisible zip instead of the pattern's exposed zipper.

The skirt has come out to be worn again since Frocktails and I really like the shape. It's fancy fabric but can easily be dressed down with T-shirt and sandals.


Frocktails came around and the weather turned awful! We had sideways rain all day long and it barely got to 12degC. At least that meant I could wear a camisole under my almost see through lace top and not be too hot.

We do so much planning together for Melbourne Frocktails, but Lisa and I never share what we're going to wear - it's good to have a surprise. Yet this year we looked almost co-ordinated...

Photo by Penny Stephens

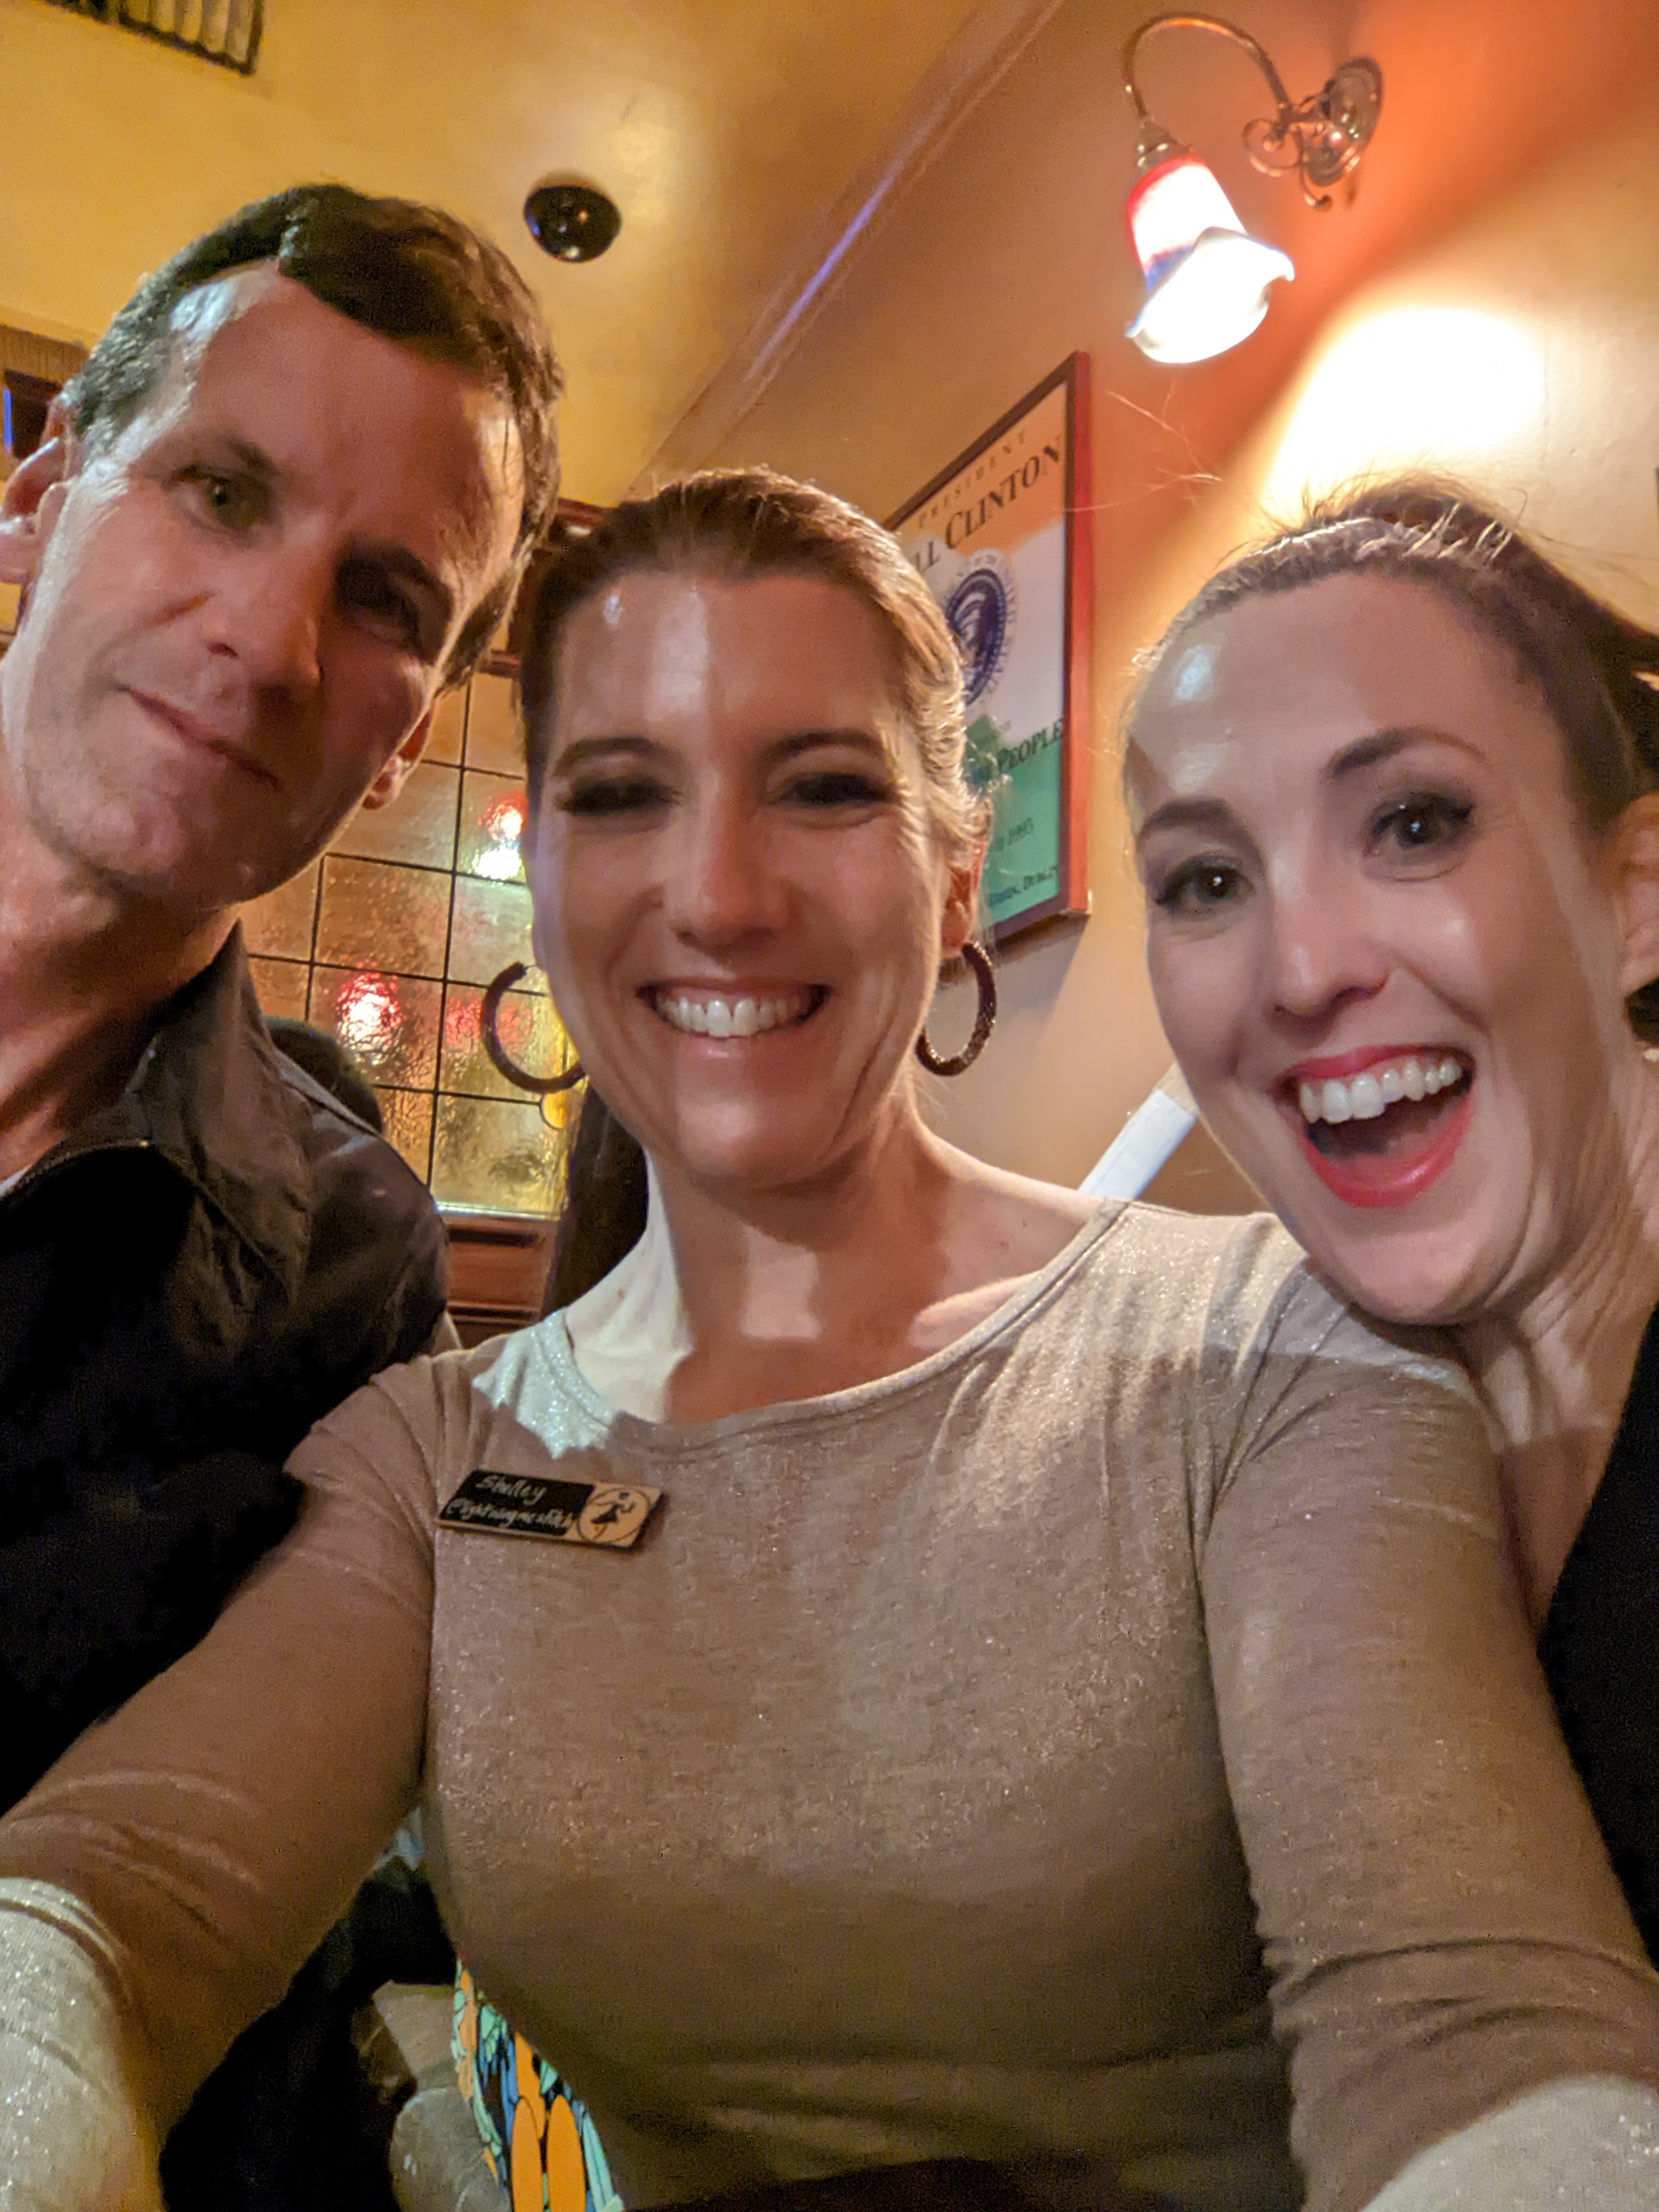
Here's Rooty and I in the photobooth! Cheers.


Tuesday, 6 May 2025

Last minute jumpsuit - Grasser 1040

Late last year I made a whole capsule wardrobe for my brother of things that I had in the stash (pattern and fabric), things that he needed, and that he couldn't easily buy due to him having very long limbs (herein referred to as the Long Limbed Sibling Freak (LLSF)).

None of that has made it to the blog yet, but just this last fortnight I've been sewing him a jumpsuit...

It came about because he was in the country and was attending an award ceremony. It should be noted I was not his +1, but I was concerned/curious enough to ask what he was going to wear. I suggested I  might make him a pair of black trousers, but then I decided a jumpsuit would be much more fun. Turns out a jumpsuit, with appropriately long legs and sleeves is something he has always coveted.

 
I was excited to try the Grasser 1040 pattern. I'd been impressed with the pattern for P's pants in the last post and am wearing a pair of Grasser pants of my own (as yet undocumented) as I type. 

He was concerned that the pattern model's version looked too big (they kindly give the model's measurements and the size worn, and I think he's wearing about two sizes bigger than he should as well). His only other requests were that the fabric should be soft and plain and the sleeves long enough. Beyond that it was my choice. 

For a jumpsuit to look a bit more awards-ceremony-red-carpet and less mechanic-on-a-lunch-break it needed all those zippers and maybe some silver metallic topstitching.

 
I bought the pattern online on Wednesday morning and Creffield Digital Print had the printed roll ready for me to collect before lunchtime. I traced it off that afternoon and then realised I didn't have enough black cotton drill in the stash. Thursday was a long work day, Friday the Anzac Day public holiday and Saturday full of chores and activities. No time to shop for fabric. Thankfully Fibresmith had a warehouse sale on the Friday and I picked up 5m of a lovely cotton drill in a light bluish grey. Spotlight opened in the afternoon and I bought some fabric dye and so then by Saturday I had my black cotton drill, even if it's a weirdly off black shade of black.
 

Sourcing the zippers was the other challenge. I needed 12 zippers in total in no less than 9 different lengths and the lengths would need to be adjusted as I sewed. I'd anticipated this as soon as I bought the pattern so I'd zoomed over to LZF zips in Brunswick where the super friendly staff cut me zipper tape to make 12 zips, put the bottom stops on leaving enough length for each of the zips, supplied all the pullers and plenty of the little top stops for me to apply once the length was correct. And so cheaply too. Five stars for LZF

To make it just a little bit "extra" I used some black and silver flocked iron on transfer material and my Silhouette Cameo to cut a letter G (the LLSF's initial) for one of the pockets

 
I couldn't quite follow the pattern's instructions for the pockets as it has you use the zipper tape exposed on one side to make the pocket edge and that only works if you have plenty of tape at both ends of the zip. It would be a curious finish, but impossible if you're only shortening your zippers at one end. 

Most of the rest of the instructions were easy to follow, with the caveat that they're translated (fairly poorly) from Russian and there's a lot of "processing the detail" type phrasing. There are photos although they don't always match the written instruction so you need to have a bit of sewing experience to tackle this one. The drafting is spot on, so once you work out what you're meant to do it all comes together perfectly. Which is good cause I only had two days and a few evenings after dinner to assemble it all.

 The sleeve cuffs, leg hems and waist all have little tabs with snaps so they can be narrowed in a bit. But if you like your legs flared, or need to get your jumpsuit off over your boots there are gusset zippers in the inner leg. Probably completely unnecessary but why not sew on two more zips!

It was finished Sunday night and washed to get the pencil marks out and then ready to wear for Monday night's event. He was delighted!


 So, who got to be his +1 for the awards ceremony? Our mum!


And it turned out that I dressed her as well, as she's wearing a  Vogue 1817 jacket that I made for her two years ago.


Details: LLSF: Grasser 1040, size 48, height 188-194, 1.5cm sleeve length added otherwise no alterations. Cotton drill.

Mummy: Vogue V1817, mix of dobby spot linen, plain black linen and a poly/metallic blend spot fabric

Tuesday, 21 November 2023

Melbourne Frocktails and another Vogue 8904

Ever since 2016 when I made Vogue 8904 (aka the shingle dress) for the first time (blog post here), I'd been keeping my eye out for the right fabrics to make the sleeveless multicoloured version.

Sometime in the middle of this year I found myself at a Fibresmith open warehouse sale and there they were; five different colours of knit fabric, all of the exact same weight and make and the same stripe width. It was finally going to happen.


I squirrelled the fabrics away to wait for summer, and then, as Melbourne Frocktails was fast approaching I thought, why not? A raw edged, easy to sew and easy to wear, singlet dress is exactly what this busy party organiser needs.

Secure in the knowledge that I'd already sewn the dress pattern once before and it would be barely a day's work, I decided that Melbourne's untrustworthy weather might require something warm and I started panic knitting a cardigan. I finished it about 5 days before Frocktails and just as a heatwave hit the city. C'est la vie. Needless to say, it didn't get worn and will have to be photographed and written about another day.

Of course that left me with a few evenings spare leading up to Frocktails so I zoomed around to some beadshops and bought 11/0 Mizuki Delica beads that exactly matched my fabrics and made this little bracelet.


Having just come back from a holiday to Fiji, the banded stripes remind me a little too much of sea snakes! I'll have to remember to write a blogpost about the sea kayaking trip and the sewing that I did to prep for it. It was amazing. The holiday that is.


Having the pattern pieces already traced from the previous dress, it really was quite a quick and easy sew. This time, being a bit smaller than in 2016 I sewed exactly as per the pattern sizing and used the 5/8" seam allowance as directed.


Here I am with my Melbourne Frocktails co-host Lisa. Her dress is all kinds of amazing with handpainted silk and a laser cut leather belt and necklace that references lyrics to a song her husband wrote. I truly don't mind being outshone and I was happy in my comfy singlet that left plenty of room for cocktails and canapes! Play to your strengths kids. :)


Super exciting news is that we had the Guardian Australia come along and here's a link to their write up of our not-so-little-anymore cocktail party! Click on the picture below for the link


Monday, 24 April 2023

Melbourne Frocktails 2022

I'm already starting into planning mode for this year's Melbourne Frocktails and I realise I still haven't shared what I made for Frocktails 2022. I didn't get great photos so maybe that's why I've stalled.

After missing out on having a Frocktails in 2020 and 2021 we didn't want to wait until spring of '22 so we brought it forward and went with a winter date. It was fun to be thinking of sewing for a different season.

My first thought, and what I stuck with, was a full, brown silk skirt and a simple bodysuit on top. A simple outfit, but buckle up, it could be a long blog post....


Can I even remember what I did?
Let's start with the skirt. That was always meant to be the main feature. The brown silk was bought on sale from Draper's Fabrics long before anything else and I think I guessed at 5m knowing it was going to be a big skirt.

The pattern choices came down to one or two different Vogue patterns that I found (and bought) and I ended up plumping for Vogue 8980 (shown variously with a designer Vogue style pattern cover or the Very easy Very Vogue style line drawings.) I went with the full, hi-lo hemmed skirt (view C) and the pleated waistband of view B. 


I've got no idea what size it ended up being. Since the waistband was the only thing that had to fit it didn't seem all that important. I suspect I started with the size 16 (a smidge smaller than what my waist was measuring) but by the time the skirt was attached to the waistband it was obviously far too small. I must have assumed the "normal" amount of crazy positive ease built into some commercial patterns. Well not this one.

I unpicked everything and let out all the skirt pleats and cut a new waistband but then I was panicked that it was now feeling too loose. I decided to hang it in the closet for a month and work on the bodysuit and maybe eat more cake!

The bodysuit is based on the Jalie leotard 3136. I liked the wide bateau neckline. The challenge was keeping the shaping that is created by the horizontal seams that sperate the yoke/chest sections from the waist sections, while getting rid of the seam itself. I could also raise the back neckline up to a standard eight as I was adding crotch snaps so I didn't need to get into it through the neckhole as one might with a normal leotard. - If I'm going to drink cocktails all night I'm going to need to use the bathroom! (and you do not want to see my try to climb out a neckhole after too many drinks)


The beige/gold sparkly knit came from Fabric deluxe and was exactly what I was after. There was a lot of pattern tweaking and at least one muslin until I eventually got what I wanted. Then I freaked out about nipples. If I had to choose between only two scenarios, one being visible back-fat bra strap lines and the other being visible nipples, I'd go seventies child and free the nips every time. 

However, neither of those scenarios seemed appropriate for a potentially cold, but definitely fancy soiree. My "solution" which I'm still very unconvinced by was to add some foam bra cups into the lining of the bodysuit.


I think they've ended up being far too molded and "booby" looking for my tastes and I've been very tempted to go back and take them out. But now that I look at that picture above I'm reminded that they're sewn in-between two layers of lining at the front, and once I'd attached the sleeves all access was lost. They did solve the no bra lines/no nipples dilemma, but I was aware that during the evening I felt like the bra cups were heading neckwards as if to strangle me, as my boobs tried to leave the party exiting downwards. Sigh.

The happy distraction from all this garment sewing drama was doing a Vogue Knitting Live course to learn tubular bead crochet with Florence Spurling. Due to time zones (and living at the arse end of the world) it was a 2am session for me, but what better time to learn a new craft?!

I bought the recommended bigger, learner beads and made a not too shabby necklace (I think there's a picture of that in yet another unblogged garment photo for another day). I tried them as hoop earrings but the weight was crazy and I felt like my ears would be sliced up in no time.

Never one to shy from a challenge I bought the much tinier, advanced level beads and set to work crocheting some tubular beads to slip over a plain metal earring hoop. I'm really proud of how these turned out. There's a dorky looking but super useful bit of free software called J-Bead which allows you to design the pattern you want and then it calculates the threading order and how many beads of each colour you need. Cool.


There's no denying this was crazy fiddly work, but once the beads are all threaded correctly and the first round is done it's actually not so hard. I think I used five different shades of beads from the deepest brown through to a very light metallic champagne colour.


As I was trying to take selfies of my earrings, Flipper was taking photos of me and ended up with this cute camera film style image


By this time I was ready to go back and face the skirt again. I finished the waistband and it fit just fine - I hadn't changed physically I think I'd just needed to walk away from it mentally. Anyway we were reconciled. I'll admit to being far too lazy to hand hem the skirt, and I was also loathe, without any help, to try and trim it level due to the drop of the bias sections. You can scroll back up to the first pictures and yell at me again to "trim the hem to account for the bias!!". It needed it.

I used the rolled hem foot attachment on the sewing machine and just went at that hem like a lady who'd stopped caring. All EIGHT metres of it. Seriously. ( I measured the hem the day after Frocktails and came up with 8m of hem and no fewer than 5 spilt cocktails stains :) )

So, last minute, I decided I need a short jacket. I traced off as many short jacket patterns as I owned and tried to fit them onto as many small bits of appropriate fabrics as I could find in the stash. The only match, and quite a pleasing one was this:


The main fabric would have been too shifty to use on its own so I underlined it with a beige cotton drill. And then I did want I've always sworn not to do: stayed up past midnight sewing bias binding on seams to finish them.


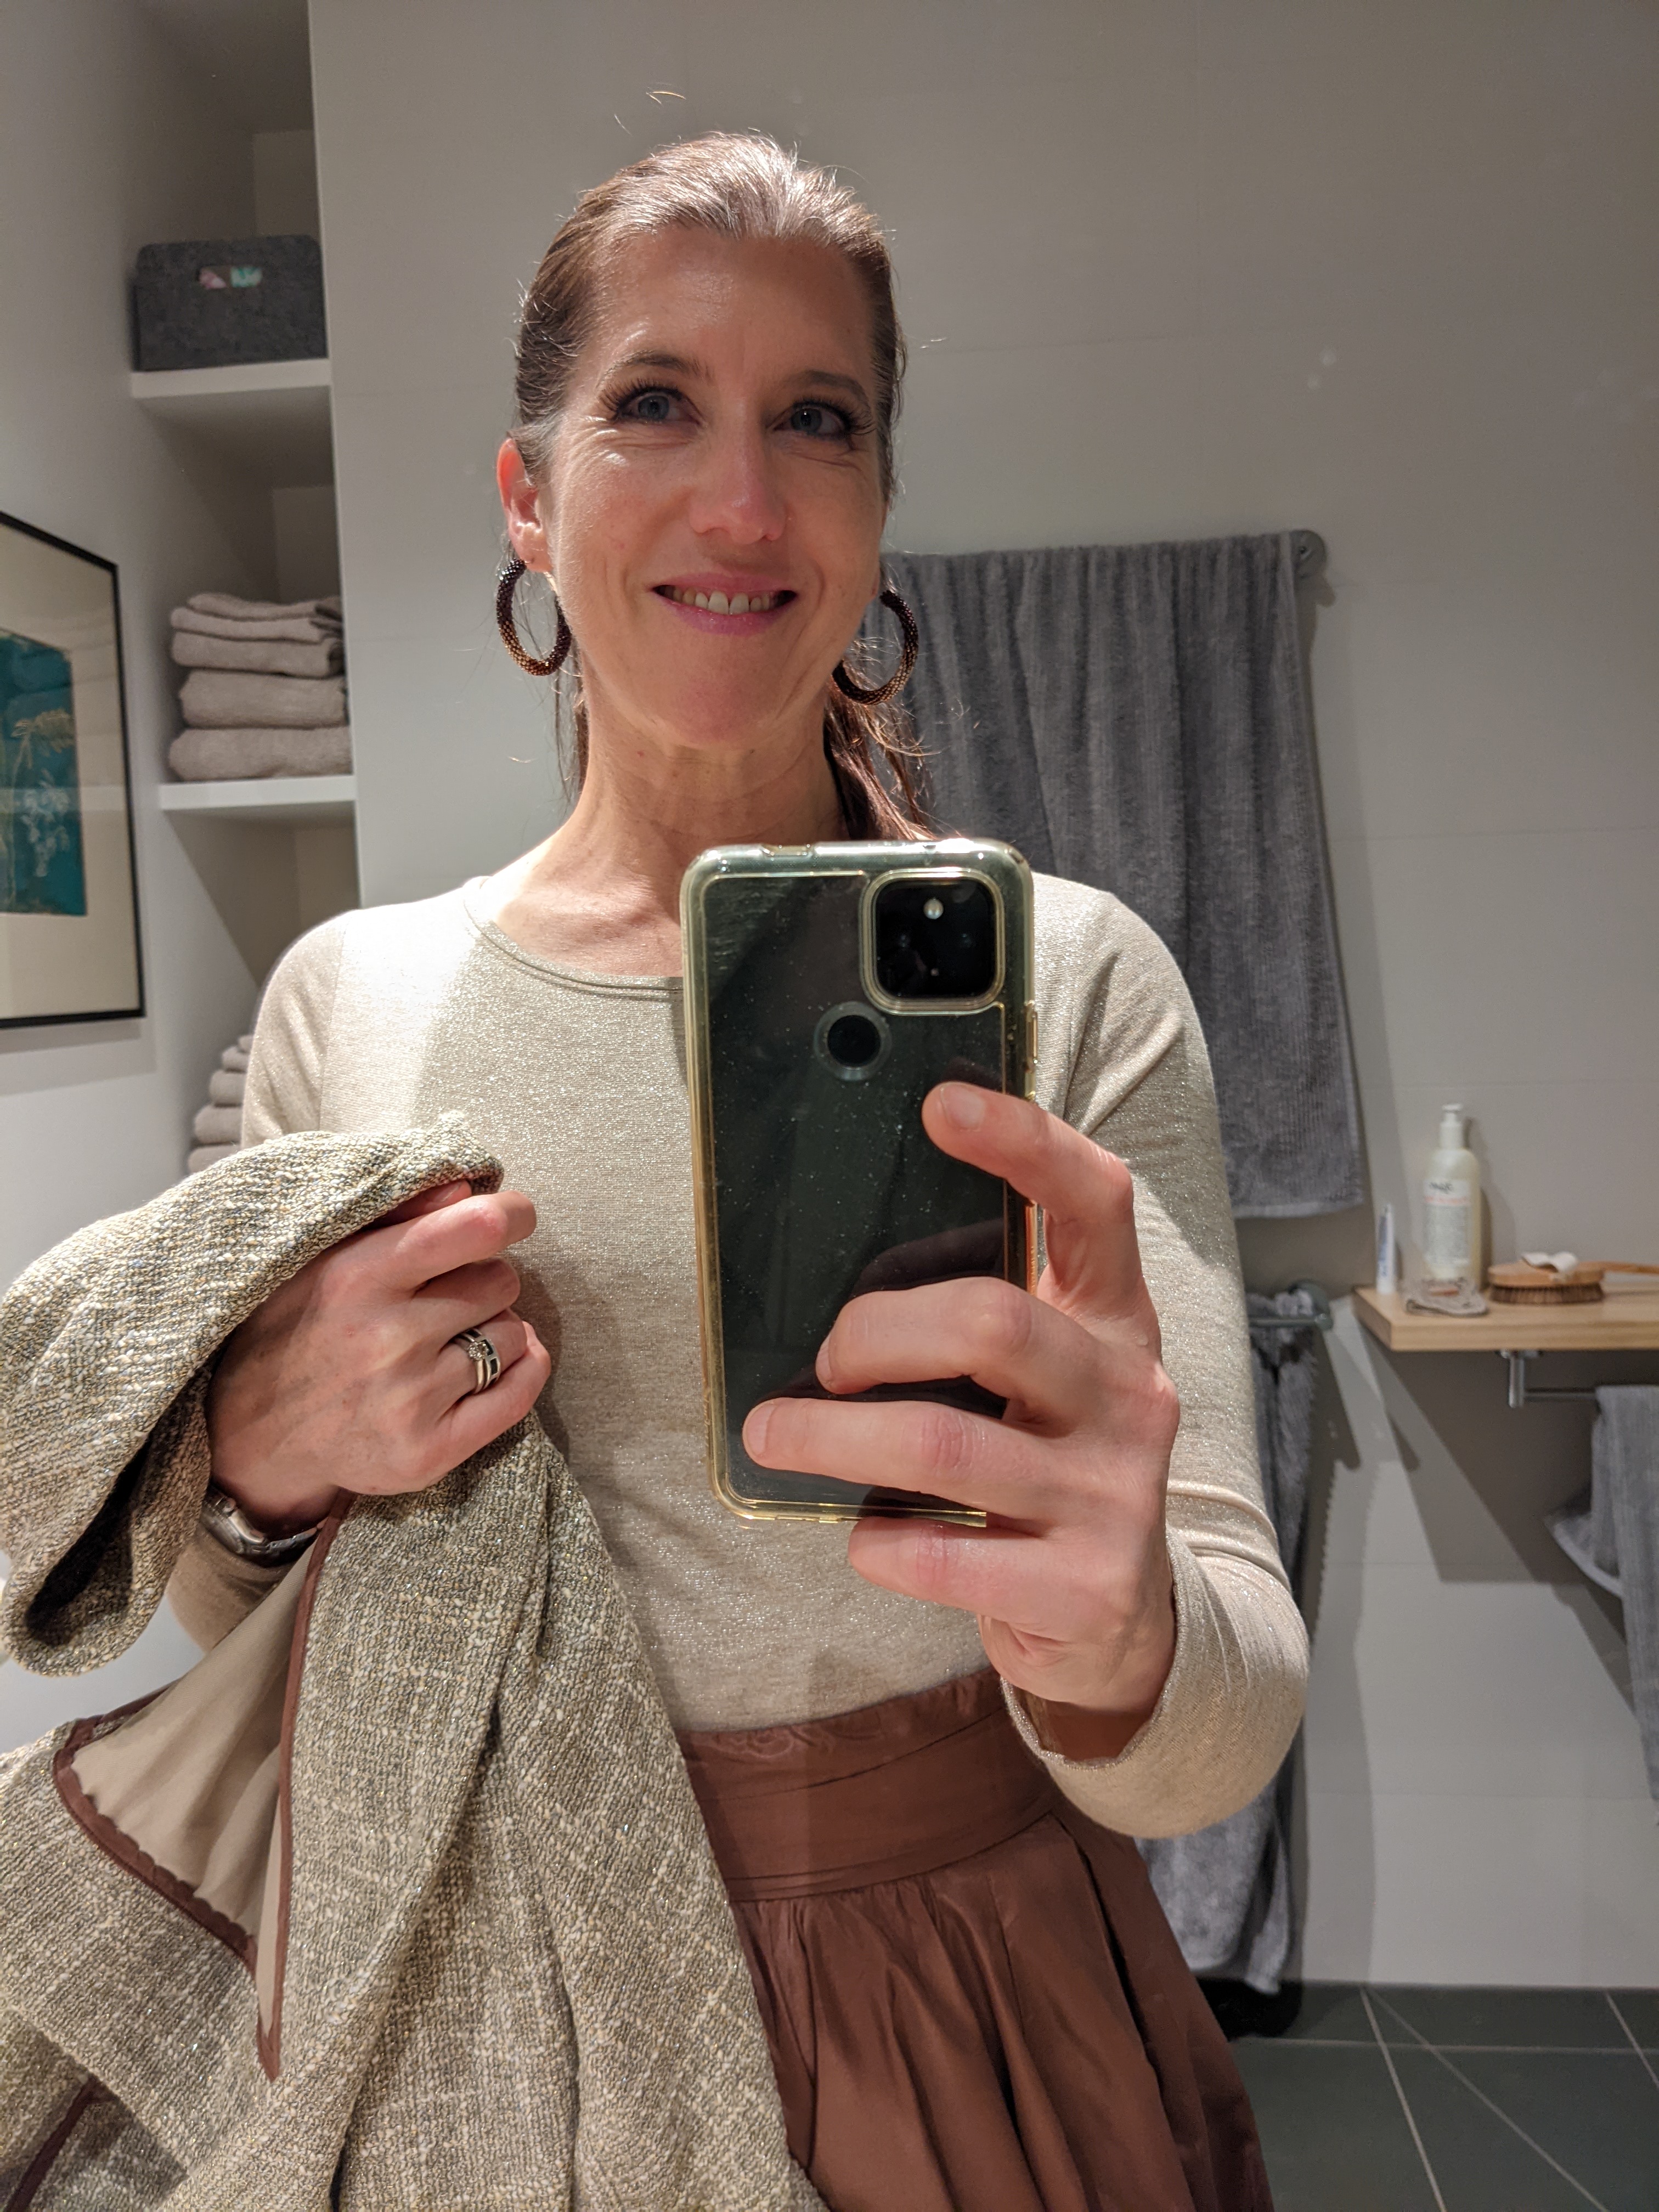
Of course it was only worn to and from the venue, and apart from trying it on in my bedroom I don't have any good photos of it. The jacket made it, just, into the annual bedtime bathroom mirror selfie


This year, 2023, will be the 10th anniversary for Melbourne Frocktails. Are you coming? 


Sunday, 6 February 2022

Vogue 9114 another two times

I'd been living in my V9114 black linen trousers made back in November, and knew I needed more before the summer was out.

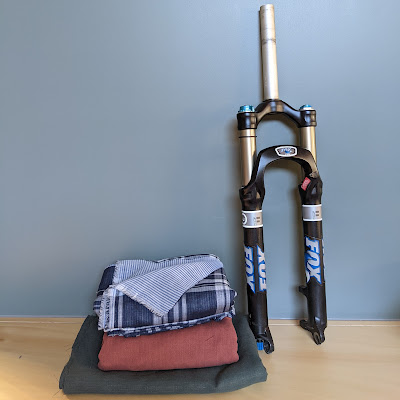
I had a mountain bike fork that had been serviced* and needed picking up, and what do you know, I had to drive past both Fabric Deluxe and The Fabric Store to get it...


* astroboyracer if you're here for the fork servicing bit and not the sewing bit!

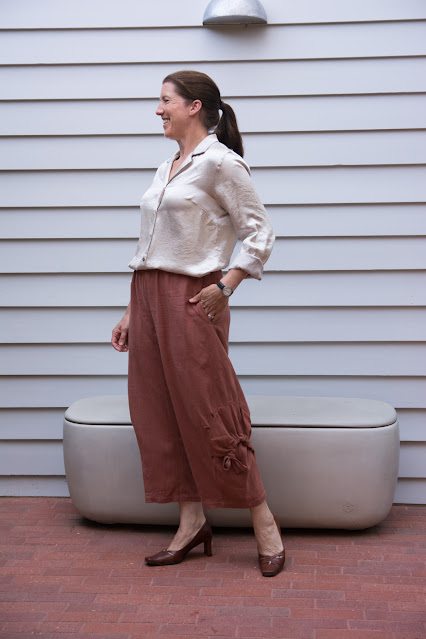
The top fabric in that stack is an amazing double sided gauze from The Fabric Store that I'm busily working on now, but the other two fabrics did get used for V9114. I'd bought both fabrics thinking of the pants, but not sure which I'd use. Both was the answer.


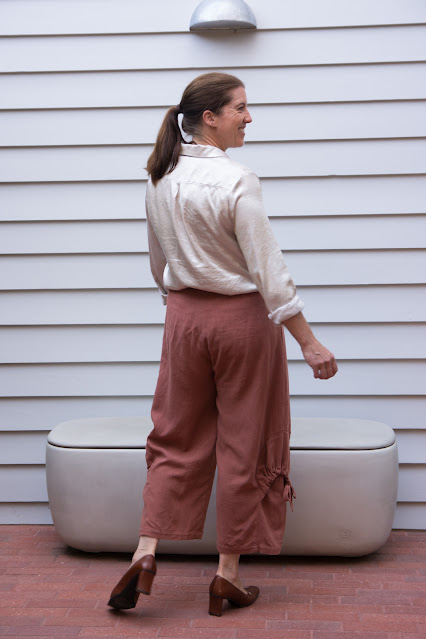
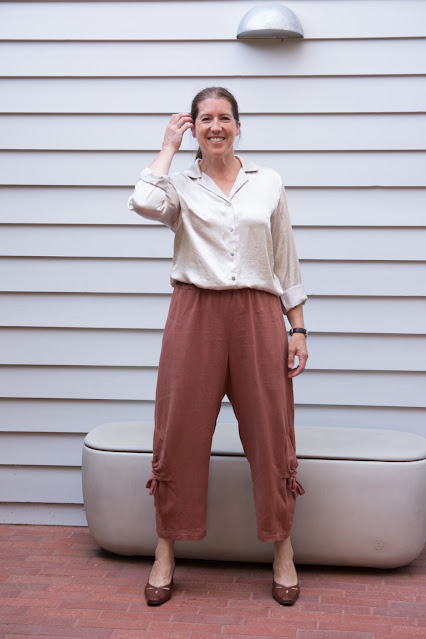
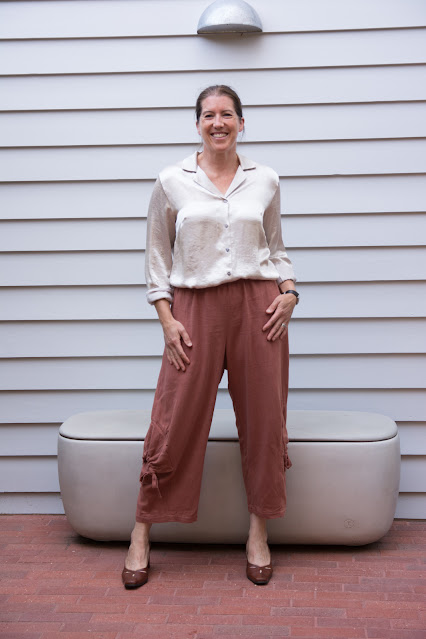
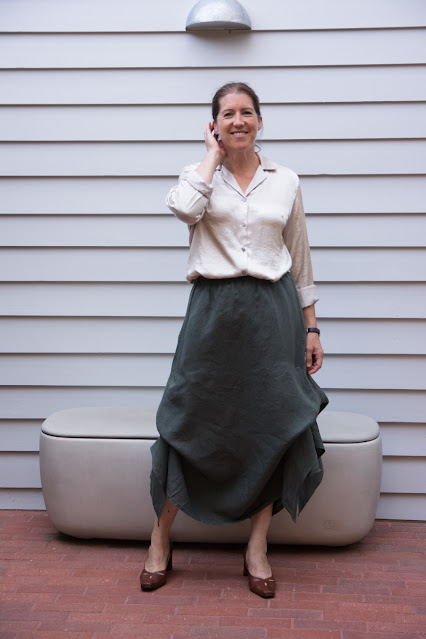
This fabric is a really lovely linen viscose from Fabric Deluxe. Here's the link if it's still there.

It has a lovely washed texture with a bit of nubby variety in the surface. It's drapier than a straight linen and is lovely and soft. Perfect loose summer pants weight fabric.
 

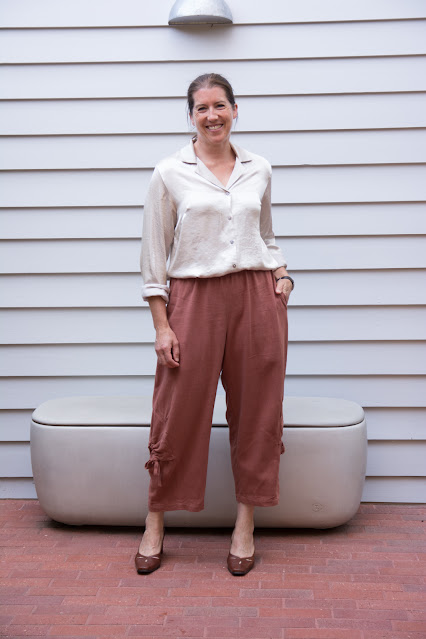
At first I wasn't sure about the colour, thinking it was a bit pink. But pair it with some old heels (1995 from memory!) and my nice courtyard brick tiles and I love it!
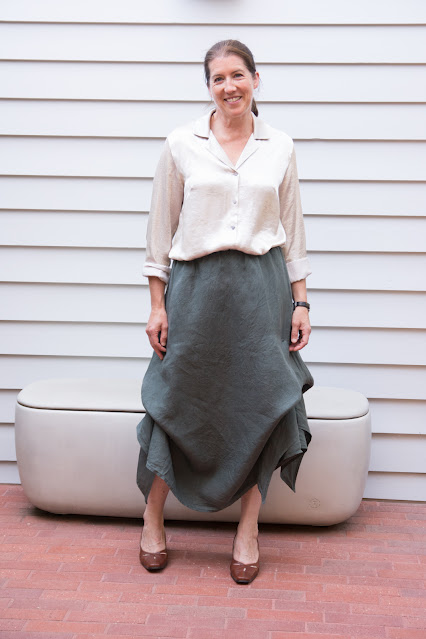


Same as my black ones, I've made the size M (one down from measurements) and hoicked an inch and a half up and out of the rise at front and back. This time I thought about adding the length back in at the lower leg but decided summer pants can be cropped.

I've read reviews of these pants that complain about just how loose fitting they are, but they're meant to be that way. The pattern cover model has got some definite slouchy pants vibes going on. I love them being so loose and wide.


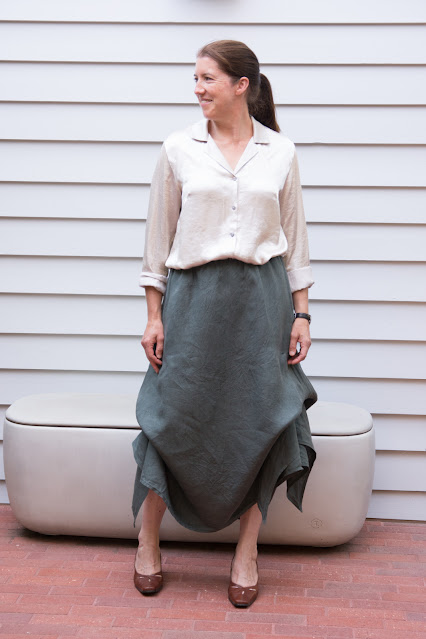
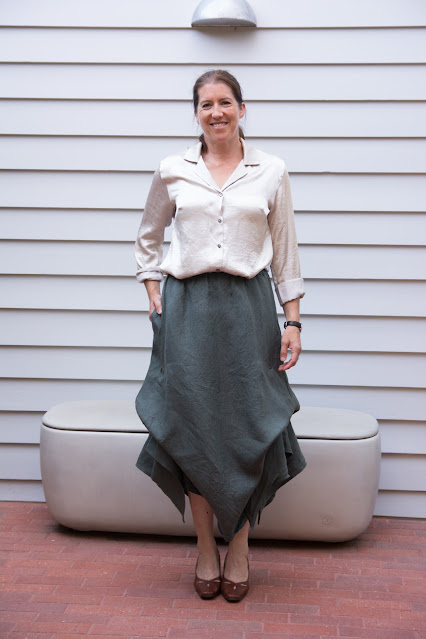
It was in reading the reviews of the pattern that I saw that more people had made the skirt than the pants and suddenly I knew that's what my green fabric wanted to be, so I dived straight back in.


This fabric is an organic hemp which was on sale as there was a slight line running down the centre. I was sure I'd be using it for the pants so nothing would be cut on the fold and it wouldn't matter.

Of course I changed my mind. The skirt pattern pieces are very wide and only just fit on this fabric which is listed as 143cm wide. I can see the fabric fault line if I look for it, but only just. Thankfully I managed to fit the skirt pattern on the 2.5m that I'd bought - the pattern fabric guide suggests considerably more.


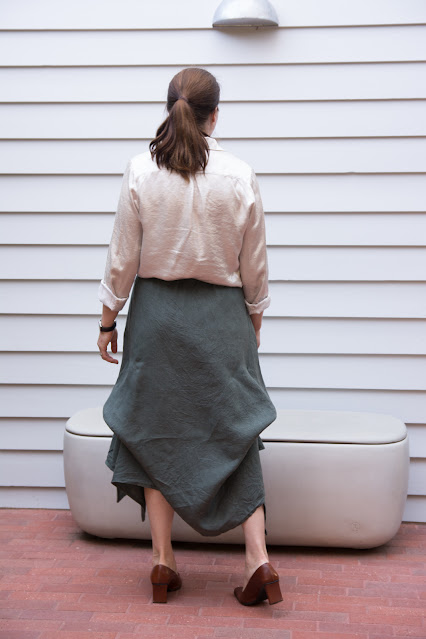
I wasn't sure I'd like the skirt with it's weird, tied-up handkerchief corners, but I LOVE it. It's odd enough to be interesting but really just a comfy, elastic waisted skirt. 

While the pants call for a single piece of wide elastic, the skirt suggests two channels of narrower elastic. That suited me as I'd run out of wide stuff anyway. I quite like the double narrow waistband as it feels softer to wear.


The only change to the pattern that I simply had to make, was to add pockets. I used the pocket pattern piece from the trousers and my own way of sewing them in (done for both pairs of trousers and documented here) so that I can press the side seam allowances open.


The instructions for attaching the ties was confusing, and I think, in error. Both the written instructions and the diagrams showed the tie stitched to the skirt, then folded over its raw edge and stitched again. Yet the direction in which you attached them, up vs down, differed from written instruction to illustration.


I'm not sure which way was correct. I attached them following the illustration, not the wording. That way the lower tie points upwards and the upper tie points downward once fully stitched on. The attachment point of the lower tie is nicely hidden by the folds of the skirt, but it's a bit annoying how visible the upper tie attachment point is.

Maybe, if I'd attached them pointing upwards, then, in tying them downwards they'd create another small pleat and cover themselves? I dunno.


Both versions of V9114 worn here with my Liesl & Co Camp shirt in metallic cotton which has had so much wear over these last two years. When evening wear and pyjamas became the same thing due to a pandemic, this was the perfect shirt to have in my wardrobe!

Tuesday, 30 November 2021

Black sewing - favourite patterns

Ever since I made the very bright (for me) Cinema Dress, I'd been dreaming of a plain black version. 

I bought some black washed linen from Maaidesign and to qualify for free postage threw in some black cotton lycra and ribbing, and maybe some other things too. ;)

That linen was not going to be right for the Cinema Dress of my dreams (Henceforth to be known as CDOMD) as it was a bit heavy, and not black enough. But it would be perfect for a pair of pants.


And a happy coincidence was that I just happened to have recently traced off Vogue 9114, an out of print  Kathryn Brenne pattern. 

Usually I would at least sew the tracing interfacing together in a rough muslin, but instead I went with the method of reading reviews on Sewing Pattern review dot com and doing what they did. It worked.


The advice was this: They're big, so size down. And: The crotch is seriously dropped so take a good bit out of the crotch depth.

I went with the smaller size that my measurements fell between (forgotten already but it's written on the tracing, probably M), and took 1&1/2' out of the rise. Then I just cut the fabric with a devil may care attitude, and possibly a glass (or two) of wine. It only occurred to me later that by hoicking up the rise and inch and a half they'd end up considerably shorter than intended.


I love them. The elastic waist is not overly gathered. In fact it could probably be replaced with a few pleats and a fitted waistband and side zipper if I wanted to fancy them up. The shape is relaxed but not clownish. They feel like tracksuit pants but look quite a bit more interesting.


Since the overlocker was thread with black thread, and I'd bought that cotton lycra, I whipped up a quick Liesl + Co Metro tee in size L. It's my favourite t-shirt, but I must remember to give myself a slightly longer sleeve and a smidge more bicep room.

If you've seen me anytime in the last month, or might do anytime this summer, pretty sure I'll be wearing at least one of these garments. Or maybe a new version in brown...


Edit; I forgot to mention that I ignored the Vogue instructions for the in seam pockets and referenced my own photo tutorial here for the Japanese pattern book way of doing it that is SO MUCH better.