Showing posts with label stencils. Show all posts

Tuesday, 30 May 2023

Men's (almost) Metro T - Part 2

No sooner had I made Flipper his mtb trails T-shirt than I had a request from the big kid for one too.

I obliged, of course, but not before making a plain long sleeved T first, cause that was the bigger wardrobe hole that needed filling.


This is the Liesl + Co Metro T size M with, from memory about 8cm extra body hem length and 10cm extra sleeve length.

Photographed quickly on the way to lacrosse training with the long pole he got for Christmas. Did I tell you I strung the head myself? Not such a hard task if you're a crafty type. Thoroughly enjoyable if you have a post Christmas lunch glass of champagne and a quiet place to sit.

The T-shirt he really wanted though was the athletic knit with the favourite Strava trails on it...


This is the Strava bike map of his favourite ride in the Mystic mountain bike park up in Bright. If you know the tracks you can probably name those loops just looking at the photo.

I kindly gave up the 2nd 1m cut of athletic knit from Maaidesign, even though I'd earmarked this one for myself. He wore it to lacrosse training on a warmer evening and was rapt, like being nude but with clothes on!

For the transfer I used the Silhouette Cameo again, but this time used a generic brand iron-on transfer material in a holographic silver. It looked great, but in the very first wash it almost all peeled off. It wasn't the application to the fabric that was the problem as all the glue was still adhered, it was the bond between the silver layer and the adhesive layer. I picked off the few bits that remained stuck fast and now there is the faint glue shadow outline of the original artwork, which I've been kindly told looks kind of cool and subtle.

Meanwhile I let the company that I bought it from know and they've refunded me. Only trouble is I have half a dozen other sheets of this iron-on transfer in other colours and I guess I'll have to reserve them for non-washable type projects.

Good thing I insisted on photos before it hit the laundry basket!


Monday, 22 May 2023

Men's Metro T - part 1

Have I told you I bought myself a Silhouette Cameo cutting machine?

I'd borrowed one from a friend ages ago and went crazy making T-shirts for the kids with iron on vinyl designs and one supergirl outfit! I gave that machine back to the friend, and every year or so afterwards I would do another little bit of online sleuthing as to whether the Silhouette or the Cricut was better. Eventually I decided on the Silhouette Cameo 4 based on two things: More freedom to create your own designs and import graphics into designs, and a deeper cutting depth. I know I'm not about to go cutting cork or leather right now, but I sure as heck don't want to not be able to should I decide I want to!

Armed with a new toy I had a sudden urge to create something. Turning to the household head of IT, I asked what he'd like on a T-shirt. "Tabs or Spaces" he replied.

Apparently that's a defining choice amongst code writers. Obviously I had no clue and needed to be instructed as to the graphics that would represent each word.

What I did know was that the T-shirt would be the Liesl + Co men's Metro T in XL as per every other one. Easy. 

He requested navy or dark blue as the colour. That I didn't have, but I'm not above shopping for fabric when the need arises ;) I found this perfect dark blue remnant, about 90cm size, at Fabric Deluxe and I suspect it's a bamboo blend? It is a lovely fabric.

The iron on vinyl is a Silhouette branded one that is a metallic blue and changes colour a bit with the light reflecting off it. Subtle yet bright, and super cool.

Here's the household IT guru in his natural environment: horizontal with laptop


This photo is taken at my parent's house. When he's not to be found napping on a couch or deckchair he'll be out on the mountain bike trails near their place.

After visiting for many years, it's in the last two or three years we've discovered a great network of single track just out of town.  I think when visiting the in-laws involves unlimited GnTs, couch naps and singletrack there can't be much to complain about right? What's that? I'm told we need to get rid of the veggie garden and put in a pool.

Anyway, back in January I had the idea of making him a T-shirt with the Strava map of the local mtb trails on it. We were up in Bright so I dropped into Maaidesign to visit and pick up some of her lightweight athletic knit fabric.


This time the transfer is a metallic silver (still Silhouette brand) with the folks' home town GPS co-ordinates, the fire-road drop in and then about 60km of sweet singletrack meandering. That's his happy place in T-shirt form.

Here we are coming back out of the bush along the fire road with the lure of coffee and cake in town...


Saturday, 8 January 2022

Catching up on 2021

Once upon a time, back when I was a more diligent blog updater, I would have had my little mosaic images of everything I'd made in the preceding year ready by now.

Now I just have a backlog of little projects that I do want to document before I forget them altogether. Maybe I'll start with a post about those items that were Christmas gifts:

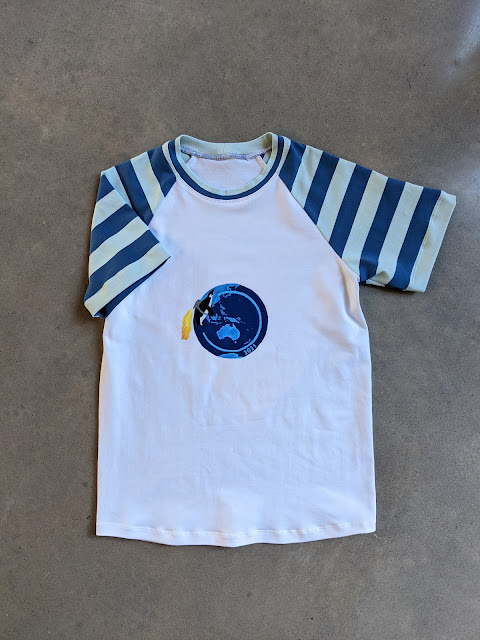
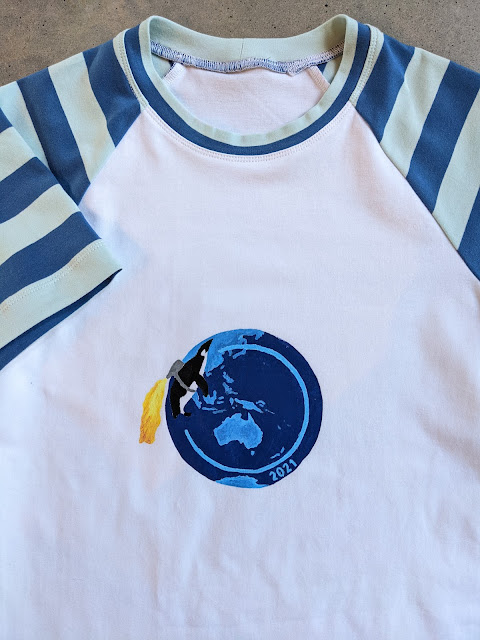
First up, I stencilled another T-shirt for my nephew. 


I don't expect anyone recalls all my various stencilled T-shirts, but the penguin has been done before: Back in 2018 I made T-shirts for his band: The Flying Penguins (blog post here)

My brother and his family have spent the last year in Australia, so my nephew's band have been separated, with the only other band member still being in Germany! I figured a memento of his solo tour down under might be alright, although, like many of us, it might be a year he'd rather not remember.


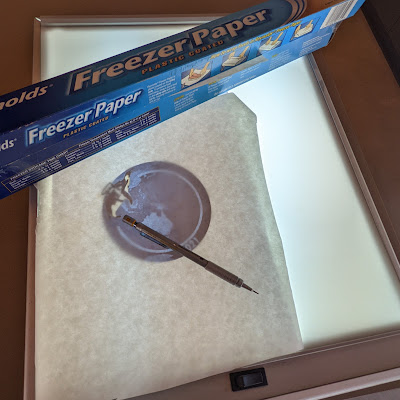
I borrowed the x-ray light box from work and hand cut the stencil using freezer paper. I just wish I'd thought to place it a bit higher up. It's easy to forget, when you just have the T-shirt front pattern piece in your hands, how high up an emblem or image should be to look right. 


The pattern is the Jalie 3669 Nico in size P (12 years) using stashed cotton lycra fabric.

For my sister in law I decided I would gift her the raw ingredients and a pledge to work like a fiend and create her Christmas gift in front of her eyes over the following week. - That's a neat way of saying, I've run out of time but now I'm on holidays...


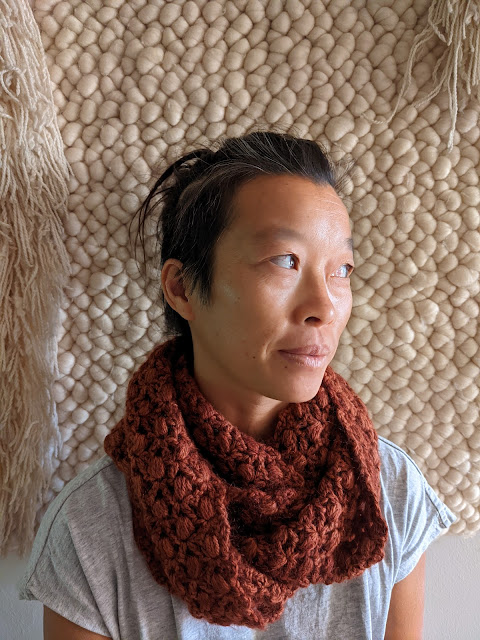
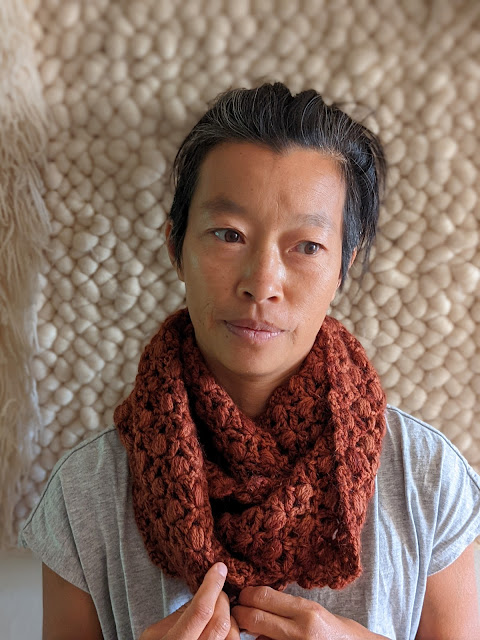
I bought 2 skeins of the beautiful brunt terracotta coloured Aran weight merino from Fibresmith, along with one skein of the fine mohair. They came in the nice Cloud Mountain Cowl gift bag, so I scored that pattern and the stitch markers and then popped the yarn back in the bag with a picture of the cowl pattern that I knew I could crochet in a week.

I'd made the cowl pattern before for myself: here and since the whole purpose of this blog is to make notes of yardage and pattern sizes, you'd think I might have thought to look back at it. But no.

I merrily set off crocheting, and by the time I'd finished the first skein of merino it was clear that two skeins wasn't going to be long enough. Now I check my blogpost and realise I'd used 3 full skeins for my version. I ripped it all back and started over with 70% of the width as my starting chain. Thank goodness you really can make this stuff up!


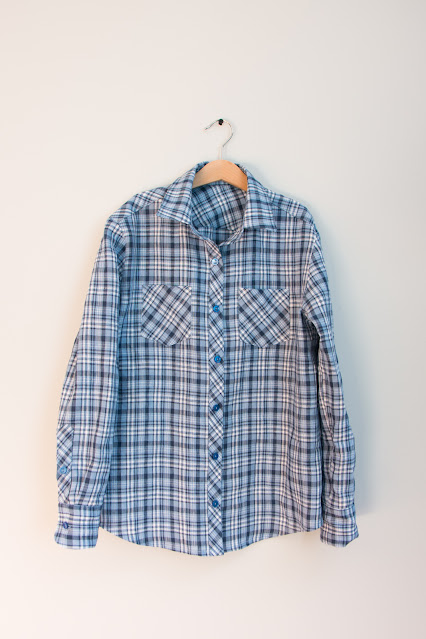
The last thing I made as a surprise was a shirt for A. Years ago I turned an old shirt of mine into a little check shirt for P (he needed a check shirt for his prep grade school concert. I think he was a duck, but a country duck, so a check shirt was appropriate ?!).

After he'd outgrown that shirt it was loved by A who wore it in a much more '90s grunge way. And ever since she outgrew it she's been asking for one just like it. Every time I saw a blue check fabric online I'd show her but it was never right. It had be blue only, no other colours and it had to have the same short of plaid, and the same sort of feel as that old shirt.

I stumbled on a really nice feeling yarn-dyed linen at Rathdowne fabrics and snapped it up. Without letting her know what I was up to I had her try on P's Ottobre black shirt but she decided it was too big, and the sleeves too long (well of course!). So I went ahead with the Oliver + S Button Down shirt in straight size 12. It's the shirt of her dreams, only it doesn't quite fit (grrr). The sleeves and armscye are a bit tight. I'll see how much room there is to let the seams out to the overlocked edges.


Meanwhile, I made her a pair of shorts that fit perfectly, and a gorgeous dress that we collaborated on and did multiple muslins to get just right. Hopefully I'll bribe her for some modelled photos soon.


Sunday, 27 June 2021

Birthday T-shirt - the stick stencil

 I couldn't let June go by without a t-shirt for the freshly teenaged kiddo. (oh my)

As always I asked what he wanted, what's the "thing" this year. No more Pokemon or fidget spinners.. this year he wanted a lacrosse stick on his birthday t-shirt. Not as easy as it sounds.


Obviously the stick part is easy, but the whole mesh basket bit definitely wasn't. I figured the only way to distinguish a women's from a men's lacrosse stick was the pocket, so I turned it to be side on. 


The stick, lettering (yes, I've outed his name, shhh) and head were all part of a freezer paper stencil. Then I just freehand painted the mesh.

On the back, a big number 7. His playing number.


Once I'd finished the painting (Setacolour opaque fabric paints) then it was a simple matter of sewing up the t-shirt. 

The pattern is Jalie Nico (Jalie 3669) is size Q with no alterations. The grey cotton lycra was out of the stash and came from RubyJam. It's a lovely quality, and I'd had other plans for it but c'est la vie. The sleeves were meant to be black, but amazingly I had no black cotton lycra left. A quick trip to Spotlight didn't yield any black but I phoned home and checked that the club colour of dark green would be even better.

I also zoomed out to buy a second bobbin casing for my new sewing machine (I really need to introduce it, it's amazing!). I'd had twin needle hemming down to a fine art with the old machine and needed to set it up nicely for this one. There is a factory bobbin holder (blue mark) that is looser tension so I bought that. It's not loose enough to use with woolly nylon and a twin needle so my hems are a bit tight. I'll take to it with the screw driver and tinker until I get the sweet up as sweet as it should be.


Meanwhile, unless the hems pop, he's a happy teenager and he's confused all the other kids in the team who suddenly thought personalised lacrosse t-shirts were an available thing. Nope!


Thursday, 4 March 2021

The Birthday Dress

My not-a-surprise birthday dress for A was to be as follows:

A dark grey T-shirt dress, with blue flutter sleeves and a Ravenclaw Hogwarts badge. She saw the fabrics (all stash) and designed the dress using the Oliver + S Building Block Dress Book, but I did paint the Ravenclaw badge in secret.

 
To make the dress I used the size 12 Building Block dress pattern. the only changes being that I sewed it in a bamboo jersey and omitted any opening.

I wrote a blogpost ages ago about doing just that on the Oliver + S blog. Here it is.


I probably overestimated how deep those sleeves needed to be, but they're statement flutter sleeves alright. The neckline and sleeves are finished with strips of knit binding.


Then the fun bit is painting the stencil.

I think I've created an animation of all the progress pictures. Let's see if I can add it here...


Saturday, 27 June 2020

Birthday t-shirt time

You might have noticed that I'm pretty fond of sewing t-shirts and if I can get the chance to cut a stencil and stick something on the front I'm even happier.

And it's June, which means it's the big kid's birthday t-shirt time.


This year he wanted a flying soccer ball. Actually, he wanted a flaming soccer ball but I kind of interpreted that  in my own way which was more monochromatic. And easier to reconcile with my stash of iron on vinyl. I chose iron-on vinyl over fabric paint as the ball had to be white

I really wanted it to be reflective silver, but he vetoed that :( 


After a bit of dabbling with my friend's Cricut machine last year, I was now going back to my roots and wielding a scalpel.

I downloaded an image, traced it in grey lead pencil, transferred the tracing to the vinyl by rubbing the back, went over the lines to make them clearer, then hand cut it. Once it was cut. it was just a matter of getting all the bits to line up as exactly as possible and then be ironed in place.


The t-shirt is the Oliver + S School Bus t-shirt. I'm pretty sure it's size 12 as per the recent pyjamas, but I've no idea where I put that tracing, and now I'm wondering if I pulled out the size 10 tracing instead. I need to blog faster or make better contemporaneous sewing notes!

What I do know is that I added about 3" to the length and a whopping 5" to the sleeves!


He knew I was going to make him this t-shirt for his birthday although he didn't know which fabric I was going to use. When I found this lovely, soft, cotton lycra in the stash I also found a 1m cut of fabric I'd bought at Spotlight with the intention of making a t-shirt for him.

So I made another.


Given how much length I need to add to a sleeve pattern to get long sleeves, I didn't have enough of this fabric. Which is a pity as it's nice and soft too, and would make a lovely winter t-shirt. I have added about 2" to the short sleeve cut line for this version.


I have been pleasantly surprised by some of Spotlight's printed cotton knits. The quality and designs have really improved over the last few years. Sadly, they're always fairly narrow fabrics compared to the more "usual" 150cm wide European knits.


I couldn't pass up skateboarding cacti in sunglasses!


Tuesday, 12 March 2019

T-shirt Time

Ages ago I borrowed a friend's Silhouette Cameo cutting machine and mindful that I need to give it back soon, I'd thought I'd give it another whirl.

I bought some A4 sized sheets of stretch iron-on vinyl from PicturePerfect and came up with some designs with the kids input.


P wanted something to do with mountain biking and came up with the phrase "This is how I roll".

I found a silhouette of some mtb moves and we were set. He chose the black T-shirt with yellow and white. I stuffed up a little part of the iron on yellow bike (the front hub of the third bike from the left if you're looking for the spot) and in trying to replace it, everything got ironed again and again. That resulted in the yellow vinyl becoming a bit more see through and less solid than it should have been.


He still absolutely loves it. I think it will be a favourite T-shirt for sure.

The phrase we all came up with for A, and everybody thought was perfect for her was this....


If you can't quite read all of it, try it this way: 


She had also wanted some more gym shorts. Suddenly all those many leotards I made are too small, or maybe just out of favour, I don't know. I was loathe to make more leotards in a bigger size just to have them passed over, so a quick pair of knit shorts it was. These are the Oliver + S Nature Walk pants in size 7 shortened. I had them already traced off as they're the shorts I used for P's swim trunks back here, or maybe here. I probably could have sized down a bit more, but she's happy.


I had quite a bit of trouble getting the settings on the Silhouette cutter right for the vinyl. Initially the machine went on the same crazy rampage that it did before Christmas when I first used it. It would jam, get stuck, then go off on a wild angle and slice the backing mat to pieces. Then, if I reduced the cutting depth or pressure it would barely mark the vinyl at all. Infuriating. At this point I was feeling like I could have laboriously hand cut the stencils faster...

The solution was some lithium grease on the cutting bar rail thingy, lots of sliding it back and forth and trying again. I finally hit on the right blade depth (5), cutting speed (4), force (31) and passes (2) to get a good, clean cut with only a slight mark on the mat. Annoyingly, I will need to purchase yet another mat before I give the machine back.

Once I finally had it sorted it seemed it would be easy to keep going, so both kids got a surprise T-shirt in addition to the one they had commissioned.


This sequence of cartwheeling required a bit of tidying up in Paint.net but then came up really well as a stencil. She was delighted!


And then, for P, I went with an idea that I first saw Brittney (Sewing For Four blog) do a good 4 years or so ago. A little riddle on a T-shirt...


Can you work it out?...


Well done you clever thing!*


All the T-shirts are the Jalie 3669 - Nico raglan T. I made them in the sizes I had traced off last year for the band members T-shirts. 

He wears Size O, no mods - seriously I have NOT added sleeve length. This is the kid that usually gets up to 5 inches of extra sleeve length. I think he could do with a touch more length than this pattern but it's obviously a very generous sleeve length if it fits the monkey child straight out of the packet.

She wears Jalie Nico size M, no mods. (and Nature Walk pants as shorts, size 7)

All fabrics were out of the stash and I just used self fabric for the neckbands. Not perfect for neckbands, but good enough.

It was a lot of fun and I kind of wish Flipper wanted a meme T-shirt too. What he does want is some more leg and arm warmers and to have reflective iron on vinyl monograms. Well, it just so happens I got some reflective iron on vinyl too. I better cut those letters before giving the machine back, or forgetting how to set it up for successful cutting.

*If you didn't get it, the clue is it's the title of a Dr Seuss book.


Thursday, 3 January 2019

Christmas sewing: T-shirts and Pyjamas

I was too busy to get the last of my 2018 sewing on the blog and ready to autopost while I was away on holiday. So let's consider this the last of the 2018 blog posts.

When I was buying the crazy bright (but dulled by bad laundry skills) leotard fabric at GJ's I spotted some amazing Kokka double gauze. It was perfect for my mum... But what to make? Why not pyjamas, and use that awesome Lisette (B6296) pattern I've had for ages.


I only insisted on this one photo of my mum wearing them, so mostly you're going to see me swanning about in them - and I tell you, it was hard to take them off and wrap them up to give them away. That fabric {drool}!


I wanted them to be a surprise so I guessed at the sizing. We have pretty much the same shoulder size and while I measured at the size 14, they were described as very loose, so I went with a straight size 12. On me, the pants are a slightly closer fit than I would choose over my peak butt and upper thigh, but I figured my mum has slimmer (weaker? ;) ) legs than me and a flatter bum so I'd be OK. Turns out her upper hips and low waist were a bit tight and both of us could have done with the size 14 pants for different reasons. After she tried them on I found a bit of extra room in the seam allowances and let them out using her sewing machine.


Of course I did consider keeping them for me and buying more fabric for another pair for my mum. But with narrow width, fairly pricey Kokka gauze that wasn't going to happen. For the record, I bought 4.5m and I think I only used just over 4m.

Just before the Christmas holiday I took a trip to Buttonmania to hunt down the perfect buttons. In my head I was imagining an inky, navy, mother of pearl flat button. For the first time, such a button was not to be found. I settled on some perfectly nice navy plastic buttons, then headed to Jimmy's Buttons to get elastic.

Lo and behold, I found my exact dream button and for only 60 cents each!


I thoroughly enjoyed the sewing of these and if I was a pyjama wearer myself I would make more in a flash.
 

The other thing I bought at Jimmy's was some velcro.... At my gym is a personal trainer who runs small group fitness classes as well as boxing classes. His boxing wraps have been getting a bit of wear and tear and the velcro was coming unstitched. While his own efforts to restitch the velcro by hand were admirable, they weren't up to a sewists standards!

So, during the Christmas break I took all his boxing wraps (20 strips of 4m long fabric with a thumb loop at one end and velcro at the other), and took them out to the country. I removed the old velcro then washed them:


Then I stitched new velcro on and repaired the thumb loops, or restitched the labels where required.


It was a nice way to hide form the heat and enjoy a bit of peace and quiet in the cool of the dining room (made much brighter for the sake of these photos)


It wouldn't be Christmas without a stencilled T-shirt for my nephew...

I caught up with my brother on the phone and asked him what this year's "thing" was. Turns out, my eight year old nephew is the drummer in a band called The Flying Penguins and is very involved in that. Perfect idea! Only... the one other band member is his next door neighbour Isaac, and it would be a bit weird if only half the band had a T-shirt. That's alright, I can make two!


Normally these freezer paper stencil designs are very much one-offs as the hand cutting of each stencil is really laborious, and the stencil gets ruined when it's removed from the fabric.

This year I had borrowed a Silhouette Cameo cutting machine from a friend. I hadn't yet returned it so I thought I'd "cheat" and cut my stencils with that. That made it much easier to do the lettering and to do a repeat and make a second. It's still super fiddly to iron the tiny pieces of freezer paper back in the right places, but at least the cutting was fast.


Each kid had their name stencilled on the back. I've never met Isaac, but he's the keyboardist in The Flying Penguins, and I hope he likes his T-shirt.

I used the Jalie 3669 Nico raglan T-shirt pattern and chose their sizes based on their age (and the fact that it would be correct for my two and I could then re-use the tracings!). All of the fabric, the matching ribbing, the cute KATM "this is the back" labels, and the fabric paints were already in my stash!


My nephew has hardly taken his one off since Christmas morning and I think he's pretty excited about returning home and gifting the other one to his friend.

The other person who seemed pretty happy with their T-shirt was A's grade 2 teacher. When I asked A what he liked the answer was "the colour blue and Star Wars". How about a stencilled T-shirt I said. Great, she said.


Again, the fabric was in the stash, and amazingly, so was some perfectly matching ribbing in the pile of things I retrieved from TopbikePhysio's mum (the gift that keeps giving).

I found the Han Solo stencil on the internet, cut it with the Silhouette Cameo and then A did the painting. We added one of KATM's "I Made It" labels just in case there was any doubt! I guessed at the size, sewing the larger of the two sizes marked as M on the Jalie pattern. It looked huge and fit Flipper quite well (yay for having another traced pattern ready for the family!) and he would usually describe himself as a T-shirt size L.


Finally, I helped P make a gift for his teacher. He had recently discovered some basic origami patterns and then I taught him an Iris flower pattern that I'd learned years ago. He became super keen on making them and I wondered if enough of them, sewn together, might not make a nice Christmas ornament.

I bought him some metallic paper in green, red, gold and silver and he got started.... He calculated he'd need to make about 26 flowers (with some clever circle volume maths), but then I complicated things by suggesting we stitch them through a styrofoam ball to give it more structure.


That worked beautifully, but he ended up making almost 60 flowers in order to cover the ball! his teacher was super impressed, but mostly he impressed himself, and that's what good gift crafting is all about in my opinion!


I hope you all had a lovely Christmas and happy start to the new year. I need to make my picture collages of everything made in 2018 next...