Showing posts with label School Bus. Show all posts

Sunday, 20 December 2020

Speedy Christmas Pyjamas

 I couldn't resist these cute Christmas knit prints that were on sale at RubyJam recently


1m of each is enough for a short sleeved T-shirt (Oliver + S School bus tee) and a pair of pull on shorts (Oliver + S playtime leggings) - and should somebody have a Christmas season baby there's probably enough leftover for a novelty romper!


The ribbings were whatever colour there was enough of in the fabric stash. By putting ribbed cuffs everywhere instead of hems, they're super quick to sew. Not even sew to be honest - bang out on the overlocker is a more fitting description.

Both kids got size 12 (cause it was traced off and ready to go) for top and bottoms with just adjustments for their preferred leg/sleeve length.

Quick and cute and Christmas ready.


Saturday, 27 June 2020

Birthday t-shirt time

You might have noticed that I'm pretty fond of sewing t-shirts and if I can get the chance to cut a stencil and stick something on the front I'm even happier.

And it's June, which means it's the big kid's birthday t-shirt time.


This year he wanted a flying soccer ball. Actually, he wanted a flaming soccer ball but I kind of interpreted that  in my own way which was more monochromatic. And easier to reconcile with my stash of iron on vinyl. I chose iron-on vinyl over fabric paint as the ball had to be white

I really wanted it to be reflective silver, but he vetoed that :( 


After a bit of dabbling with my friend's Cricut machine last year, I was now going back to my roots and wielding a scalpel.

I downloaded an image, traced it in grey lead pencil, transferred the tracing to the vinyl by rubbing the back, went over the lines to make them clearer, then hand cut it. Once it was cut. it was just a matter of getting all the bits to line up as exactly as possible and then be ironed in place.


The t-shirt is the Oliver + S School Bus t-shirt. I'm pretty sure it's size 12 as per the recent pyjamas, but I've no idea where I put that tracing, and now I'm wondering if I pulled out the size 10 tracing instead. I need to blog faster or make better contemporaneous sewing notes!

What I do know is that I added about 3" to the length and a whopping 5" to the sleeves!


He knew I was going to make him this t-shirt for his birthday although he didn't know which fabric I was going to use. When I found this lovely, soft, cotton lycra in the stash I also found a 1m cut of fabric I'd bought at Spotlight with the intention of making a t-shirt for him.

So I made another.


Given how much length I need to add to a sleeve pattern to get long sleeves, I didn't have enough of this fabric. Which is a pity as it's nice and soft too, and would make a lovely winter t-shirt. I have added about 2" to the short sleeve cut line for this version.


I have been pleasantly surprised by some of Spotlight's printed cotton knits. The quality and designs have really improved over the last few years. Sadly, they're always fairly narrow fabrics compared to the more "usual" 150cm wide European knits.


I couldn't pass up skateboarding cacti in sunglasses!


Tuesday, 28 April 2020

Pyjama time: episode one

Between sewing these pyjamas and getting around to blogging about them (and fixing all those broken image links on my blog - grrr Blogger), I've already made some others. But that will be episode 2.


My kids both love knit pyjamas and P is still wearing some very short and tight merino knit thermals that I made years ago... It was time for more.

I bought these fabrics from Nerida Hansen when they had a sale on some seconds quality cotton knits.


I only bought a metre of each fabric as I hadn't had a plan for them at that stage. Then the kids started loudly demanding winter pyjamas and so that became the plan.

The quality is really lovely. With these two prints I can't work out what it was that made them seconds, however the one other print I bought has a very slight dye run mark that repeats. It's barely noticeable.


The pterodactyls are awesome. It's hard to find good non floral prints for boys that aren't diggers and toy trucks and too childish. Pterodactyls wearing sunglasses and singlets makes a really cool design!

Hers is a May Gibbs design and is lovely with little flowering gumnuts amongst the native Australian floral background.

Both kids are actually wearing the same pattern sin the same size with just alterations in length:
It's the Oliver + S School Bus T for the top in size 12 for both of them, with about 15cm added to the sleeve length for monkey-boy (and then the cuffs as well. Yep, seriously!)

The leggings are the Oliver + S Playtime leggings also in size. The length was cut to make use of the remaining fabric (no scraps left behind) but then A insisted hers should be shorter, like gym shorts.

The ribbing I had in the stash and I wrote a blog post ages ago showing how to turn these two patterns into pyjamas using cuffs. You can find it here.


Quick and easy to sew and in soft, good quality cotton knit they're a delight. Only 1 metre each and they're very affordable too.

The kids were trying to recreate an old photo that I still have as the screensaver on my phone. Let me find it....(November 2016 - and yes they still wear those pyjamas in summer. Honestly, they're the best value things to make for kids!)


Details:
Size: 12, both kids - with sleeve and pant length modifications;
Cuff modifications to make them more pyjama-y
fabrics: Nerida Hansen knit

Monday, 30 December 2019

end of year gymnastics...

It would be nice to have all of the 2019 makes on the blog before the end of the year.

But I can see that won't happen as there's a good few that aren't even photographed yet.


And if I'm honest, I can barely remember some of the details of things I've made.

The end of term gymnastics show involved a routine set to the Pink Panther theme song, and required a pink top and white bottoms.


Of course she had neither of those things, and amazingly my fabric stash had neither of the fabrics I wanted. I'm sure there's some thick, white, stretch poly-something left over from the Evel Knievel suit but it was not to be found. So I shopped cheaply.

The t-shirt style was dictated to me (you know how it goes) and so I used the School Bus t-shirt as the block. I've added a ruffle to the sleeves and scooped out the back neck, finishing the neckline with binding rather than a neckband and adding the cross straps. The angle/position of those is not quite as it should be but did I care enough? No sir.


The shorts are the Nature Walk shorts, already traced off as swim trunks and super quick to sew.

I'm writing this on my phone (first time, so I'll be very curious to see the formatting) out at my mother's house. She's just had me sew some basic cushion covers....

I need to pin her down to photograph her Christmas gift jacket. It's much more interesting...

Tuesday, 2 October 2018

Simple elastic waist skirt tutorial

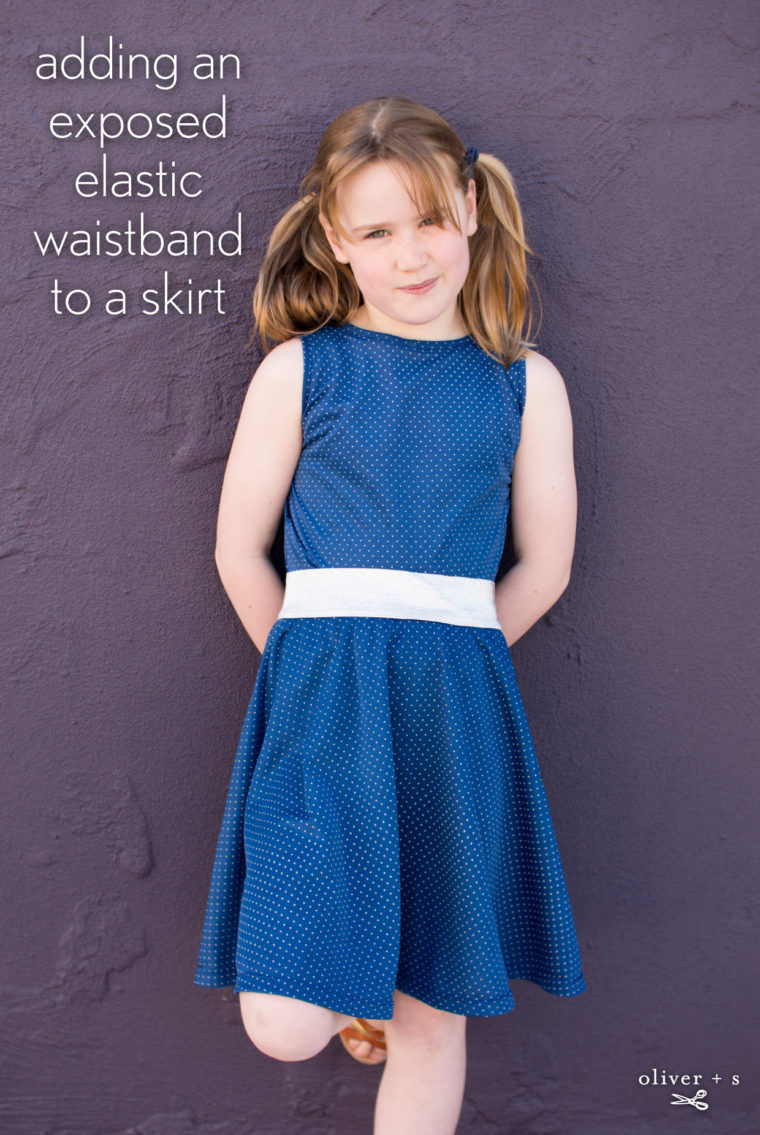
Hello, I've got a lovely, quick, easy tutorial over on the Oliver + S blog.

Click on the picture link below to check out how simple it is to sew a nice, twirly, neatly finished skirt with an exposed elastic waistband


Here we'll keep it real and talk about what didn't work so well, right?

I ordered a few 1 yard cuts of fun, wide elastics from Strap Crafts, a Hong Kong based store with a huge range of interesting wide elastics and very reasonable shipping to Aus.

Rummaging around in the fabric stash for what would work well with this 2" wide, glittery silver elastic I found some of Topbike Physio's mum's stash fabrics that was perfect. A lightweight, breezy, summery synthetic knit in blue with tiny silvery white dots.


There was just enough to cut this part circle skirt using the Building Block Dress Book pattern (the size 6 width, 7 length already traced off) and a little singlet based on the size 8 School Bus T-shirt.

To turn the t-shirt into a singlet I reduced the shoulder width back to the point where the notch is marked on the pattern. I raised the underarm by about 1/2" - which it turns out I shouldn't have done. then I sewed a band just like the neckband to finish the edge.

The armpits are a bit high but she's hasn't complained and has worn it a few times already. For next time, I'd leave the armscye depth alone, but shave a bit more width out in the upper chest. It's not helped in these photos by her accidentally wearing the top back to front. That doesn't change the arm line but the front neck, which I lowered by 3/4" would look better at the front.

But here it is at the back, and a demonstration of the lovely twirl of the part circle skirt.


This outfit has proved to be a real winner and since it was so easy to make I can see a few more two piece spectaculars using exposed elastic and stash fabric being made this summer.


Bring on the warm weather!

Wednesday, 19 September 2018

Ears, beaks, tops and leggings

A quick round up of a few little projects that otherwise wouldn't make it to the blog.

Book week was last month and the kids both agreed to go as the two main characters from the book we were currently reading together: The Wonderling by Mira Bartok


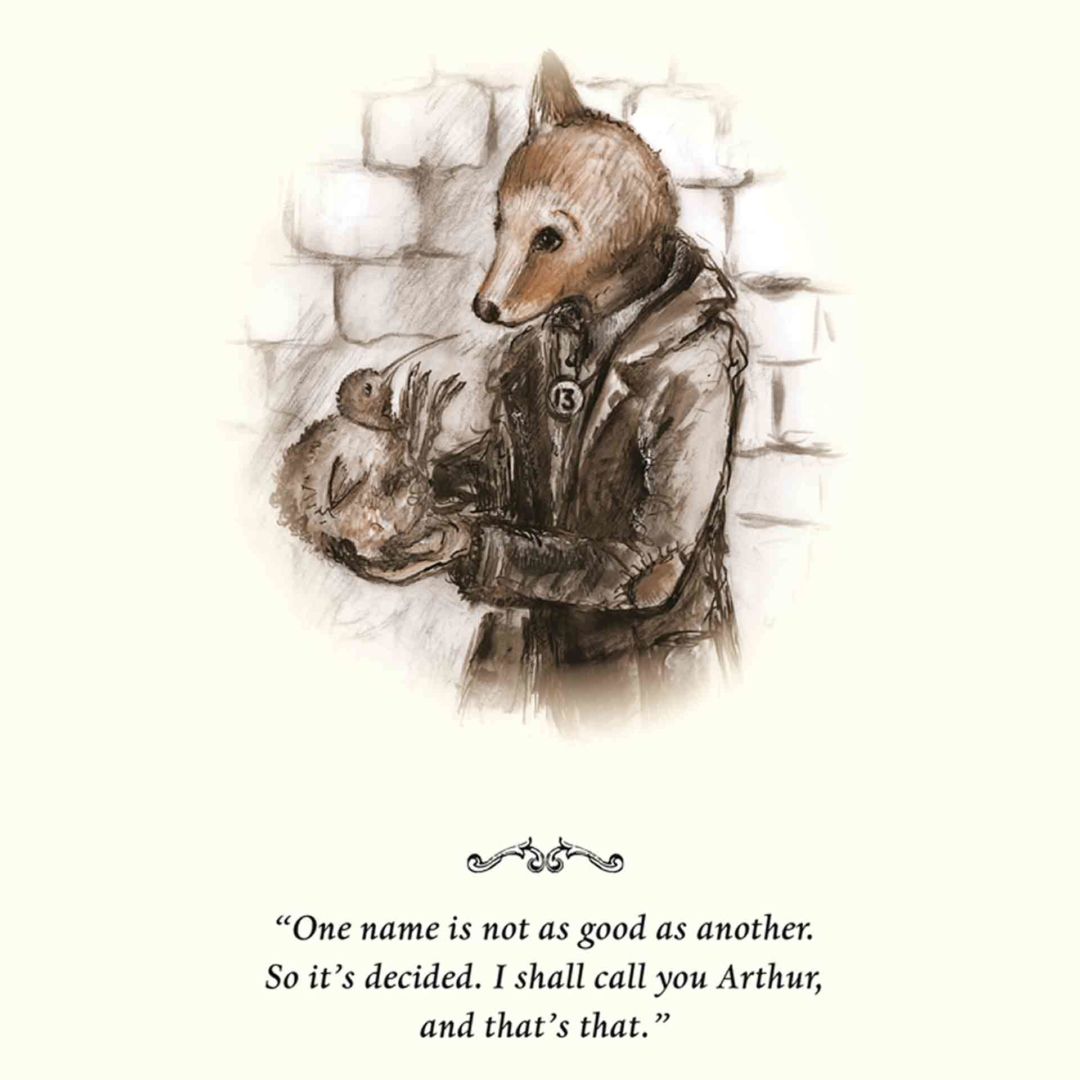
The book follows the adventures of a couple of  orphan "groundlings" which are part human part animal creatures. Arthur is a fox groundling with one very large ear and the superpower of amazing hearing. Trinket is his little bird friend who is an inventing genius and does amazing things with her beak. - "It's all in the beak, Arthur, all in the beak"


I won't go into a book review except to say that it was a thoroughly enjoyable read and the kids got very involved in the story. I've seen the book described as Dickensian, but I felt that one section was so derivative that I am prompted to read the kids Oliver Twist and see where they think the line sits...

Anyway to costumes: P was Arthur, a formerly un-named orphan known only by his Number 13 tag around his neck. We made that from some metal cut from an aluminium can (Flipper obligingly drank a Coke to help out the kids in their crafting) and then all he needed was one big ear.


The stash bucket yielded some foxy coloured fleece knits and a headband to cover. His favourite hoodie is looking suitably old, faded and torn now. Teemed with a foxy coloured Parachute Polo and some Field Trip cargo pants and he was sorted.

As a bird, Trinket struck me as very Kiwi like. I had a bit of my bird plumage brown knit fabric left from when I dressed as a scrub hen for the theatre (if you're new to the blog that sentence might surprise you, but that's how we roll).

Just enough for a long sleeved Tee and some leggings. The body of the T-shirt is pieced in a few spots but the pattern is so busy you'd never notice.


Forgive me a little boasting but I am quite proud of that beak! :) It's a styrofoam cucumber that came from the local, weird $2 asian shop that sells all sorts of stuff you never knew you needed. Among the kitchen utensils and placemats were these fake vegetables on strings. A raffia string with five long, green cucumbers attached was just what I needed. A bit of brown paint, a single cone from an egg carton and some elastic and we had a very kiwi-esque beak. The funny, frizzy hair extensions on bobby pins also came from that shop and make perfect fluffy bird bits on head and tail.

The only downside is A has decided the other four cucumbers on their string are "lovely" and insists on hanging them in her bedroom. Sigh.

Pattern wise the top is the Oliver + S School Bus T-shirt, size 8, with the neckband made into a higher skivvy neck with a slight cowl twist. The leggings are from a Japanese pattern book and I'd previously made another pair so the pattern tracing was already out.


They're size 130cm which is her height and measurements but they're really long. For the bird ones I just left them long, as I'm sure kiwis have slightly wrinkly ankles, right?

But for these blue ones I'd thought it would be fun to try and gather them and use some of this vertical bow ribbon that I've had in the stash for ages.


This leggings pattern was tried to see if it solved some of the crotch fit issues of the jeggings I'd made based on the Oliver + S Playtime leggings. It doesn't really, so I'm thinking the Jalie Eleonore pull-on jeans might be the pattern for stretch jeans/jeggings. Of course that's one I don't (yet) own. But that's also how I roll.... right?

Tuesday, 21 August 2018

Ballet Wrap Top with Oliver + S

This was a fun idea that came out of the Oliver + S Facebook group and a request for a tutorial to create a wrap tie cardigan.


I had a good long think about this one as I knew I wanted the bottom band and the ties to be continuous and cleanly finished. It worked really nicely in the end and the full photographed tutorial is up on the Oliver + S blog now.

Click on the image below to go to the tutorial:


The first version I made was with a remnant of some of the "maille merveilleuse" I bought from Mamzelle Fourmi a few years ago. It is lovely, thick, squishy cotton knit.

I cannot, for the life of me work out how the bottom band and the ties all seem to be one piece. The fabric is simply not wide enough to allow that, yet it certainly seems to be the case. Some bit of cutting magic that with the passing of time since I made it, I absolutely can not explain. Shrug.

Edit: In adding the Mamzelle Fourmi link above I noticed the fabric is a "tissu en tres grand largeur" measuring a whopping 185cm wide. 


I gave A the choice of whether it should tie at the side or the back and she chose the side, telling me that it would be uncomfortable in the car or sitting in a chair if the bow was at the back. Fair enough.

Yet since I've made it, she seems to want to wrap it crazy tight around her so that it's almost like a strait-jacket and then ties it at the back anyway. That's irritated me and we've ended up bickering about how it should be worn, hence it's not getting worn all that much. Silly me.

The second one that I made for the Oliver + S tutorial used the final colourway of the retro double sided knit that I found at Fabric Deluxe. (previous makes with this fabric are here, here and here)


I haven't any modelled photos of this one yet, but they'll come I'm sure as winter seems to be sticking around for a while longer.

Both tops were based on the size 8 School Bus T-shirt. The first version has sleeve cuffs added as the fabric length was insufficient for the required sleeve length.


It was a fun exercise to nut out the tutorial. They're great tops and I know, once I start ignoring how she wears them, they'll get plenty of use. If you're curious about turning a T-shirt into a wrap cardigan, check out the tutorial.

Wednesday, 20 June 2018

Double Knit Double Dipped

Let's not ask who wore it best, OK?

When it comes to modelling sewn garments for the blog, the champion in our house is this kid. He schools the rest of us every. single. time.


It's the same wonderful and weird, double sided poly knit from Fabric Deluxe.

The pattern is my go to T-short pattern for the kids: The Oliver + S School Bus T-shirt


I went with the size 10 again and added the usual 15cm of sleeve length. Yes, you read that right, 15cm! I'm perfectly prepared to concede my kids are monkey-like in their arm length, but I'm sure this pattern must also have shortish sleeves. Don't tell me I'm the only one who adds length to the sleeves on this one?...


For a bit of fun I sewed the neckband using the reverse orange side of the double knit. The pattern has a standard round crew neck, but my tutorial for sewing a V neck is right here. It's super easy and looks great. Also, kinda handy when the fabric has less stretch than a regular t-shirt fabric and you want to make your neck-hole a bit more generous.

Not much more to say about a t-shirt, but he can model it with his skateboard....


And only gets caught out looking silly when I say he has a spot on his face....


I'm sewing the other colour of this fabric now, and it's looking great. Come on over to the inner west and get some. The coffee is awesome over here too.

Monday, 2 April 2018

Made, Worn, Torn, Mended, Blogged....

Not my preferred sequence of events when it comes to getting clothes documented and on the blog, but hey, when kids wear what you make, you take the good with the bad.


No sooner had I made this little T-shirt than she was putting it on and heading off for the day with her granny.

I'm sure I've said it before but she is a cartwheel fiend and is upside down as least as often as she is right way up. Well, she turned a cartwheel onto a stick and tore the t-shirt, coming home with a gash along her tummy and a hole in her clothes.


I found a cute little scrap of knit fabric that colour matched well and made a patch:


To look more like a design feature and less like it's covering a hole I probably should have added some extra little hearts but I couldn't be bothered. It's fixed.

The pattern is the Oliver + S School Bus T-Shirt with my own V neck modification. It works really well and I can't believe it's been a few years since I last did it. Here's the link to the tutorial if your curious: https://oliverands.com/community/blog/2015/06/v-neck-metro-t-shirt-tutorial.html


I made the size 6 width with 7 length, adding another 3cm to the sleeves - they still look a bit short to me. Sigh.

And it turned out I did something weird with the body length as my back panel ended up longer than my front panel. Not to worry, I just made some side splits and kept the uneven hem length. I asked her to show me the side splits for a photo....


Not quite what I meant kiddo


That's better, thanks.

This fabric has been hanging out in the stash for a very long time and is the last of what I used for the very first knit sewing I ever did, way back in 2012

We're off to the beach next week and if you follow me on Instagram you'd know there's a whole new batch of swimwear to photograph. If you're not on Instagram (and fair enough) then you would have missed what we got up to this Easter weekend....

We entered my dad's car in the country town Easter parade again. This year as a chicken


...and here was last year's entry as a rabbit


He wants to sell it, but I have at least two more ideas for Easter parade car costumes so here's hoping that doesn't work out! :)

Hope you all had a lovely Easter. See you after the holidays!

Monday, 25 December 2017

Christmas gift making

Hello!

Did you have a lovely Christmas day? I'm going to guess that I did, but I'm writing and scheduling this post in advance as I'm going to be out of town. Lets' imagine I ate and drank too much and we're probably not far wrong.

But now that the unwrapping is done I can share all the Christmas gifts that I/we made.

First up: the wonders of Kraft-Tex washable paper fabric...


I cut out this little box pattern and then drew in, using a mechanical pencil, the areas that would be each side (minus the fold down at the top) and the bottom, then A painted it. Even with my obvious THIS WAY UP arrows she still got muddled and did some upside down painting, but she took it all in her stride and turned her upside down flower into a flower on a vine. On the bottom she wrote a dedication to her teacher and signed it. Good job kid.

When the fabric paint was dry I ironed it to set the paint then stitched the box together, wet it and then rolled the top down with it damp. We filled it with dark Lindt chocolate balls and wrapped it in cellophane. Only hiccup was the grey lead pencil doesn't wash off the white Kraft-Tex as well as I'd imagined it would.

P used some black Kraft-Tex paper to sew a little wallet for his teacher


He has a "very cool" teacher who plays guitar and I've now learned is a vegan, so the choice of washable paper for his wallet was perfect. The pattern is one of the Wallet Set from Thread Theory which I'd bought with gifts and this washable paper fabric in mind. The little front pocket is perfect for a single key, or your guitar pick. If you're that cool....


P read the instructions, glued the PDF together, cut out the pattern and then did the first line of topstitching before freaking out and asking me to do the rest of the stitching. Fair enough, as the little Janome had to fairly hammer to get through three layers of this stuff. I used a leather needle and upholstery thread.

The last Kraft-Tex project was a commission for my mum's newly renovated bathroom. She gave me the dimensions for a bucket bag to hold some cosmetics and requested a black/dark grey colour scheme.


This one has had a bit more scrunching after washing and you can see how nicely the paper behaves. When it's wet it really feels like the chamois your dad used to use to wash the car.  I'd previously given my mum a couple of the Uashmama branded bags and she uses them in the kitchen, one as a breadbag for the table, and the other to collect produce in from the garden. they have aged really nicely.

I found that Kraftcolour, here in Aus, stocks all of the colours in 1.37metre rolls at quite reasonable prices. I bought one roll of every colour for about as much as one extra large commercial bag would cost. Expect a lot more Kraft-Tex paper projects to come! ;)


I thought my choice of lining fabric was terribly clever until I realised that the print on that quilting cotton would be sideways or upside down on three out of the four sides of the bag. Ah well.


Here's a little Ida clutch (free pattern from Kylie and the Machine) that I made for the daughter of one of my friends I do french conversation class with. She had gifted me a fat 8th of fabric from their trip to japan earlier last year. I've turned it into a little clutch purse to gift back!


I've never let a Christmas go by without making something for my nephew. We don't see him often enough to have any idea what his "latest thing" is, but my kids were pretty sure he'd still be a big fan of Nexo Knight LEGO.

OK, time for a stencilled T-shirt, right?!


The T-shirt is a straight size 8 Oliver + S School Bus T-shirt. I used some Lisette knit for the sleeves and back, a perfectly matched Ottobre ribbing for the neckband and a nice white cotton/lycra for the front. All from the stash.

I cut a freezer paper stencil to get the main shape and details of the character


And then most of the shading and painting was done by hand once the base stencil was dry. I've used Setacolour opaque paints and just mixed them to get the shades of grey I wanted. I love doing these!


The last sewn project was another All Day Shirt for my husband. This one will certainly get a blog post all of it's own but here's the sneak peek:


The fabric is some crazy vibrant Vlisco Wax Print from Brave Fabrics. I bought it quite a while ago and I was careful to consult the bloke as I wasn't sure he'd go for it. He has a bit of a tradition of wearing a Hawaiian style shirt for Christmas lunch and I thought it would be fun to make him one. I struggled to find the exact print I wanted (not classic hibiscus, not too floral but not like a quilting cotton surfboard print either...). When I saw this fabric and when I showed it to him and said the magic words: Tron Legacy, he was 100% on board!

Can you spot the pocket?!

Let's hope he doesn't change his mind when he sees it!

After the sewing came the knotting....

My daughter has been wanting a dreamcatcher for a long time. I think they're mostly pretty hideous, but I wondered if I couldn't make a "tasteful dreamcatcher" (oxymoron) with macrame cord. the pattern came from Fanny Zedenius' book "Macrame" . I happened to have just the right amount of 3mm natural colour cotton cord in my stash and only needed to buy the plastic ring for a couple of dollars.

 
The ring is 30cm across, so it's quiet a sizeable wallhanging. I think it's not bad as far as dreamcatcher's go, but the husband's first comment was "isn't it meant to have feathers and stuff?" so I'm not sure the kid will think it's authentic enough after all.

My final bit of rope craft, and the gift I put off making for fear I had been overly ambitious, was this:


With much cheering on from my lovely Instagram followers, I made a rope mat for my brother in law's new boat. I bought 100 metres of 10mm navy, marine nylon rope that was on sale and when it arrived it looked like a massively overgrown sewing reel! This project required me to cut 40m but I probably only ended up using just over half of that once it was all tightened up.

With all the leftovers I'm thinking I can kit his whole boat out in co-ordinating navy rope things!

The instructions came from my Des Pawson Book of Knot Craft & Rope Mats and I loved the quote for this project: "giving a modest yacht a touch of class" Perfect!


For a first go it's not bad although I can see that with practice in working it not too tight, not too loose, I will have plenty of room to improve.


The pattern suggested that in 10mm rope it should be 60cm across, but mine has only ended up 40cm in diameter. Not sure how that worked, but let's hope his yacht is more "modest" than some.

here it is with feet to give a sense of scale


And the back view shows my first ever go at a side splice finish. You can see the splicing at about the two'o'clock position. It worked quite neatly I think.


So that was all my Christmas crafting, but I'll leave you with some little reindeer biscuits that the kids and I made last week. The inspiration came via Deb and the LMLD food blog.


Not all of our reindeer muzzle biscuits worked out and the first batch were a bit more like mini scones. So we made some random woodland creatures to go along with our reindeer.


Thanks for sticking it out if you've made it all the way to the end!
Wishing everyone a safe and happy festive season. Hopefully I'll be back with one last post before the New Year and that one will include a giveaway. Stay tuned!