Thursday, 15 November 2018

Frocktails 2018 - Butterick 5882: Sort of

Frocktails! The one time of the year when I ignore the kids and their demands for new stuff, food, shelter etc... When I ignore almost every other aspect of my life and sew something just for the heck of it.

My annual excursion into sewing what Closet Case Patterns and True Bias are calling Sew Frosting - the trivial, frivolous, fabulous icing on the cake kind of sewing. For me this dress is 100% frosting - and true to the cake analogy I was only happy to dabble with it once I knew I had my solid back up cake outfit seen here


I had a vision in my head of using a wax print to make a vintage rockabilly style dress. I live in an area that has seen a large wave of Sudanese migration and wax print is often seen on the streets - usually worn by gorgeous, tall, leggy, dark skinned Sudanese women. There's no way I could wear it in the traditional manner without it looking like cultural appropriation at best, or just plain awful at worst.

I needed to find a middle aged white lady way to wear my wax print :)

Enter Gertie's patterns for Butterick... B5882


The words that I fell hard for were "shelf bra". Could this finally be the pattern that gave me cleavage? In my imagination that bias band that became the shoulder straps would go under my boobs and lift them sky high....

Before we dive in to the story of woe that is B5882, let's have another peek at what I'm calling my final success. It's not a trick of light, there is almost cleavage, folks!


Are you already cleverer than I? Have you looked at the sketch on the right of the pattern envelope and realised that there is no lift in this pattern? It took me a muslin to work that out...


My first muslin: Size 12, almost exactly as per the pattern (I'd already added 1" length at the waist here). Great fitting bodice but what is with that bust seam line? The "shelf" bit hits right on the apex of my boobs. I thought that must be a fitting error, but when I went back to the pattern there was the nipple target thingy (you know the circle plus thing that indicates bust apex) right on the seam. Wha???


So half my boobs are submerged below the seam line and the euphemistically labelled "cups" are actually like little pleated lids on top. I don't want tit lids. I want cups damn you.

What if I hoick it right down at the front?...


Getting there but I now have dangerously little coverage and those tit lids are so flat that they don't curve with the fullness (yes that's tongue in cheek) of my bust.

And of course hoicking down the front does no favours to how the bodice fits. Check out the amount of front drop as evidenced by the wonky waistline


So, I thought I can work with this,...
I just need to give it the ol' Melbourne treatment and lower it, mate


So I scooped probably two inches out of the front pattern pieces just by taking a texta and drawing a line under my bust where I thought the seam should hit.

Maybe I was flattering myself, but Liz was my inspiration and I hoped it could work


There's lots of reviews of this pattern where others have either not minded or not noticed the semi-submerged boob issue. A few good souls have called it out for the weirdness that it is. I pored over lots of pattern reviews, including Gertie's own version and found that there was also a lot of discrepancy in how the band was intended to be worn.

I let Liz lead the way and had it turned up all the way around, which of course, if it's supporting your bust as a true shelf bra, is how it would have to be.


Muslin number 2. Lowered, but then I had to figure our how to create real cups. I've never made a bra before but I searched for some online images of bra patterns to get an indication of what shaped pieces constituted a bra cup. This Cloth Habit post was really helpful.

I fashioned a cup similar to those in the link above, then draped my fabric onto a padded, strapless bra and pinned it in place to get the pleated outer cups.

I narrowed the straps from the original pattern and then cut only the section that was to go under and around the bust on the bias. You can just see the join where the bias cut bust part meets the straight-grain cut shoulder strap. The pattern has you cut the whole thing on the bias and other pattern reviews had already pointed out that that leads to the straps stretching out.


Here you can see my self drafted cups and the weirdly shaped, self drafted pleated cup piece underneath.

By now I was completely ignoring the pattern, so I invented my own way of giving the whole thing enough support. I handsewed horsehair braid onto the seam allowances of the bust seams, then stitched Rigolene boning to the front seams, and constructed a little harbour bridge of support. There is also a bent, formed piece of Rigolene sewn into the seam allowance under the bust where the bodice and the cups are joined.


It turns out you really can just make this shit up and it works. I never would have imagined!


Then I had a crisis of confidence about the skirt. I loved the way the wax print looked without any seam lines. The way it shone a little and swished as it moved. It has a really nice, crisp hand that makes it just perfect for a cocktail dress, or a seventies maxi dress....

I had been super careful to cut my bodice so that the front seams, centre back seam, and side back seams were all pretty much invisible as far as pattern matching went.


The idea of chopping the skirt into six bias cut sections and throwing pattern matching to the wind filled me with horror. But you know I did, so let's see that six panelled skirt twirl!


I went backwards and forwards on the skirt. I traced off no less than three different seventies patterns for their maxi skirt, before finally going to back to Gertie..

... and discovering it didn't fit on my fabric!

I had heaps of this fabric, but the print has such distinct bands of stripes that it would never have worked to cut panels up side down, or at staggered heights on the fabric. Every panel had to be cut with the centre bottom at the same height on the fabric. And suddenly my "heaps" was not enough.

That little hiccup at least hardened my resolve to make the Gertie skirt be the one I used (stubbornness being my middle name) and I shaved 3/4" of the bottom width of each skirt panel, tapering out to nothing by about two thirds of the way up the side of the panel.


I swapped out the lapped zipper for an invisible zip and lined the whole thing in a lovely bright grass green acetate lining.

Here's the only view of the back which my poor posture in the picture makes it look like I'm busting out of the seams - I didn't feel I was...


Now, I had my wax print rockabilly cocktail dress and I was ready for Frocktails. I couldn't work out what to do with my hair that would be quick and easy and so I made a little version of our Frocktails logo as a hair ornament


A friend had lent me her Silhouette Cameo stencil cutter - my gosh they're fun. I cut the Frocktails cocktail lady logo in two pieces of Kraft-Tex washable paper and then glued them together with a bit of my green lining fabric in between.


My hand bag for the night - which I can't tell you anything more about yet, was also brown Kraft-Tex. I'm really excited to share this with you, but it has to remain secret a bit longer (eeep!)


My co-organiser of Frocktails, Lisa, blew me out of the water with her dress - completely designed by her, from the fabric design and printing to the pattern drafting - all to match her crazy good Karl Lagerfeld shoes. How's that for Sew Frosting!


We sucked at synchronised twirling! :)


But I think we threw a pretty good cocktail party.

And now that I've finished ranting about the sucky pattern I'll close out with more pictures from Melbourne Frocktails 2018!

Prize Giveaways
 
First guest to turn up has to pose with the organisers. Thanks Lexie!


Finally meeting Sew This Pattern Annie - and look she's wearing green
Hang on, everyone is wearing green! :)
Lisa got a Silhouette Cameo cut logo hair thingy too!

Giving more stuff away thanks to our sponsors
And then I came home, completely smashed, washed my face and went to bed.

Details:
Pattern: Mostly B5882 but with the whole upper front completely redrafted. Proceed with caution.
Size: 12
Fabric: Vlisco wax print (from the stash via Brave Fabrics online shop - now closed) and acetate lining from Fabric Deluxe
Notions: invisible zip and Kraft-Tex hair accessory and bag.
Katie helped me with a 10 minute hair do and my face is entirely thanks to the MAC cosmetics counter at David Jones because I absolutely know my limits!

Tuesday, 13 November 2018

Hollywood Trousers and a Guy Laroche V1339 tank

This is my not-my-Frocktails-2018* outfit, but only because I got my other plan to work, sort of. But that's for another post. This is the outfit that I didn't wear last Saturday night, but will probably wear to every other evening function for the next decade...

*what on earth is Frocktails? check it out here.


I was delighted to be able to pattern test for Liesl & Co when Liesl had a couple of new patterns in the works. All three are now released. Check them out here.


I made the Hollywood Trousers and the Neighbourhood Sweatshirt, which I'll share another day. The trousers straight out of the packet were the best fitting pants ever. I made my pattern test version in a super cheap $2/m mystery fibre fabric from Eliza's. I was immediately dreaming of a fancy version in something nicer.

Here are my test pants photographed to demonstrate fit as part of the pattern test.


So, not the best fabric, but they've already proved to be really useful, easy wearing, casual trousers. An overexposed photo of the back view posted on Instagram created a bit more excitement :)


Knowing that the fit was perfect for me I dived straight back in and went for round two. I didn't even wait for my final version of the pattern to arrive but worked off the pattern test version. Afterall, the design and drafting were faultless - I approach the pattern test like it's a pop quiz and the challenge is to spot every errant apostrophe or missing comma. (I won't launch into a diatribe about pattern testing and the whole promotional blog tour malarky that so many indie companies build their businesses on. Suffice to say it's hard work. I treat it like a job and so do Liesl & Co. Two thumbs up)


I had just enough of a wonderful navy crepe that I'm going to assume is wool. I scored it from the back rooms of Buttonmania when the shop was being sold and moving out of the city. It was in the same corner as the 60 year old tulle used here, so I'm not only calling it wool crepe, but almost-certainly-vintage wool crepe.

This time I lined the pants - the instructions are there for lining, and they feel super lush. The hems are finished with a little navy satin bias binding and only the fly shield and pocket stays are a pale blue cotton.


The instructions for the zipper and fly are superb and really, I was surprised at how quickly they come together. I guess I'm used to pants involving lots of topstitching and belt loops and extra bits.

I pondered putting welt pockets on the back but I'm glad I didn't. I think the great, smooth expanse of butt is better without pockets! Feel free to disagree.


The only place that's not quite perfectly smooth is where the front pockets bottom edge sits. It happens to land right on the top of my quads where my legs are quite big. I wouldn't say the pants need more room there, but in a thinner fabric I would definitely omit the pockets to prevent them showing through any more.

In fact, I'm already dreaming of a version without pockets, moving the front fly to an invisible side zip and adding a big waist sash tie. Similar to a pair of ready to wear pants that I have. If you see any wool crepe on sale anywhere give me a heads up!


Of course, not everyone has the same shape body so I fully appreciate the sheer luck I'm experiencing here. These pants feel like they were drafted just for me!

But for anyone looking for a fitted, high waist, wide leg trouser then I have to recommend these as an excellent launching place to start whatever fit adjustments you might need.


The tank top is an idea that's been kicking around in my head since Frocktails last year... Back then I made the Vogue Guy Laroche dress: V1339 (blogged here). At that time I feel in love with the top half on it's own.

It has the box pleat on one shoulder, the weird inside to outside french seam on the other shoulder and then all that hand rolled hem and pleated waist detail. It's such a great tank top it needed to be made on it's own.


When I found this drapey, navy blue metallic knit at Fabric Deluxe the idea of the whole outfit - navy wool crepe trousers and fancy singlet, came together in my head. And simply wouldn't get out.

The sparkle in the knit is gorgeous as it's really bronze rather than a bright gold and being a big fan of all things brown I was instantly smitten.


All I did to turn the top half of the dress into a tank top was serge on this folded band on the bottom. I think I eyeballed the depth and guessed at the width. Sewing with knits is awesome like that.

So this is what I WASN'T wearing at Frocktails a few nights ago (still recovering - oh my!). But it was the liberating relief of having this outfit as my back up plan that allowed me to get on the other idea.

That one is much less my usual style and was quite an adventure in sewing outside my skill level. Thankfully it turned out alright!


I liked this outfit so much that I took it along with the intention of an outfit change midway thought the night. It was my party, I figured I could get away with that much self indulgence! Only I forgot to pack a bra... the dress I wore had so much support and structure that to take it off and then wear this singlet with no bra underneath would have been a flop - metaphorically and literally!

Details:

Trousers:
Pattern: Hollywood Trousers by Liesl & Co

Size: 8 - I measured between the 8 and the 10, but my size 10 Soho Shorts were feeling a bit loose so I went down for that super fitted look.
Modifications: none
Fabric: Almost certainly vintage wool crepe, cotton pocketing from the stash, navy lining from Fabric Deluxe

Tank Top:
Pattern: V1339 Vogue Guy Laroche dress
Size: 12 (previously sized down on recommendations from Pattern Review) 
Modifications: Omitted the skirt and just added a hem band to make it a top
Fabric: sparkle knit from Fabric Deluxe

Monday, 8 October 2018

Banksia dress

This one is jumping the blogging queue as it was a dress in a hurry...

The fabric arrived in the post Friday. I washed and dried it that evening (yay for Spring), cut it that night and sewed it up Saturday night. Worn on Sunday and now hitting the blog on Monday.


For all the speed in which it was made, it wasn't a dress that I had planned, or particularly desired... It came about like this: A friend and work colleague commented on a Gorman clothing post on Instagram wondering if I could make something like the dress she liked.

Well of course, it was a simple sleeveless bodice with a gathered skirt. And, of course, I'm heavily into procrastinating as I have a Frocktails dress that needs to be made, so could I be distracted by her project? Absolutely I could.


The fabric was the first thing to find. I discovered Nerida Hansen which is a website that collaborates with designers to release little curated batches of printed fabrics.  The one pictured above, top right, was my friend's pick. I added some of this banksia print by Jocelyn Proust for myself. There seemed to only be two substrates available, a mid-weight cotton (what I've used) and a heavier linen.

Since we're about the same size I figured I could make a version for me, then she could try it on and her version could be adjusted as necessary.

The pattern in the Felicia Pinafore by Tessuti. I might not have bought a pattern for something like this, but like teaching a man to fish, I'd rather make one dress, then pass the pattern on to the friend, direct them to a local sewing school and let them go on to discover how easy it really is!


The photos get pretty "real" from this point on as I just wanted to talk more about the pattern than the lovely fabric. Apologies for crappy back lane weeds and all.

I went into Tessuti to buy the pattern in paper format and they had the pinafore made up in a size S which fitted perfectly. The waistline is quite low and on the Tessuti version it hit about 1cm below my navel.

When it came time to cut out the fabric I realised my 147cm wide, 2m cut wasn't quite enough. Annoyingly, there is a discrepancy on the Tessuti website here: It says  for size S using 140cm wide fabric you need 1.9m (let's ignore the 112cm wide skinny fabric option also given). 2m should have been plenty and let's not forget I am a cutting ninja ;)

On the pattern the fabric requirement is printed as 150cm wide fabric, not 140cm wide. The cutting layout is also for 150cm. Well not many woven fabrics come 150cm wide so that's a pretty useless yardage list. On a 147cm (or more standard 144cm) wide fabric you need about 20-30cm extra. Closer to 2.2m

Or, as I did, you just shorten the bodice by about 1cm (bringing back up to navel height anyway) and then shorten the skirt by about 1&1/2"


It's still plenty long enough and I suspect my colleague's version will go shorter still.

It was my first time using a Tessuti pattern and I was slightly dismayed by the heavy paper and sketchy, handwritten style of the pattern sheet. For a $25 pattern it looks a bit amateurish.  The instructions, however, are concise and clear and are accompanied with colour photographs. For a new sewist, like the one I'm planning to pass it on to, I think it will be a great pattern. I don't mind photographs instead of illustrations at all when their already printed but I hate sewing from a computer screen or working from black and white versions of colour photographs - I suspect if you printed at home and scrimped on the coloured ink you'd have a had time making out the images.

I ignored the instructions to use tear away Vilene stabiliser and just staystitched the neckline and armholes. The facings were perfectly drafted and that all came together very nicely. I haven't had to move the bust dart and the bodice is great, and certainly one I'd use again. The skirt is a rectangle with pockets. Nothing more to say,I guess.

Except that, the gathered skirt, in my cotton is a bit poofy and tent like. I think the one I tried on in the fabric shop might have been a crinkle linen or something with more hanging drape as I don't recall it feeling like maternity wear. The think that saves it from maternity wear is the dropped/natural waist.


While it's not an entirely flattering silhouette, on a hot day, after a big lunch, it's going to be the perfect dress to be wearing.


I thought putting my hands in my pockets gave it a nicer silhouette, but Flipper said no, not really...

Then I tried to point how, when I walk the fabric tends to move forward and create even more overeating-belly room...


But he just thought I was flexing and showing off, so then things got really silly...


Verdict:
The Felicia Pinafore Dress: If you're new to sewing, go for it. If you don't have a sleeveless bodice, or have a fear of facings, then go for it. For everyone else, you can almost certainly do without this one in your stash
Nerida Hansen Print and Textiles: If you like a bold print then yes! They have permanently free shipping in Aus, very reasonable prices and were quick on the postage. Cotton is always fun and easy to sew. I suspect the linen may be more a home dec weight, but could be awesome for a jacket!

Tuesday, 2 October 2018

Simple elastic waist skirt tutorial

Hello, I've got a lovely, quick, easy tutorial over on the Oliver + S blog.

Click on the picture link below to check out how simple it is to sew a nice, twirly, neatly finished skirt with an exposed elastic waistband


Here we'll keep it real and talk about what didn't work so well, right?

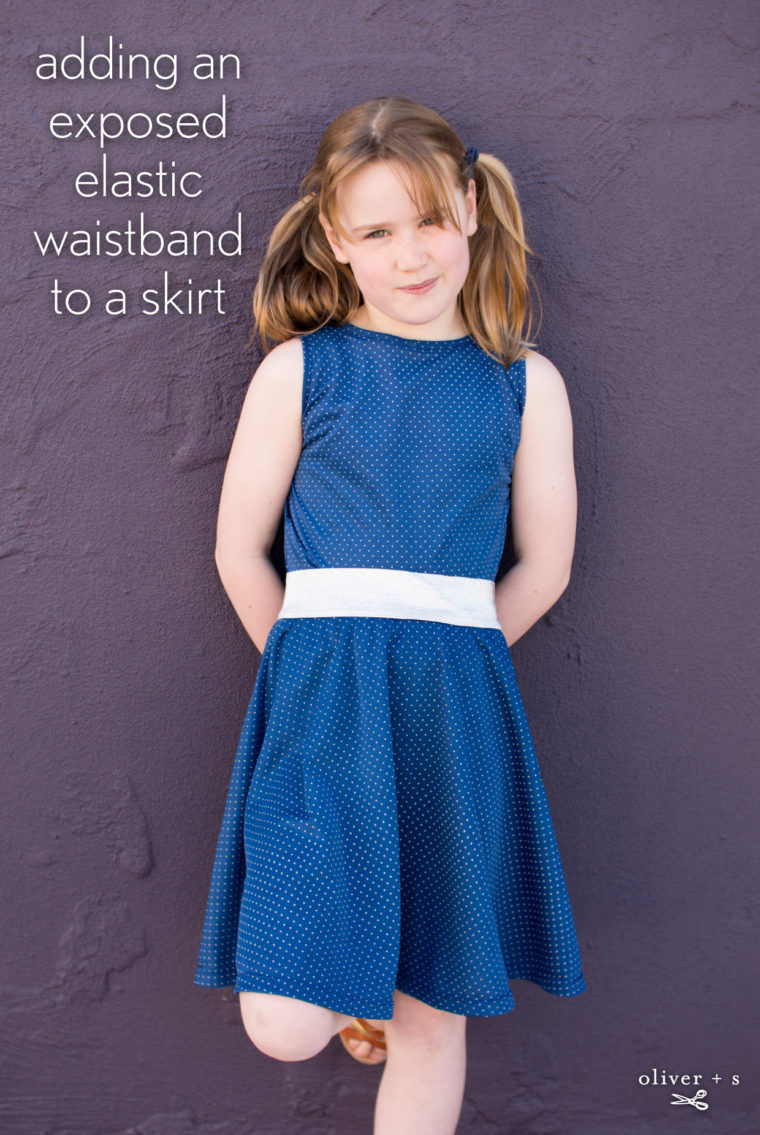
I ordered a few 1 yard cuts of fun, wide elastics from Strap Crafts, a Hong Kong based store with a huge range of interesting wide elastics and very reasonable shipping to Aus.

Rummaging around in the fabric stash for what would work well with this 2" wide, glittery silver elastic I found some of Topbike Physio's mum's stash fabrics that was perfect. A lightweight, breezy, summery synthetic knit in blue with tiny silvery white dots.


There was just enough to cut this part circle skirt using the Building Block Dress Book pattern (the size 6 width, 7 length already traced off) and a little singlet based on the size 8 School Bus T-shirt.

To turn the t-shirt into a singlet I reduced the shoulder width back to the point where the notch is marked on the pattern. I raised the underarm by about 1/2" - which it turns out I shouldn't have done. then I sewed a band just like the neckband to finish the edge.

The armpits are a bit high but she's hasn't complained and has worn it a few times already. For next time, I'd leave the armscye depth alone, but shave a bit more width out in the upper chest. It's not helped in these photos by her accidentally wearing the top back to front. That doesn't change the arm line but the front neck, which I lowered by 3/4" would look better at the front.

But here it is at the back, and a demonstration of the lovely twirl of the part circle skirt.


This outfit has proved to be a real winner and since it was so easy to make I can see a few more two piece spectaculars using exposed elastic and stash fabric being made this summer.


Bring on the warm weather!

Wednesday, 19 September 2018

Ears, beaks, tops and leggings

A quick round up of a few little projects that otherwise wouldn't make it to the blog.

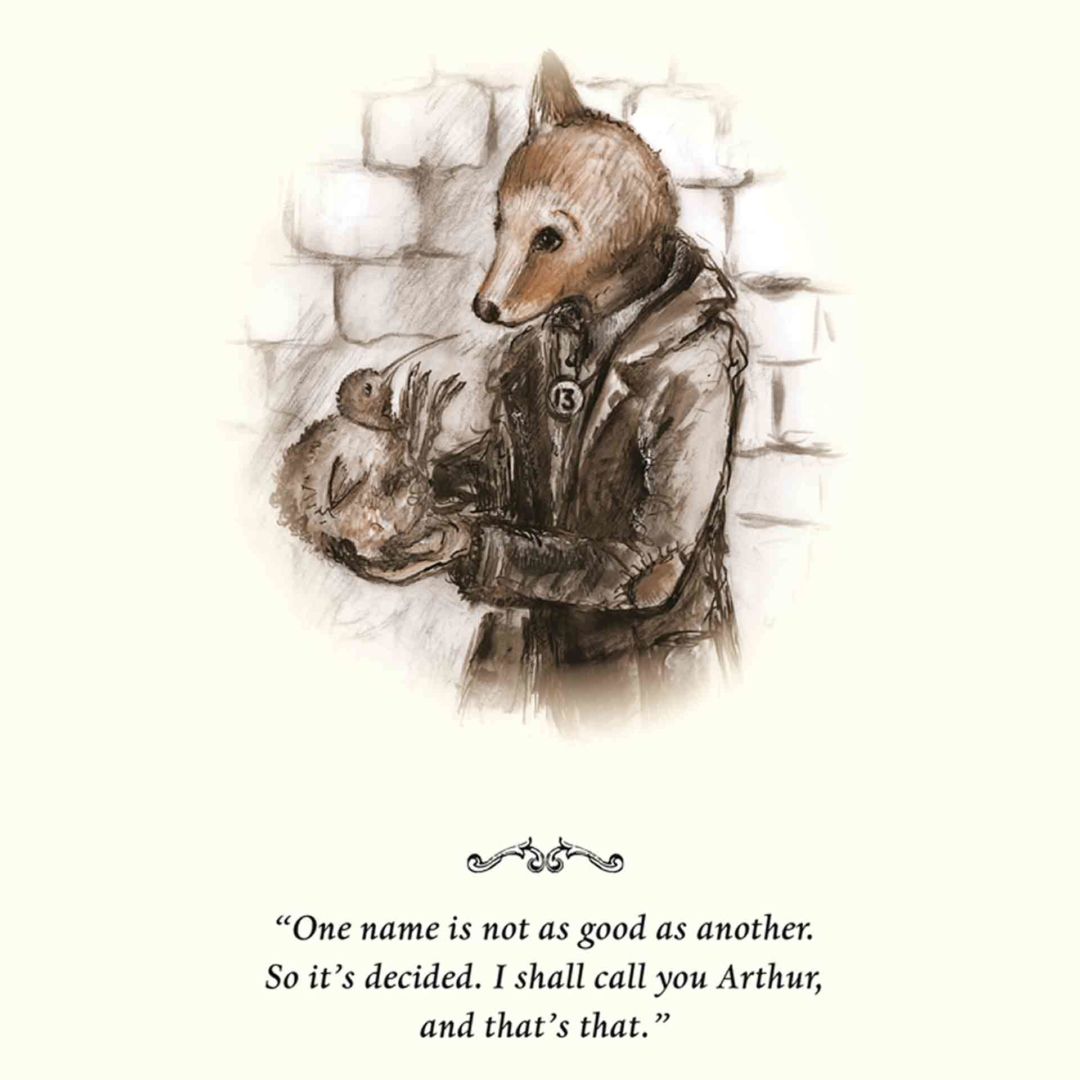
Book week was last month and the kids both agreed to go as the two main characters from the book we were currently reading together: The Wonderling by Mira Bartok


The book follows the adventures of a couple of  orphan "groundlings" which are part human part animal creatures. Arthur is a fox groundling with one very large ear and the superpower of amazing hearing. Trinket is his little bird friend who is an inventing genius and does amazing things with her beak. - "It's all in the beak, Arthur, all in the beak"


I won't go into a book review except to say that it was a thoroughly enjoyable read and the kids got very involved in the story. I've seen the book described as Dickensian, but I felt that one section was so derivative that I am prompted to read the kids Oliver Twist and see where they think the line sits...

Anyway to costumes: P was Arthur, a formerly un-named orphan known only by his Number 13 tag around his neck. We made that from some metal cut from an aluminium can (Flipper obligingly drank a Coke to help out the kids in their crafting) and then all he needed was one big ear.


The stash bucket yielded some foxy coloured fleece knits and a headband to cover. His favourite hoodie is looking suitably old, faded and torn now. Teemed with a foxy coloured Parachute Polo and some Field Trip cargo pants and he was sorted.

As a bird, Trinket struck me as very Kiwi like. I had a bit of my bird plumage brown knit fabric left from when I dressed as a scrub hen for the theatre (if you're new to the blog that sentence might surprise you, but that's how we roll).

Just enough for a long sleeved Tee and some leggings. The body of the T-shirt is pieced in a few spots but the pattern is so busy you'd never notice.


Forgive me a little boasting but I am quite proud of that beak! :) It's a styrofoam cucumber that came from the local, weird $2 asian shop that sells all sorts of stuff you never knew you needed. Among the kitchen utensils and placemats were these fake vegetables on strings. A raffia string with five long, green cucumbers attached was just what I needed. A bit of brown paint, a single cone from an egg carton and some elastic and we had a very kiwi-esque beak. The funny, frizzy hair extensions on bobby pins also came from that shop and make perfect fluffy bird bits on head and tail.

The only downside is A has decided the other four cucumbers on their string are "lovely" and insists on hanging them in her bedroom. Sigh.

Pattern wise the top is the Oliver + S School Bus T-shirt, size 8, with the neckband made into a higher skivvy neck with a slight cowl twist. The leggings are from a Japanese pattern book and I'd previously made another pair so the pattern tracing was already out.


They're size 130cm which is her height and measurements but they're really long. For the bird ones I just left them long, as I'm sure kiwis have slightly wrinkly ankles, right?

But for these blue ones I'd thought it would be fun to try and gather them and use some of this vertical bow ribbon that I've had in the stash for ages.


This leggings pattern was tried to see if it solved some of the crotch fit issues of the jeggings I'd made based on the Oliver + S Playtime leggings. It doesn't really, so I'm thinking the Jalie Eleonore pull-on jeans might be the pattern for stretch jeans/jeggings. Of course that's one I don't (yet) own. But that's also how I roll.... right?

Thursday, 6 September 2018

Nana pants mark 2

I only went in to Fabric Deluxe to get thread you know...

And there I found the perfect heavy knit fabric for more pull on pants. the kind of hefty nana-ish knit I was talking about back when I made these lighter weight ponte pull on pants.


But these ones aren't the same pattern (the others were V9284). This time I tried out the Anne Klein Vogue pattern V1517

How did I discover I had a second pattern for seamed, pull on knit pants? Well, I ended up with a few really lovely hides of navy leather at a very cheap price and suddenly remembered I had a pattern for a leather jacket. Lo and behold the same pattern yielded some pull on pants. How did I come to score a pile of leather hides? Well I went out to Eliza's to try and get a zipper.... :) (you know how it goes)


So I got my thread (and my zipper and leather) and then bought some of this heavy weight knit. It's a charcoal grey rib on one face and a matte black, smooth ponte type on the reverse. It was somewhat narrower than the average knit at only 135cm and I was keen to avoid any leftovers. I plumped for 1.25m after reading, then disregarding, the pattern fabric requirements on my phone at the store. (it only lists 150cm wide knit and suggests 1.6m).

I traced the size 12 (after measuring exactly as per the size 14 - but I'm learning) and then overlaid the pattern pieces from the V9284 pants. The legs looked very similar but the rise was much shorter on these ones. So I added 1" depth at the crotch lengthen/shorten line and another 1" length at the lower leg lengthen/shorten line. And with those changes it just fit on my fabric with nothing left to spare. (I had to cut some pieces upside down and if direction mattered you'd need 150cm wide fabric or to double the yardage)


Size and fit wise I think I was mostly correct. Certainly sizing down was right and I think the extra length at both positions was a good call. I love how the back rise of my other pants allows me to cycle without looking like a tradie who's lost his driver's license. These ones afford a similar coverage now.

The back seams are set a bit too far to the sides from above the knee. They're fairly centered on my calves but need to come more to the midline from there up. The only other review I could find of these pants suggested the same thing.


They're certainly comfortable and while they suffer the same existential crisis as my other pull-on pants (real pants or trackpants - what are you?) I've been wearing them around the house as well as out once and they're not half bad.

The waistband is 2" wide elastic which is sewn to the inside and left exposed. I cut it a good inch shorter than the pattern piece and it's perfect - although maybe I should have taken in that centre back seam first to avoid those pucker-y gathers.


I thought I had 2" wide elastic in my stash, but it was only 1.5" and that wouldn't have covered the waistband seam allowances. I dashed out to Vo-Le where she had exactly what I needed at only $1.50/m (best table tennis and sewing notions shop in the world!)

The pattern was very quick to sew. I used the overlocker for all the seams then the twin needle to edgestitch/topstitch the front and back seams and hem the waistband and ankles.


I think these pants are occupying that middle ground where they don't look like activewear, or trackpants, but they're not formal, proper trousers either. They're nana pants and I'm liking them. But I do wonder if my mum might like them more.... ;)

Of course I traced off the jacket pattern and that will need a muslin or two before chopping into my leather. Perhaps that can be my Frocktails jacket in case of cold weather. Are you coming to Frocktails? Have an outfit plan yet?

Details:
Pattern: Vogue V1517
Size: 12
Fabric: ribbed double knit from fabric Deluxe
Modifications: 1" extra rise length, 1" extra lower leg length

Notions:2" wide waistband elastic, thread.


Wednesday, 5 September 2018

Bomber Jackets and that awesome ribbing

Each time I pull a bit of fabric out of my stash I find other bits and am reminded of an idea I might have once had....

Bomber jacket time!


It was this shiny, brown, patterned faux leather that got me started on the bomber jackets for kids idea. When I re-discovered it in the stash and decided it was all wrong for my pencil skirt, I showed it to A and she went nuts for it.


I already had a kids bomber jacket pattern in McCalls M7619, and I had lining fabric. All I needed was the ribbing for the cuffs...

I'd been seeing the Albstoffe cuffs on instagram and decided they would be perfect. My dealer for all things hip like that is Maaidesign and while I'm not sure if hers are actually the same brand, they're awesome all the same.

Of course that left me having to choose which cuffs to use, so I bought two different ones and made a bomber jacket for P as well!


His fabric was also pulled from the stash. It's a wool that almost feels like a felt, not as thick as a regular melton or coat weight. Knowing he feels the cold I underlined it with some fleece interfacing and then lined it in black.


To use the ribbing for the neckline required it to be wider than the pattern's intended neckband. the ribbing has a distinct fold line in the middle where the weave changes. Which is perfect for a good fold but means you can't really change the width without unbalancing the stripes.

I'm not sure the jacket needed it but this funny alpaca with it's gold "hello" was at Spotlight and A was keen for it to go on her jacket. Sure, why not. I hand stitched it to the front panel before constructing the jacket.


And so P got a giant fluffy letter P which came from Eliza's for only 50cents (only about 4 letters in the middle of the alphabet were available). Flipper informs me I've put it on the wrong side but I thought the shape of the P looked nicer facing in - in other words, meh, who cares.


Both zippers came from Jimmy's buttons and I took to them with pliers to shorten them and reapply the metal stoppers.

The sewing was pretty straightforward. The pattern is fairly basic and a here's a tip for anyone making this version with the external front pockets. After sewing one side of the zipper in, close the zipper and mark every point where there is a seam (or a stripe in your ribbing!). There's nothing worse than a jacket that closes with wonky pocket lines - go back and have a look at the pattern cover photo of the boy's jacket and you'll see what I mean.

The pattern has you stitch the lining to the bottom ribbing waistband and then hand sew the whole front, neckline and sleeve cuffs by hand. After doing A's jacket that way I thought I'd figure out some way of bagging the lining, but then I couldn't be bothered and hand sewed P's as well. Sometimes it's easier to turn the brain off, the telly on, and just stitch.


A's jacket has these side seam pockets which are kind of like patch pockets only applied under the jacket front rather than on top. It took her a while to even realise they were there!

I measured the pattern pieces for the neckband, cuffs and waistband and discovered I would need two lengths of each cuff ribbing. From one length is the waistband and the other length yielded the neckband and two sleeve cuffs. The sleeve cuffs are a bit big on A but to gather the jacket sleeve to a smaller cuff would have been very tricky to sew.

The jacket sleeve has quite a nice shape with the outer back sleeve being slightly longer than the inner front sleeve.


Working with my small remnant of grey wool I added as much sleeve length as possible to P's version: which was barely 2cm extra length. It's just long enough for monkey boy this year but I suspect it will be "bracelet" length before too long.

Both jackets look really great on the kids and I'm pretty pleased to have used up some odd bits of stashed fabric and to have finally had a play with these awesome ribbings.

The ribbing weight is perfect for jackets - similar to what is often described as 2x2 ribbing. It's hard to photograph, but the pale gold is really lovely. I worried it might be a bit girly for P but he adores his blingy gold jacket :)


I stitched the labels on by machine so that the stitching is through all fabric layers - just in case my hand stitching of the lining at the neckline wasn't secure enough.


We were on our way down to the fruit and veg market and stopped at the local university campus where there's this lovely mural of birds - I mention this one because it's the red wattlebird and at this time of year it (or its other wattlebird species relatives) is the nemesis of every Melbournian who might like to sleep past 5am.

At our house it's known as the "hoo ha hee ha" bird as its call sounds like that, over and over again.
Here's a audio of the "Melbourne alarm clock bird" and , if you don't mind bad language, a very funny discussion about how to try and live with them (because you can't kill them).

Details:
Pattern: McCalls M7619
Fabric: A - fake snakeskin pleather, bemberg lining. P - wool coating, fleece interfacing, rayon lining
Size: A - straight size 8. P - size 10 with 2cm extra sleeve length
Modifications: Cut neckband to suit ribbing width
Notions: Ribbing from Maaidesign. Zippers from Jimmy's Buttons. Patches: Spotlight and Eliza's