Thursday, 15 January 2015

The story of the Stripe Solution and the Facing Fail

Do you sometimes think you know what you're doing, only to discover you kind of don't? Yeah. Me too.

For the blog post where I look like I know what I'm doing, click on the image below and hop over to the Oliver + S blog.


Or stick around here, to see what I was trying to do, what I discovered I needed to do, what went right and what went really, quite wrong....

So, let's start with the inspiration and what I was trying to do. I attend a weekly French class. Well, it used to be a class until we completed the course, now it's more of a discussion group but we have kept our teacher on a retainer so we don't get too distracted. Anyway, one of the other students subscribes to Point de Vue and often passes on the copies. It's like flipping through a moderately high brow weekly magazine.  Lots (make that LOTS) on the various royal families of Europe, but also some real articles on French history and culture and of course a regular fashion spread.

Point de Vue - Semaine du 23 au 29 Juillet 2014: Page 12
I am hopelessly addicted to stripey tops and I WANTED that one. The photo credited Peter Hahn and I was curious to see what the "prix sur demande" might be, but this particular top was nowhere to be found. No worries (I'm obviously still very much an Aussie!) I can make one.

And so began the search for the fabric.... As you can see I didn't quite get there. I found uneven stripes of almost every colour but red. For the record the St James interlock is the perfect Mariniere fabric, of course unless you want red. Eventually I found this fabric at Stylish Fabric. It's described as a medium weight rayon spandex. I'd say it's more a light weight and wow, is it soft. The kids were so keen to have pyjamas made out of it and kept running off with it and wrapping themselves up

(if only I'd got the pose right, we could've been twins! :) )
 
While I was hunting for the fabric I was also thinking about how to make the top. What I needed to start with was a drop shouldered T-shirt. I was about to start changing up the front of the Weekend Getaway dress when the Bento Tee pattern was released. Bingo I thought, that's my solution right there.
 

Mindful of my Oliver + S blogging duty, I thought I'd do a nice tutorial on adding a hem facing to a knit top to achieve a neatly curved hemline. That was my plan.

I made my short sleeve Bento Tees as practice runs then planned the modifications. I wanted a deeper neckline, a slimmer, longer silhouette and the hi-low hem with the steeply curved side split.

Only at the last minute did I realise that the sleeve of the Bento tee has a curve where it joins the body. The short sleeve, striped version seen in the pattern advertising works because the cuff turns up and covers the bit where the stripes would look wonky. A long sleeved version would need the sleeve squared off  in order for the stripes to be parallel to the seam across the arm.

And in adjusting the sleeve to get the Stripe Solution I found my blog post after all.


Luckily, 'cause I then went on to completely butcher the original hem facing idea. I painstakingly drafted and cut a hem facing which I intended to sew to the hem, flip to the inside then stitch down. Somehow I lost all my stripe-fu by this stage and even though I'd laboured over the cutting, the hem facing was not going to match. Then it became apparent that nothing was going to "flip to the inside" as sharply as I'd imagined. There was much clipping close to seams and still plenty of puckering.

Eventually, in a salvage attempt, I cut the facing off. But I was then left with very little fabric with which to hem the shirt. I'm usually quite fussy about my knit hems. I overlock the edge, turn it under and then twin needle stitch such that the bobbin zig-zag is on the overlocked edge and it all looks quite professional.

This one doesn't come close and I'll be surprised if it lasts. Here's the barely hemmed underside in all it's ugliness


Oh, and one other blindingly obvious thing: you can't sew tight curves or 90 degree angles with a twin needle. There ain't no lift and pivot when you've got two needles in the fabric.  Kind of like how trains can't turn corners. Seems very obvious now, but I needed to go there to realise it. This is what happens when you try to sew a tight curve with a twin needle. Ick.

 
If only I had sewn the side seam with the sewing machine and finished the seam allowances separately I could have pressed the seam allowance to each side at the split and my hem might have worked. Perhaps I also wouldn't have mucked up that stripe matching seen above.


One part of the original plan which was also quickly modified was the neckline. I'd planned a below the collarbones neckline with a turned under hem and no neckband. But I'd been a bit scissor happy in creating my new neckhole and it would have been enormous! Ok, a neckband was needed.

I don't think there can be a formula for how long to cut a neckband when you've modified the neckhole as it depends so much on the fabric. I cut it the width that suited my stripes and a length that was about an inch shorter than the measured circumference of the neckhole. Then I pinned the neckband loop to the shirt and kept shortening it by inch to half inch increments until I felt like the neckband needed a reasonable stretch to fit the T-shirt.

Then I got lazy and attached it straight up with the overlocker and fluffed the centre back neckline a bit. C'est la vie, huh.


What was successful was my changes to length and width. I lay the Bento Tee pattern piece down, then my pattern tracing interfacing, then the Neptune tee pattern piece on top. I drew a new side seam that was somewhere in between the narrow Neptune and the boxy Bento. I used the Neptune's length with a little more added to the back and free drew my own curved side splits. I wish I'd taken a photo of the unhemmed splits as they looked great. S'funny I can't leave a knit hem unfinished. Even my somewhat mangled hems on this top seem more complete than if I'd done nothing.

I've rather enjoyed writing this one up, warts and all. I know I'm fussy and I'm not fishing for compliments by pointing out my mistakes. Just noticing what I botched and making a mental note to do better next time.


I love this top and I can see myself wearing it 'til it falls apart, which may not be all that long! I'm still perplexed about how badly my imagined hem facing married with reality. That's a problem that remains in need of a solution. If I ever find the perfect asymmentrical white on red stripe, I'll come back for another attempt!

Wednesday, 14 January 2015

Bento Tee: Straight out of the box

I had an idea for fiddling around with the Bento Tee pattern by Liesl & Co the moment it was released. While I searched and searched online for the exact fabric I wanted, I sewed a test version exactly by the pattern to see how it worked straight up.


I can never go past the remnant packages at The Fabric Store. Maybe it's the way they present them, rolled around a cardboard sheet with a nice brown paper cuff. It might be the designer names that are sometimes scrawled in texta on that brown paper sleeve, or maybe it's just the price. Whatever it is, I buy them for the kids, but then start coveting them for me.

This was one such fabric. It was labelled Lyocell knit and it is insanely pleasant to sew with and to wear. It feels like a slinky, slippery, silky knit but with a bit of ironing it held the sharpest creases and sewed as easily as a fine woven cotton.

I have never seen fabric advertised as lyocell knit before, but trust me, if you do, then buy a bit. Apart from being so nice to work with I can vouch for it being brilliant to wear in a heat wave too!


The pattern is such a fun, easy sew as well. The front and back are basically symmetrical (with the excection of the neckline) and the sleeve is a dropped shoulder sleeve so attaches without any fuss. I sewed the whole thing on the overlocker and then just finished the bottom hem with a double needle. Everyone talks about T-shirts being quick to sew, but this one really is. I did spend a few minutes hand sewing my sleeve cuffs up as they were unlikely to stay put without some attaching.

I really did try to photograph this "in the wild" but was wearing it with tight jeans, on a blustery windy day and once I saw the pictures I realised how bad it looked. The wind didn't help as I looked about 8 months pregnant in most shots. Mental note: Cropped boxy tops do not go well with fitted bottoms for me. I'm blaming the weather and poor pants choice as I quite like how it looks here.

I had grabbed another knit remnant on a later trip to The Fabric Store and couldn't work out what else to do with it, so a second Bento tee came to be.


This was a decidedly tricky piece of fabric. Because of the lovely packaging I hadn't realised that what I thought was a grey-beige snakeskin looking knit actually had a very pronounced ombre effect.

Only the shading of the ombre went across the grain from selvedge to selvedge. That meant anything I made with the stretch horizontal would also have the shading going from side to side instead of the more usual top to bottom.

I'd resolved to make leggings for A, with one leg considerably darker than the other (could be cute, no?), when I changed my mind and thought of another Bento tee but with a kind of harlequin effect.

So I cut the sleeve cuffs and neckband to shade in the opposite direction to the shirt. One side seam is barely noticeable, but with a full pirouette the other side is dramatically different.


It's odd, but I kind of like it.

These two are in fairly regular T-shirt rotation, but really they were the launching block for the top that I was still hunting for the perfect fabric for.... (to be continued)

Tuesday, 6 January 2015

Thread Theory love: Newcastle cardigan and Camas blouse muslin

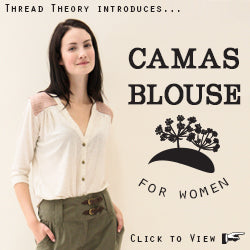
I hadn't planned on showing you my Camas blouse* until I'd made a second one with some fit changes, but, truth is, I've been wearing it heaps and it's a great pattern, and Thread Theory are having a sale, so how could I not share?! Click on the picture link below to shop the thread Theory website and take advantage of their sale.


The blouse is a knit shirt with the option of functional or faux button placket, and with shoulder and back yokes that can be the same or a contrast fabric.

I had some small pieces of Liberty lawn, and there was exactly enough (from a fat 1/8th) to make the yokes and I had some T-shirt cotton that was lying around. Perfect for a test run....


I made a straight size 14, and with the thicker t-shirt cotton and the size I feel it's a bit boxy. For my final draft I've picked a slinkier viscose jersey, sized down one size and added a bit of length through the waist. I'm super excited about how it will turn out!
 

I don't have much in the way of a bust, and certainly can't boast a cleavage as such, so I was nervous about the low front, but it sits at exactly the right spot. Low cut, but not indecent, and, as the next photo shows, it get's the photographer husband tick of approval :)


I happened to have just the right number of grey linen covered buttons leftover from this shirt turned dress and they're not a bad match.

The pattern was a delight to sew, and I have the next one cut out and ready to go. Stay tuned...

Now,... Do you remember the Newcastle cardigan that I made for my dad, and Roger stole the show with his turn at modelling? Well, he asked nicely enough for one of his own in the same fabric, so that was his Christmas present sorted. He requested pockets and red lining. I almost fulfilled his wishes...


My dad had given me feedback that the lining, while soft and pleasant was too catchy to wear the cardigan over long sleeves. His had been lined with a cotton jersey. It seemed I needed proper slippery lining, but also needed to retain the stretch.

If you're wondering why I'm talking lining for a cardigan which is normally unlined (by the pattern instructions) then I should explain: the faux quilted main fabric has an awful black, scratchy interfacing type reverse side. It needed something behind it.

I asked around and discovered stretch woven lining. It feels just like normal lining but has enough lycra to have some reasonable stretch in one direction. Perfect. Only problem was I couldn't find any colours in bricks and mortar shops around town (I'd left it too late for buying the perfect red off the 'net).


Eventually I found this pewter grey which I thought was ideal, and snuck in the red by using some quilting cotton from the stash for bias binding on the facing edge and for a label background. I guess that's one reason for hanging onto some bits of quilting cotton right there.


Adding a lining is quite simple. I had thought to take pictures and turn it into a tutorial but this was sewn during some very late nights leading up to Christmas, and if I'm sewing until 2am for a few days straight, I ain't taking photos as I go!

I cut the front, back and sleeves from lining. After sewing the shoulder seams of the lining I added it at the point where the front button plackets are attached. Then it's just a matter of attaching all four sleeves, before sewing all four side seams, being conscious of keeping everything from getting twisted up. While it adds a bit of sewing it does save on finishing any seams and I think I'd do this every time now.

The pockets were inspired by these ones that Meredith of Thread Theory did when she made a Newcastle cardigan for herself. Only I decided mine should have a curved turned down bit that echoed the shape of the shawl collar. Then I thought they should be lined, and then that they should be fussy cut to match the pattern of the jacket. Somehow these all seemed like rational thoughts when I was self drafting a pocket after midnight on a weeknight!


I was very excited when I bought more of the main buttons to discover a smaller version that was just right for the pockets.


This cardigan had the same extra length in the body and the GWA (Grandpa Waist Adjustment) of my first one, but this time I got the recalculation of the button spacing right, so it has the correct number of buttons down the front.

The finished cardigan was wrapped and left under the tree at my parents house for Roger who was visiting after we'd left. Of course I left instructions about photographing it, but forgot to say I'd already taken some on the hanger shots.

He artfully composed some suitably rustic shots by the back door...


But then all his modelled shots failed to work with the exception of this "side elevation" of the model preparing himself:
 
 
As we're now experiencing rolling summer heatwaves we're all going to have to wait until fireside, port drinking weather comes back around and I can coax Roger into another blog appearance.
 
* I was given the Camas blouse pattern in exchange for some publicity. I'm sure you know my enthusiasm for Thread Theory patterns is entirely genuine and that I can't be bought!


Wednesday, 31 December 2014

2014 sewing review

I started the year with something for me, and didn't stop there...


And there is one T-shirt, a blouse and a pair of pants that haven't yet been photographed. The hits and misses?

Well the first dress, the one that looks and feels like a camel bred with a settee; definite miss. The Coco? Saved only by the fabric, it's still getting some wear. The Coco top didn't even make this picture collage. The Lisette denim jacket made me realise just how fussy I am about inside finishes. I won't make another jacket without lining it. Live and learn.

The jersey knit dresses have been the standout successes and are in very heavy rotation. The silver sparkly Weekend Getaway has come out for a couple more parties recently and is just the easiest thing to throw on but still look very dressed up. (just realised I still haven't worked out what to do with Grandma's vintage silk)

I remain quite clueless about fitting myself, but since I'm hooked on sewing and wearing knits, I'm mostly getting away with it.

The kids love their knits too....


If P were here to ask what his favourite of the year was, there's no doubt he'd say the Knight Hoodie. Man, he loves that sweater! All of the T-shirts have had heavy wear. He especially liked his Robert Morris Sculpture T, but we never did get around to visiting the art gallery while wearing it.

The duds? Well, sewing so many pairs of navy shorts and pants for school was always going to get boring. As much as he loved the Sandbox pants initially I think he found the drawstrings too fiddly, and since they're a heavy knit, I suspect they may have been falling down a bit.

The insane straw boater project ended up being a touch too small once the Petersham ribbon was added. Worn once, but worth the effort just to prove to myself I could do it.


Much harder to predict is what A will like, or wear, or not tolerate at all. After declaring her favourite colour was purple for most of the year, she surprised me by seeming to be most fond of the brown Hopscotch dress, and the brown Japanese leaf dress. Happy surprise, but a surprise nonetheless.

The things I really like that she simply won't wear are the Apple Picking dress in that sweet  Alannah Hill fabric that J Wo gave me, and the red wool peplum. Oh well, they'll be as good as new when they get passed on to someone else.

And what became of the insane beaded deer project? She declared it "too bobbly" for a long time and then finally decided to wear it one day. I snapped the picture above, and then we headed out for the day. We ended up at a country school fete which had a bouncy castle. No sweat, she's a pretty timid bouncer... Next thing I know she's graduated from the little bouncy castle to the giant inflatable slide next to it and she's going down head first! Needless to say, the larger beads didn't survive, there are bits of frayed beading thread everywhere and the sweater itself is filthy. Still, I had a lot of fun making it, and it was pretty hilarious watching her fly down the slide. Clothes are for wearing, right?

The only kid's clothes I bought this year were some school uniform shirts for P and socks and underwear for both kids. Otherwise I went 12 months without buying anything for either of them.

On to making things just for the fun of it: Here are all the gifts and accessories and Little Things To Sew projects I made this year. - Correction: I didn't make all of them. The kids did some sewing and made the butterflies (with help). The blue one on the card was made entirely by P and was a gift for his prep teacher. Thanks to Heidi for the inspiration and link to tutorial.


Admittedly a few of those gifts were projects from the Little Things To Sew book that I was making because of my challenge to sew the lot, the recipient just happened to be in the right place at the right time. But shhh, don't tell them that.

For Christmas, Flipper got a couple more pair of lycra booties and some little phone cases made out of old PUL nappy bags. It's on my list of things to do to share the cycle shoe cover pattern as I really don't think you'll find another like it on the web anywhere (You've been searching too, right?!)

The other gift that hasn't yet made the blog is the Newcastle Cardigan that I made for Roger. I took some photos of it on the hanger, but missed seeing Roger at Christmas, and I know you'll be hanging out for modelled shots. That's his New Year mission, and perhaps, a condition of receiving the gift! :)

I had a lot of fun with the blog this year. Hosting the Little Things To Sew challenge was so enjoyable, and only a lot of work because I suck at formatting Excel spreadsheets. Being a contributor to the Kid's Clothes Week was a blast and quite an honour. I landed a dream job with Oliver + S contributing to their blog on a regular basis. I think my job description is to do interesting things with their patterns and occasionally something a bit out of left field. I loved the Valentine's gift exchange and I'm hoping Sanae and Ute host it again, and I'm branching out into blogging advertorial and have a new Thread Theory pattern to show you very soon.... (I think you know I'm brutally honest about what I think about a pattern and that there won't be any cash for comment on this blog!)

Thanks to everyone who has visited the blog in 2014. I hope, by documenting what I make, the brilliant bits and the balls-ups, I can amuse or inspire you in the new year.

Have a Happy New Year!

Wednesday, 24 December 2014

A gift for a baby far, far away

When I was stroking and squishing that maille merveilleuse that I bought from France, I really was thinking I needed to sew something for a baby with the leftovers.

...Then, of course, there is the Oliver + S Lullaby Layette pattern that was demanding to be sewn.

.... and I had some nice merino jersey leftover which would do perfectly for lining a little jacket.

Finally, throw in just about the most beautiful, and beautifully photographed, children on the internet, and their awesome mother, who is occasionally awake at the same time as me and we can email chat as if we're talking over the back fence....

OK, so it's a little bit weird and fan girl-ish to make something for someone you don't really know. But we all feel like we know Rachel, right?! If you're not nodding your head, go check out Stitched Together

But in my head, all of that sounded like a perfectly reasonable argument to sew something, so here is my only sewing gift for a kid this holiday season!


I made the Size 6-12m jacket, but it turns out baby Hazel has just clocked over at 4 months old. So it should fit perfectly just about when the northern hemisphere summer rolls around. Oops. (face palm).

Rachel kindly assures me they live in a land of air conditioners and a soft, squishy jacket will always get worn. Phew.

Apart from the sizing gaff, I did get a bit inattentive while sewing and I ended up stitching the sleeve fronts to the sleeve backs and the body parts into two separate tubes. Unpicking the wool was fine, but the thick, fluffy cotton was a nightmare. There's nothing wrong with the instructions, it's actually quite a clever way of constructing the jacket, just be warned and pay attention!


The lining is a little touch of down under in some fine merino jersey (probably from New Zealand as I recall it was a Fabric Store purchase). Now, between the taupe main fabric and the brown lining this was looking more like something I'd wear than a baby's jacket, and I went round and round in circles trying to decide on which bias binding colour would un-beige it best.

It came down to the pink, a nice mustard and a peacock blue. They all looked great and I might have plumped for the mustard except that's really just a yellowy shade of brown, and Flipper interjected and said it had to be pink.

And finally, for the lack of a label, I stitched her initials at the back neck. I like it better that way. Rachel and her family know who sewed it,... although they know who their baby is too, so that argument may not wash.


It's not just that maille fabric that is warm and fuzzy. This was one of those times that I just felt good that I am able to make things, that I can share them here and for the friendships that I've made on the other side of the world.

It's warm and fuzzies all round!
And on that note, I hope you all have a happy holiday season and a glorious start to the new year! See you in 2015.

Saturday, 20 December 2014

Julia Sweater: Pattern testing

Firstly I want to thank everyone for their comments on my last blog post. I don't know if I'll be able to make sense of what's going wrong, or work out how to fix it, but I am feeling better for all your kind words! I could get far too philosophical about the narcissism of blogging,.... suffice to say I love hearing from you, and I can't believe I enticed my own husband (aka Flipper) into his first blog comment. Yay! (oh, and if you read his comment and didn't get it - here's the link to the best scientific powerpoint presentation ever!)

The randomly drawn winner of the Oliver + S pattern is Inspinration - I've sent you a message via facebook. I am terribly behind in my own blog reading and comment leaving list, but I do always click on the names of people who visit my blog and I love seeing what you're doing.

What have I been doing? Far too much actually.

A couple of weeks ago I joined the pattern testing crowd again to test the Julia Sweater for Compagnie M.


The pattern is an adult version of the cute, dolman sleeved Julia sweater for kids. At the time of the pattern test there were a few different options for how to do the sweater; with or without collar, with button tabs, faux placket and with or without a kangaroo pocket. By the end of the pattern test it had blown out to dozens of variations. Most of which are included in the final pattern and a few others as tutorials on customisation.
 
I figured the pattern testers role is to make the pattern as designed by the pattern creator and see how it goes, so no embellishments here.
 
 
This first one is a merino rib knit with quite a lot of stretch in both directions. It worked perfectly. Since the sleeve's circumference ends up being perpendicular to the main direction of stretch, some testers were having trouble with too tight lower sleeves. Marte ended up including instructions for a split front and back panel with the sleeve parts being angled 45deg and apparently that works fine with less stretchy fabrics.
 
The collar option I sewed above ended up being ditched in favour of a wider neckline and a bigger collar. The final collar does look more balanced on an adult sized sweater.
 
To properly test the instructions I thought I'd have a go at the option with a button tab and front pocket:
 

I picked some random bits of T-shirt cotton knit and some navy ribbing. The lower sleeves are a firmer fit on this one, but they're still Ok. I found the instructions for the pocket to be somewhat lacking. I've sewn exactly this kind of pocket with the School Photo dress but that one comes with very detailed instructions, pattern markings at which to stop the seams and clear diagrams. Perhaps I made things difficult by printing the instructions in black and white, and thus the coloured photos were less clear, but I found it very confusing. Mostly the entire sweater can be made on an overlocker, but I couldn't get my head around stopping an overlocked seam mid way up the garment, so reverted to the sewing machine.


The instructions are probably no more or less than you might expect with an indie PDF pattern. I guess I've been spoiled by the likes of Oliver + S and Thread Theory.

Speaking of Thread Theory, I've just been sewing a Christmas gift for Roger (remember my dad's body double from father's day?). He wanted a cardigan just like dad's, only with pockets, and some red lining.

I've almost fulfilled his wishes. More details and hopefully modelled pictures to come after Christmas, but here's a sneak peek:


And then, as soon as I get the chance I'll be doing a bit of Thread Theory sewing for me! They've just released their first women's pattern, the Camas blouse,  as a reward for all the women who buy their patterns to sew for their blokes. Although there are blokes buying their patterns and sewing for themselves. I love this blog post and the seriously impressive pants he made.

But back to my Julia sweater (which I'm wearing right now as I type)... Flipper said it was missing one thing, so I photoshopped it in. If only I'd thought to do the hand salute too!


Thursday, 11 December 2014

Giveaway: and a request for help

Hi.

Easy for me to say, but I'm wondering if it isn't becoming increasingly difficult for you to respond.

I seem to be having some issues with Blogger and I suspect it might be affecting how you can leave comments on the blog. (or maybe you have all wandered off to look at something else, and I'm being vain and not realising it!).

Can you help me out?


I tried an HTML patch that changed the page refresh times, and I think it might have even made things worse...

Could you do me a huge favour, and spare a minute to leave a comment on today's blog post. Make sure to include the internet browser you're using (or tablet/phone etc) and which ID you're signed in as. In the example above I'm at home, so it's Internet Explorer (IE) and I use my Google ID.

Now, in case it doesn't post, be sure to highlight and copy what you've written. If, or when, it fails to post you can paste the same content into an email. Either click on the mail icon at the top of the blog, or send it to lightningmcstitch at gmail dot com


As a bit of an incentive, I'll give away an awesome paper Oliver + S pattern to one person who leaves  a comment. Whether it arrives by email or on the blog I don't mind. It's your effort that's being rewarded, not the success of the comment posting!

The pattern is the beautiful Hide and Seek dress which I recently made here. It's size 6m to 4 years, uncut and as new. Happy to post to anywhere.

Can't think of anything to say, well, everyone has a haircut story, right?


Only a week after having her hair trimmed into the nice, angled bob that she's been sporting for a while, A decided that she and her toy koala needed a bit more off. She hacked at the front part of the bob (and koala's fluffy ears) and so I saw my chance to whiz her back to the hairdresser and get the short, Mia Farrow cut that I've been thinking would be super cute.


When I was her age I had a very similar haircut and she's sold on the idea of looking just like mummy. Before it grows out, I want to recreate a dress I had at the time and play along with the When We Were Young series

I eventually grew my hair quite long, and so here's my hairdressing horror story:

With my long hair ready for a new style I went to see my uncle's family who were all hairdressers. I won't say exactly how old I was, but you might guess the era anyway...

I pointed to a picture on the wall and requested the haircut to be just like that one. The picture probably looked like this:


My cousin set to work, snipping and trimming. I became a bit concerned at how this was going to eventuate into the style I wanted, but I didn't say anything, as he was the hairdresser and I presumed it would work out at the end.

Eventually he put his scissors down and reached for the mirror. That was when I realised he'd finished. That was it. He looked quite proud of himself as he showed me the sides and back. I burst into unexplained tears.

The picture next to Farrah Fawcett looked a lot like this one...


He'd done a perfect job of it, it's just that, not only was it not the haircut I wanted, I didn't even look like that model.

I looked more like Adam Rich (aka the chubby kid from Eight is Enough):


I'll draw the winner of the pattern in about 7 days. Thanks for your help. As much as I use the blog as my own record of what I've done, I really enjoy hearing from you, and I know how infuriating it can be when a blog comment fails to post.