Monday, 28 February 2022

Ellen shorts

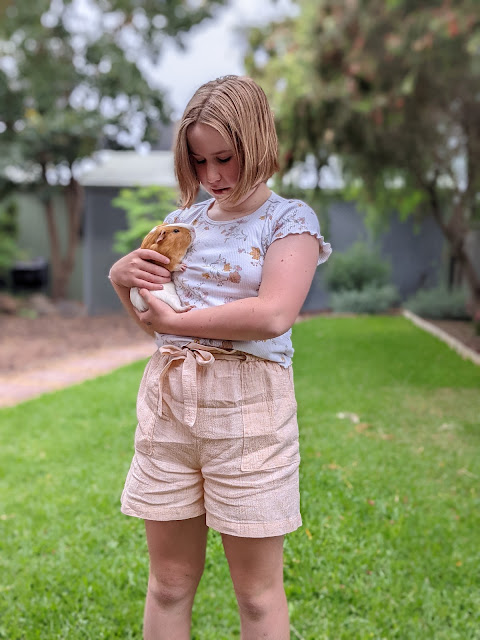
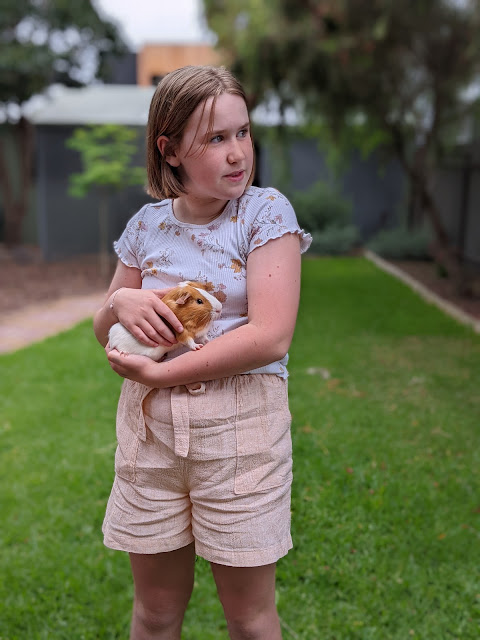
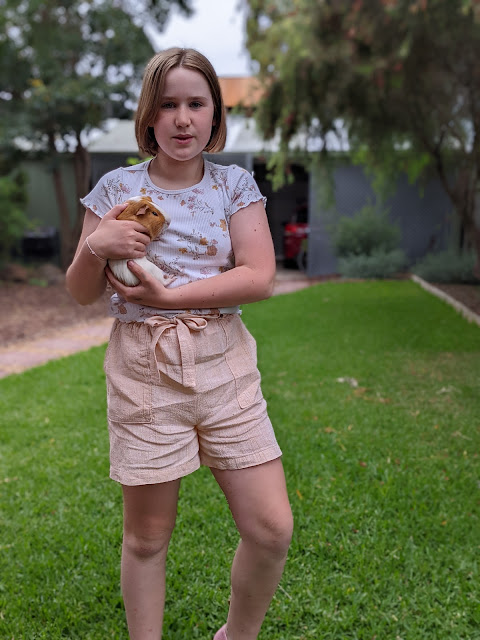
Late last year I had a request from A for some shorts that had a "paper bag" waist. I think she intended for me to buy a particular ready-to-wear pair, but that's no fun.

I found the Style Arc Ellen Woven shorts pattern, plus a few other Style Arc patterns (I'd thought the much hyped on instagram Hope Dress might have worked for my mum - nope) and then some great crinkle linen from Maaidesign and I was off...


The first pair I made was a straight size 6. They were instantly declared to be too big and too low in the crotch. Yet she did wear them comfortably on a couple of occasions.


It's been a while since I made them so I don't have any helpful notes re the pattern itself. The instructions are sparse but clear and there were plenty of notches and pattern markings such that it all came together without a fuss.

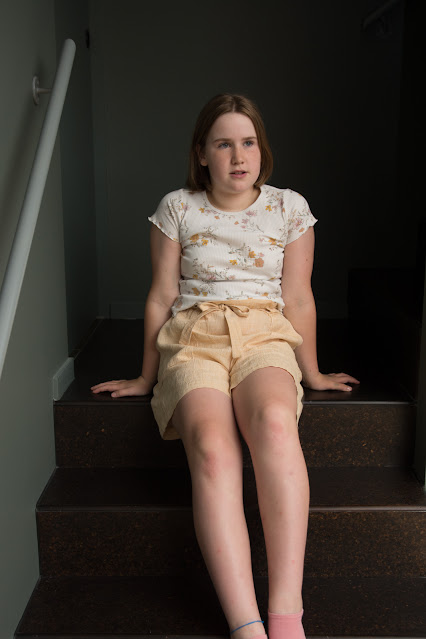
I made a second pair in a size 4 with about 3/4" (forgotten!) length removed from crotch depth. Those were in a gingham version of the same crinkled linen. I could have sworn I'd photographed them, but it turns out I'd just taken pictures of these same ones in a different spot.


They've also been worn but I think they might ride up a bit when walking, and so neither pair are in high rotation. That's something that has always annoyed me about shorts and I don't know if it's a leg length, or crotch depth issue. It's certainly something that puts me off shorts too. I'll have to try and solve it one day.

Sunday, 6 February 2022

Vogue 9114 another two times

I'd been living in my V9114 black linen trousers made back in November, and knew I needed more before the summer was out.

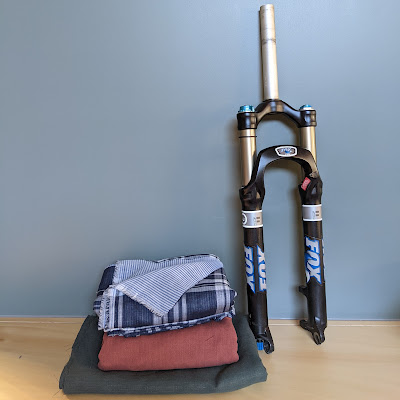
I had a mountain bike fork that had been serviced* and needed picking up, and what do you know, I had to drive past both Fabric Deluxe and The Fabric Store to get it...


* astroboyracer if you're here for the fork servicing bit and not the sewing bit!

The top fabric in that stack is an amazing double sided gauze from The Fabric Store that I'm busily working on now, but the other two fabrics did get used for V9114. I'd bought both fabrics thinking of the pants, but not sure which I'd use. Both was the answer.


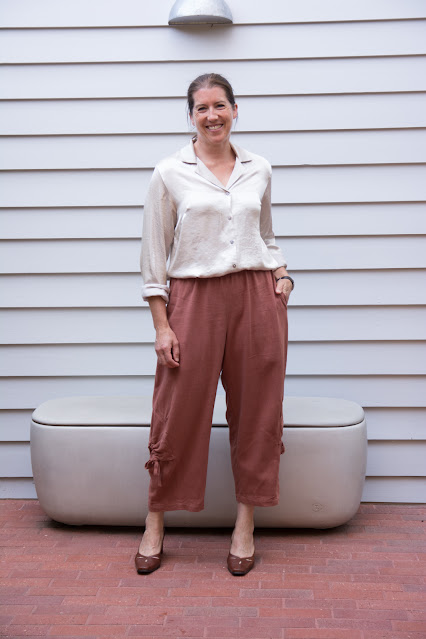
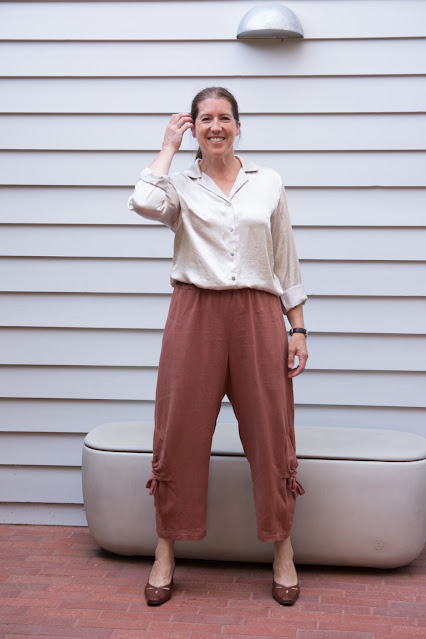
This fabric is a really lovely linen viscose from Fabric Deluxe. Here's the link if it's still there.

It has a lovely washed texture with a bit of nubby variety in the surface. It's drapier than a straight linen and is lovely and soft. Perfect loose summer pants weight fabric.
 

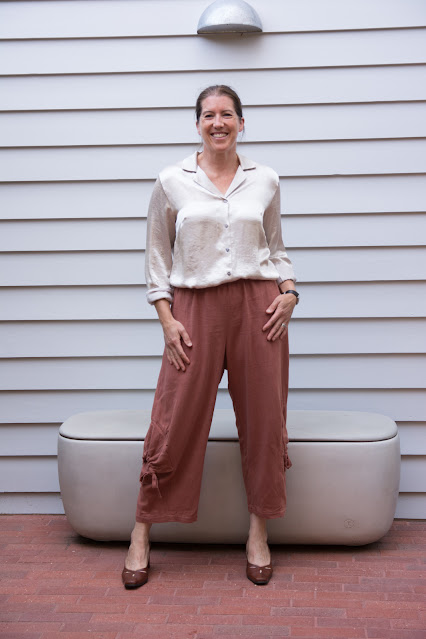
At first I wasn't sure about the colour, thinking it was a bit pink. But pair it with some old heels (1995 from memory!) and my nice courtyard brick tiles and I love it!


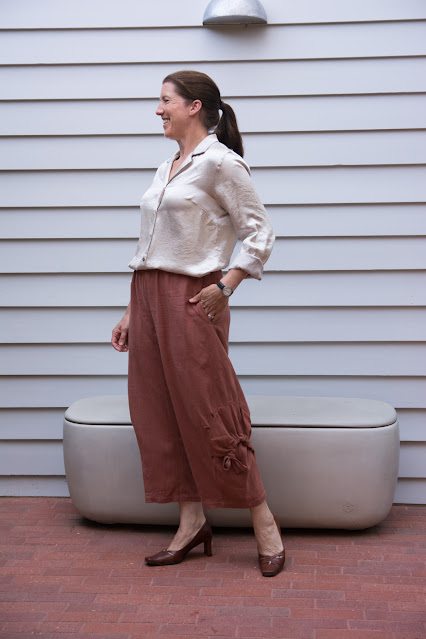
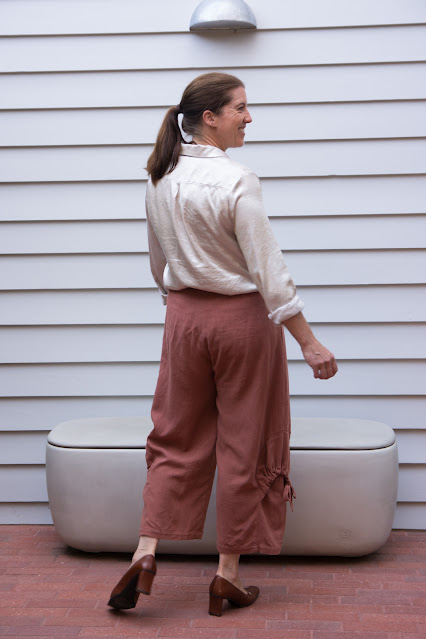
Same as my black ones, I've made the size M (one down from measurements) and hoicked an inch and a half up and out of the rise at front and back. This time I thought about adding the length back in at the lower leg but decided summer pants can be cropped.

I've read reviews of these pants that complain about just how loose fitting they are, but they're meant to be that way. The pattern cover model has got some definite slouchy pants vibes going on. I love them being so loose and wide.


It was in reading the reviews of the pattern that I saw that more people had made the skirt than the pants and suddenly I knew that's what my green fabric wanted to be, so I dived straight back in.


This fabric is an organic hemp which was on sale as there was a slight line running down the centre. I was sure I'd be using it for the pants so nothing would be cut on the fold and it wouldn't matter.

Of course I changed my mind. The skirt pattern pieces are very wide and only just fit on this fabric which is listed as 143cm wide. I can see the fabric fault line if I look for it, but only just. Thankfully I managed to fit the skirt pattern on the 2.5m that I'd bought - the pattern fabric guide suggests considerably more.


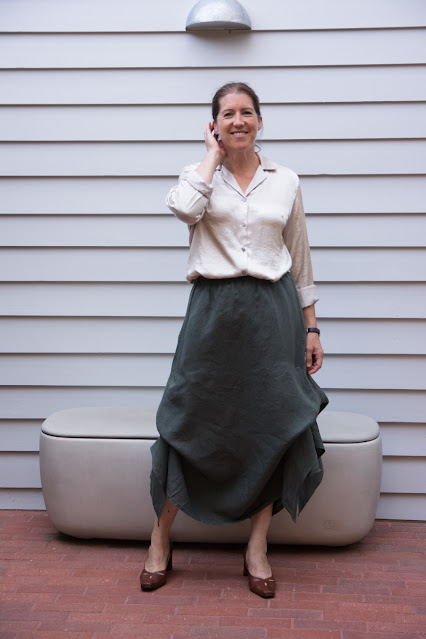
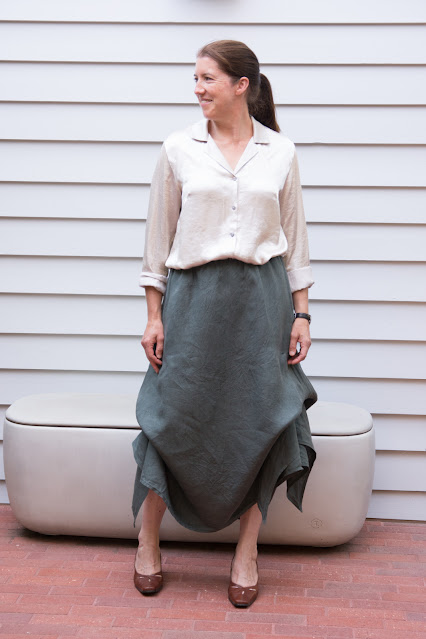
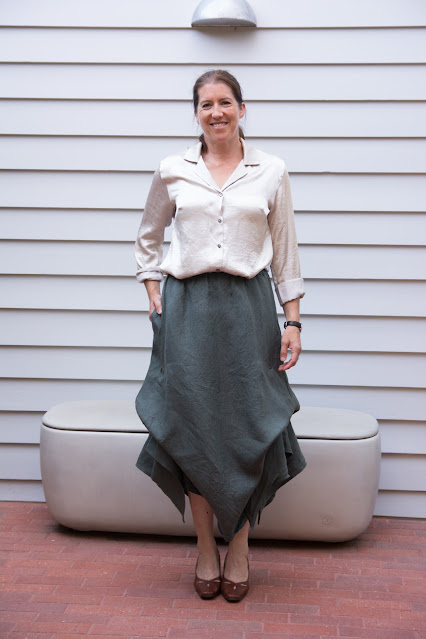
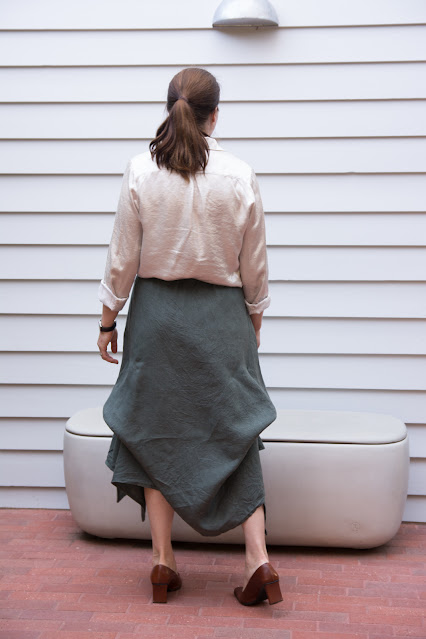
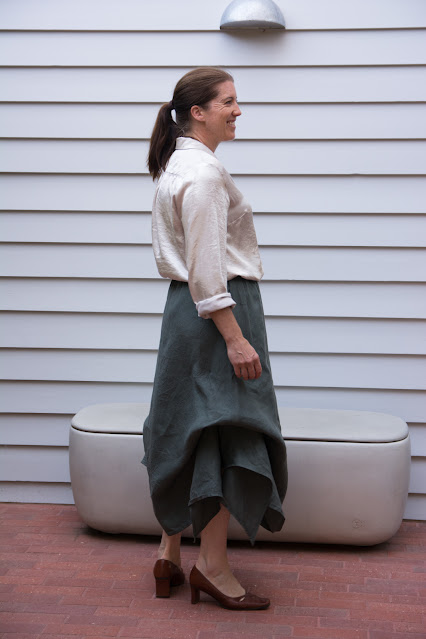
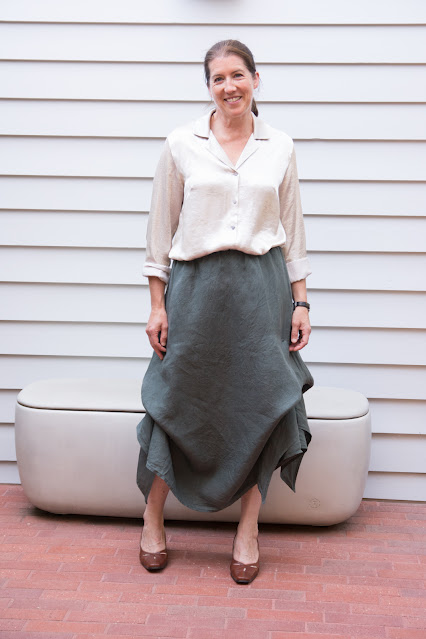
I wasn't sure I'd like the skirt with it's weird, tied-up handkerchief corners, but I LOVE it. It's odd enough to be interesting but really just a comfy, elastic waisted skirt. 

While the pants call for a single piece of wide elastic, the skirt suggests two channels of narrower elastic. That suited me as I'd run out of wide stuff anyway. I quite like the double narrow waistband as it feels softer to wear.


The only change to the pattern that I simply had to make, was to add pockets. I used the pocket pattern piece from the trousers and my own way of sewing them in (done for both pairs of trousers and documented here) so that I can press the side seam allowances open.


The instructions for attaching the ties was confusing, and I think, in error. Both the written instructions and the diagrams showed the tie stitched to the skirt, then folded over its raw edge and stitched again. Yet the direction in which you attached them, up vs down, differed from written instruction to illustration.


I'm not sure which way was correct. I attached them following the illustration, not the wording. That way the lower tie points upwards and the upper tie points downward once fully stitched on. The attachment point of the lower tie is nicely hidden by the folds of the skirt, but it's a bit annoying how visible the upper tie attachment point is.

Maybe, if I'd attached them pointing upwards, then, in tying them downwards they'd create another small pleat and cover themselves? I dunno.


Both versions of V9114 worn here with my Liesl & Co Camp shirt in metallic cotton which has had so much wear over these last two years. When evening wear and pyjamas became the same thing due to a pandemic, this was the perfect shirt to have in my wardrobe!

Monday, 17 January 2022

Impromptu swimwear sewathon

I should have seen it coming, as I've sewn swimwear almost every summer, but this year it snuck up on me.

In the country over Christmas the kids were at the pool every day it became apparent A had only one pair of swimmers that fit. Between returning home on the 1st of Jan, and her flying up to the Queensland beaches with her granny on the 3rd, there would have to be some new swimwear created....


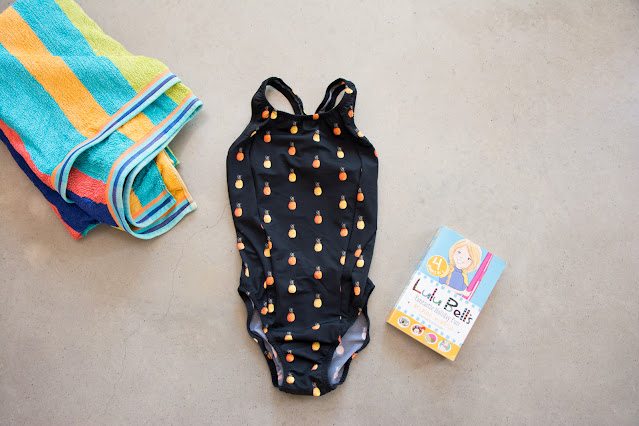
The pattern choice was immediate: She wanted the same as her "school swimmers": Jalie 3134

Previously she's always measured longer in the torso than her width, but I took some fresh measurements and that had all evened out, which is nice, cause figuring out where to add length is a bitch


So, two versions of this seemingly perfect racerback swimsuit (I really must try it for me), in straight size P, using her choices of fabrics from the stash were made in about a day and a half, between the necessary things like sleeping, and went off with her to the beach. Lucky kid.


Saturday, 15 January 2022

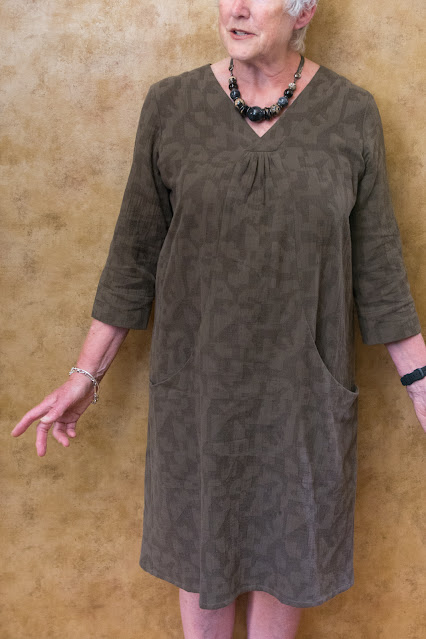
12 months, two dresses

For Christmas 2020 I gifted my mum some fabric that I knew she'd like and the promise to make her whatever she wanted.

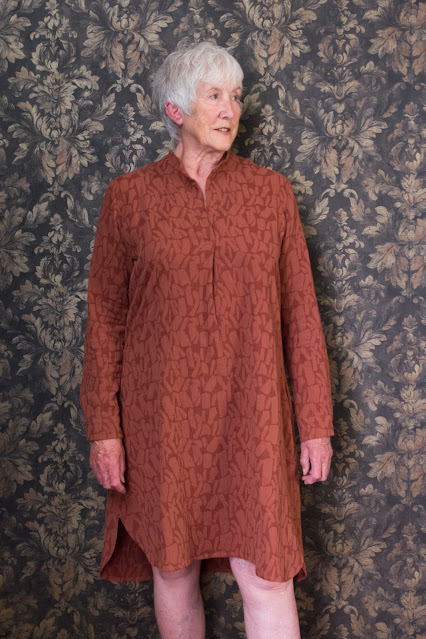
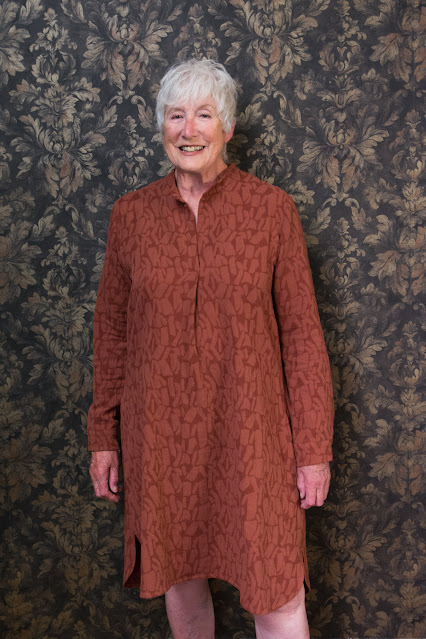
The first was easy; The red fabric should be a Gallery Dress


Ages ago I gave her this one that I'd made and she liked it enough that she wanted another just the same. Very straightforward. 


The fabric is a lovely midweight jacquard cotton/linen that feels like a heavy double gauze. I bought both fabrics from Potter & Co in Perth and was very pleased with them.

Having bought, and gifted 3m of each I did get to keep the remnants and so A has these shorts to match.

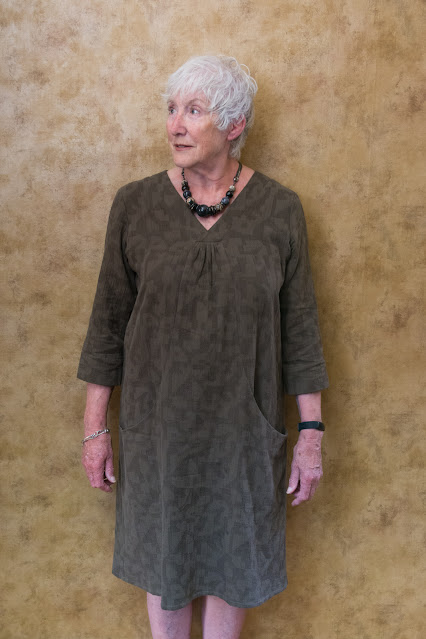
The second garment required a few months deliberation. My mum knew she wanted it to be a pull on dress, with sleeves, but not much more than that. We looked at various patterns and eventually I chopped  up some bedsheets and  made muslins of Butterick 6567, The Liesl + Co Cappuccino dress and the Style Arc Hope dress

None of them were right, although I'm tempted to make the Butterick one for myself (and am I the only person to have sewn a Hope dress and not liked it?). And so I set to the task of turning the block of the Gallery dress into something with the visual appearance of the cappuccino dress.


There's a blog post over at Oliver + S where I show, roughly, how to do just that. Here's the link

A full twelve months later it was nice to see the dresses on my mum.


Tuesday, 11 January 2022

Trophy Hare

Ever since I made the trophy head swan, A and I were in agreement that there should be more trophy head animals in her room.

We agreed that the next one should be the hare, and I couldn't love it more!


The wool is a really lovely, and very reasonably priced alpaca. It had just the right amount of fuzz to give the hare a bit of a furry look.

it's Cloudborn Alpaca worsted, from LoveCrafts I think. The pattern is from Vanessa Mooncie's book: Trophy Heads to Crochet


The eyes were done by blending some strands of embroidery floss in gold and brown together, and then the whiskers are the same heavy duty fishing line used way back here for my mice.


As well as the backing plate, the ears have some curved mount board in them to keep their shape. I was really happy with the hook size and yarn for this project as it has good density, unlike the recent lobster where the stitches are a bit too open.


I can see myself making more of these as I love pretty much every pattern in the book! Maybe a fox next?


Saturday, 8 January 2022

Catching up on 2021

Once upon a time, back when I was a more diligent blog updater, I would have had my little mosaic images of everything I'd made in the preceding year ready by now.

Now I just have a backlog of little projects that I do want to document before I forget them altogether. Maybe I'll start with a post about those items that were Christmas gifts:

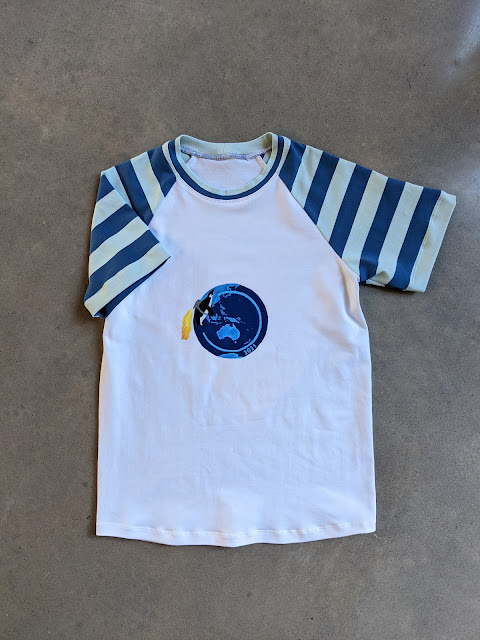
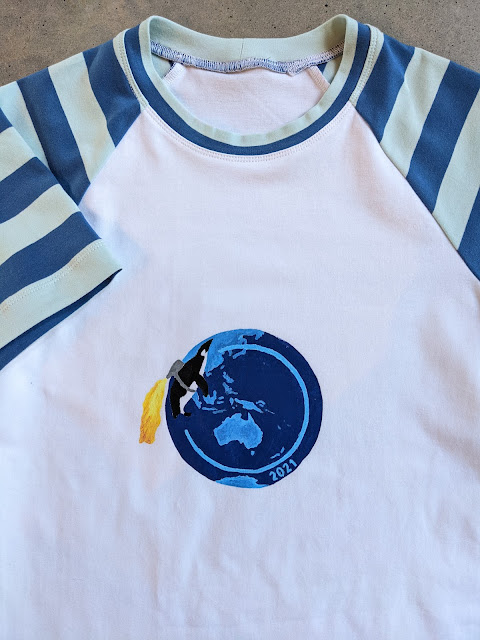
First up, I stencilled another T-shirt for my nephew. 


I don't expect anyone recalls all my various stencilled T-shirts, but the penguin has been done before: Back in 2018 I made T-shirts for his band: The Flying Penguins (blog post here)

My brother and his family have spent the last year in Australia, so my nephew's band have been separated, with the only other band member still being in Germany! I figured a memento of his solo tour down under might be alright, although, like many of us, it might be a year he'd rather not remember.


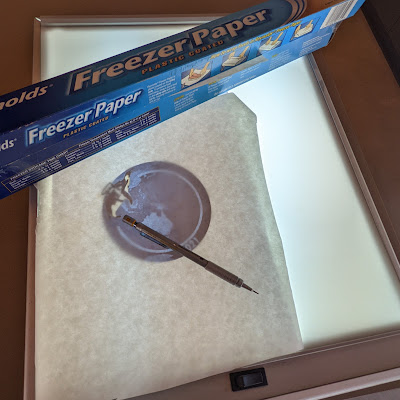
I borrowed the x-ray light box from work and hand cut the stencil using freezer paper. I just wish I'd thought to place it a bit higher up. It's easy to forget, when you just have the T-shirt front pattern piece in your hands, how high up an emblem or image should be to look right. 


The pattern is the Jalie 3669 Nico in size P (12 years) using stashed cotton lycra fabric.

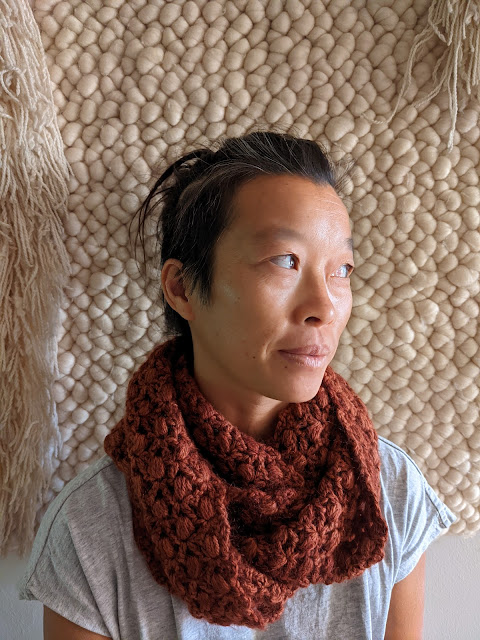
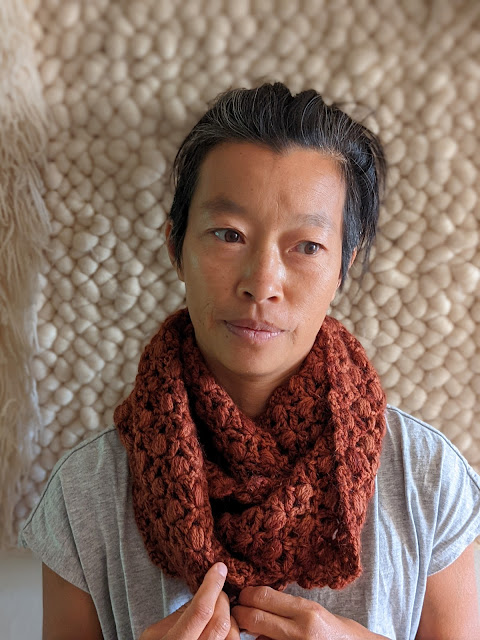
For my sister in law I decided I would gift her the raw ingredients and a pledge to work like a fiend and create her Christmas gift in front of her eyes over the following week. - That's a neat way of saying, I've run out of time but now I'm on holidays...


I bought 2 skeins of the beautiful brunt terracotta coloured Aran weight merino from Fibresmith, along with one skein of the fine mohair. They came in the nice Cloud Mountain Cowl gift bag, so I scored that pattern and the stitch markers and then popped the yarn back in the bag with a picture of the cowl pattern that I knew I could crochet in a week.

I'd made the cowl pattern before for myself: here and since the whole purpose of this blog is to make notes of yardage and pattern sizes, you'd think I might have thought to look back at it. But no.

I merrily set off crocheting, and by the time I'd finished the first skein of merino it was clear that two skeins wasn't going to be long enough. Now I check my blogpost and realise I'd used 3 full skeins for my version. I ripped it all back and started over with 70% of the width as my starting chain. Thank goodness you really can make this stuff up!


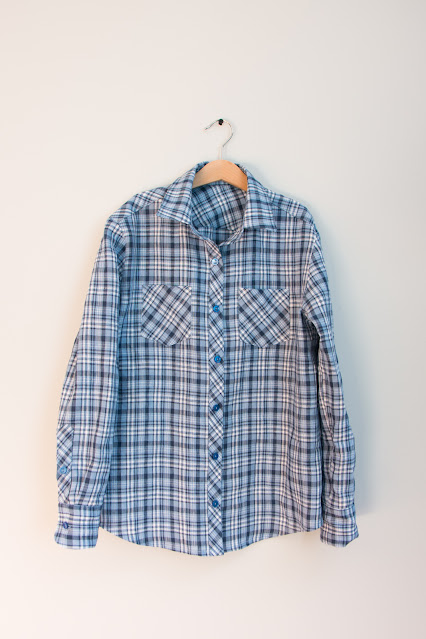
The last thing I made as a surprise was a shirt for A. Years ago I turned an old shirt of mine into a little check shirt for P (he needed a check shirt for his prep grade school concert. I think he was a duck, but a country duck, so a check shirt was appropriate ?!).

After he'd outgrown that shirt it was loved by A who wore it in a much more '90s grunge way. And ever since she outgrew it she's been asking for one just like it. Every time I saw a blue check fabric online I'd show her but it was never right. It had be blue only, no other colours and it had to have the same short of plaid, and the same sort of feel as that old shirt.

I stumbled on a really nice feeling yarn-dyed linen at Rathdowne fabrics and snapped it up. Without letting her know what I was up to I had her try on P's Ottobre black shirt but she decided it was too big, and the sleeves too long (well of course!). So I went ahead with the Oliver + S Button Down shirt in straight size 12. It's the shirt of her dreams, only it doesn't quite fit (grrr). The sleeves and armscye are a bit tight. I'll see how much room there is to let the seams out to the overlocked edges.


Meanwhile, I made her a pair of shorts that fit perfectly, and a gorgeous dress that we collaborated on and did multiple muslins to get just right. Hopefully I'll bribe her for some modelled photos soon.


Friday, 17 December 2021

Concert time

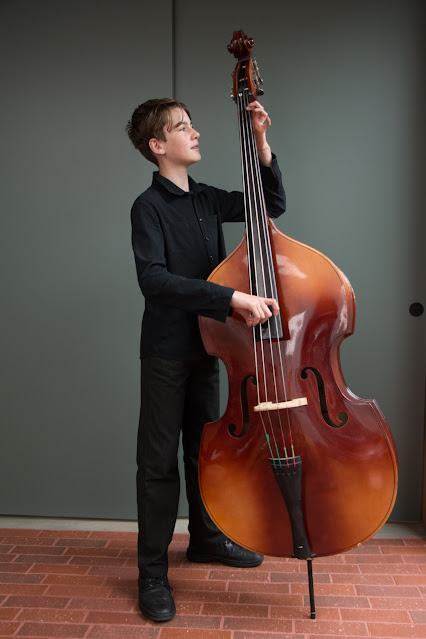
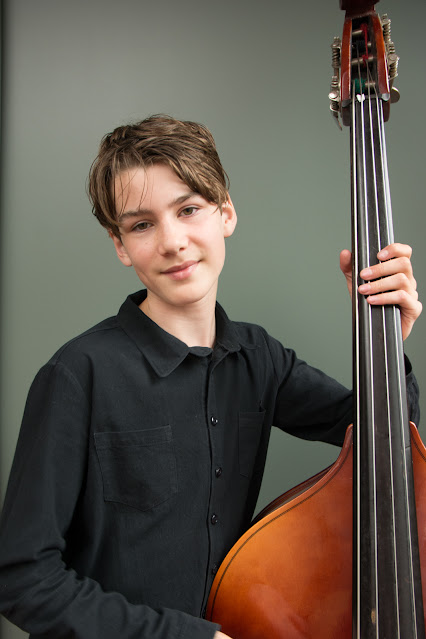
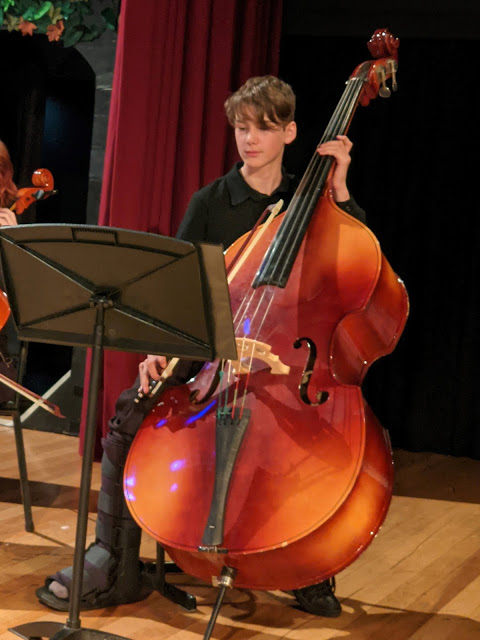
In his first year of high school, P decided to learn a musical instrument, and I was happy that he got to do the double bass.

He was really enjoying it, and so when I got the 10 day notice of the end of year concert and the need for a black, smart casual outfit I jumped into action


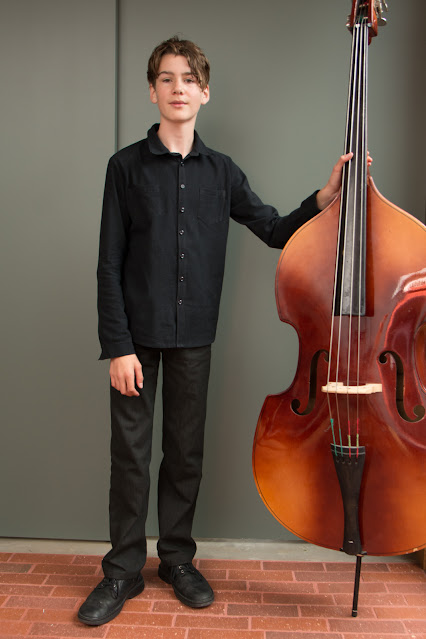
I went straight to Ottobre,and those are about the only patterns that suit 13 year old boys. In the winter 6/2012 edition there were exactly the patterns I needed. A button up shirt (pattern 37) and a pair of chino style trousers (pattern 39)

I made both to his measurements, which landed him in size 164, adding one inch each to leg length and sleeve length, from memory. 


The trousers have a single welt pocket on the back which I somehow managed to completely stuff up (it was an instagram story reel if you enjoyed the opportunity to laugh at/with me). I ended up with an enclosed pocket that acted like a flap, and a very neat welt opening that just functioned as a hole into the pants under the pocket flap. Oops. Anyway, I simply topstitched the pocket flap to the trousers and called it a design element. The welt then lead into a "pocket" formed by the pants and the double thickness pocket flap and at least you couldn't tickle his butt through the opening!

The rest of the construction was smooth sailing, and I really should remember to look at the Ottobre website, as, although their instructions are sparse and sometimes unclear, there are some photo tutorials for things like back welt pockets.

Although now I remember there were some curious instructions for finishing the waistband so that it could be let out later. I didn't quite understand them either, so I simply tried it on him and then adjusted the centre back seam before attaching the waistband.


The shirt was simple, although I did make some construction changes and give it "the Oliver + S treatment". I doubled the yoke so I could have a back yoke facing and enclose all the seam allowances.

All the fabrics were in the stash. The pants was the very last of some Eliza drill and the shirt was some lovely antique washed cotton from fabric Deluxe - leftover from a dress of mine that I'm yet to photograph.

I finished everything in perfect time and went off to work on Tuesday morning, the day of the concert, only to get a phone call in the afternoon to say he'd rolled his ankle in gym class and needed collecting. Barely three hours before the concert I rushed out of work, picked him up from school, whisked him off to A&E for xrays, got him fitted in a moon boot (minor non displaced fracture) and then had him at the school concert in time. 

In his own words : At least the moon boot is black!